RoboScopes – Real Armchair Astronomy

The Faulkes Telescope. Credit: Faulkes Telescope/LCOGT

[/caption]

Using and getting the most out of robotic astronomy

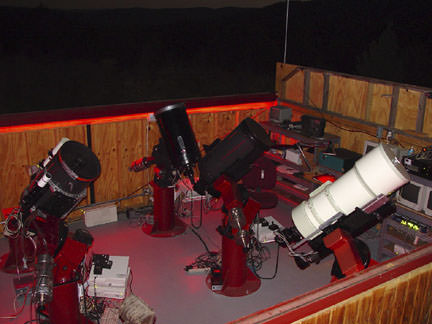
Whilst nothing in the field of amateur astronomy beats the feeling of being outside looking up at the stars, the inclement weather many of us have to face at various times of year, combined with the task of setting up and then packing away equipment on a nightly basis, can be a drag. Those of us fortunate enough to have observatories don’t face that latter issue, but still face the weather and usually the limits of our own equipment and skies.

Another option to consider is using a robotic telescope. From the comfort of your home you can make incredible observations, take outstanding astrophotos, and even make key contributions to science!

The main elements which make robotic telescopes appealing to many amateur astronomers are based around 3 factors. The first is that usually, the equipment being offered is generally vastly superior to that which the amateur has in their home observatory. Many of the robotic commercial telescope systems, have large format mono CCD cameras, connected to high precision computer controlled mounts, with superb optics on top, typically these setups start in the $20-$30,000 price bracket and can run up in to the millions of dollars.
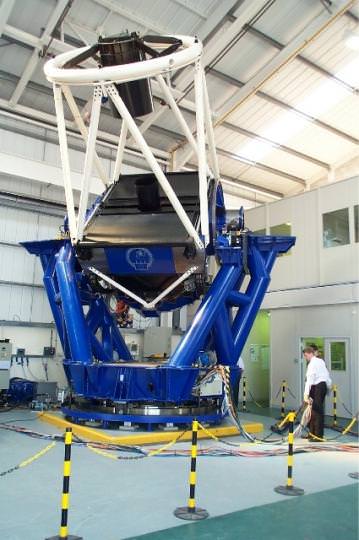
A look at the Faulkes Telescope South inside. Credit: Faulkes Telescope/LCOGT

Combined with usually well defined and fluid workflow processes which guide even a novice user through the use of the scope and then acquisition of images, automatically handling such things as dark and flat fields, makes it a much easier learning curve for many as well, with many of the scopes specifically geared for early grade school students.
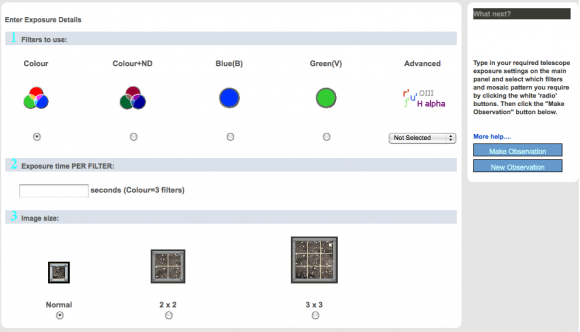
Screenshot of the Faulkes Telescope realtime interface. Credit: Faulkes Telescope/LCOGT

The second factor is geographic location. Many of the robotic sites are located in places where average rainfall is a lot lower than say somewhere like the UK or North Eastern United States for example, with places like New Mexico and Chile in particular offering almost completely clear dry skies year round. Robotic scopes tend to see more sky than most amateur setups, and as they are being controlled over the Internet, you yourself don’t even have to get cold outside in the depths of winter. The beauty of the geographic location aspect is that in some cases, you can do your astronomy during the daytime, as the scopes may be on the other side of the world.
iTelescope systems are located all over the globe. Credit: iTelescope project

The third is ease of use, as it’s nothing more than a reasonably decent laptop, and solid broadband connection that’s required. The only thing you need worry about is your internet connection dropping, not your equipment failing to work. With scopes like the Faulkes or Liverpool Telescopes, ones I use a lot, they can be controlled from something as modest as a netbook or even an Android/iPad/iPhone, easily. The issues with CPU horsepower usually comes down to the image processing after you have taken your pictures.

Software applications like the brilliant Maxim DL by Diffraction Limited which is commonly used for image post processing in amateur and even professional astronomy, handles the FITS file data which robotic scopes will deliver. This is commonly the format images are saved in with professional observatories, and the same applies with many home amateur setups and robotic telescopes. This software requires a reasonably fast PC to work efficiently, as does the other stalwart of the imaging community, Adobe Photoshop. There are some superb and free applications which can be used instead of these two bastions of the imaging fraternity, like the excellent Deep Sky stacker, and IRIS, along with the interestingly named “GIMP” which is variant on the Photoshop theme, but free to use.

Some people may say just handling image data or a telescope over the internet detracts from real astronomy, but it’s how professional astronomers work day in day out, usually just doing data reduction from telescopes located on the other side of the world. Professionals can wait years to get telescope time, and even then rather than actually being a part of the imaging process, will submit imaging runs to observatories, and wait for the data to roll in. (If anyone wants to argue this fact…just say “Try doing eyepiece astronomy with the Hubble”)

The process of using and imaging with a robotic telescope still requires a level of skill and dedication to guarantee a good night of observing, be it for pretty pictures or real science or both.

Location Location Location

The location for a robotic telescope is critical as if you want to image some of the wonders of the Southern Hemisphere, which those of us in the UK or North America will never see from home, then you’ll need to pick a suitably located scope. Time of day is also important for access, unless the scope system allows an offline queue management approach, whereby you schedule it to do your observations for you and just wait for the results. Some telescopes utilise a real time interface, where you literally control the scope live from your computer, typically through a web browser interface. So depending on where in the world it is, you may be in work, or it may be at a very unhealthy hour in the night before you can access your telescope, it’s worth considering this when you decide which robotic system you wish to be a part of.

Telescopes like the twin Faulkes 2-metre scopes, which are based on the Hawaiian island of Maui, atop a mountain, and Siding Spring, Australia, next to the world famous Anglo Australian Observatory, operate during usual school hours in the UK, which means night time in the locations where the scopes live. This is perfect for children in western Europe who wish to use research grade professional technology from the classroom, though the Faulkes scopes are also used by schools and researchers in Hawaii.

The type of scope/camera you choose to use, will ultimately also determine what it is you image. Some robotic scopes are configured with wide field large format CCD’s connected to fast, low focal ratio telescopes. These are perfect for creating large sky vistas encompassing nebulae and larger galaxies like Messier 31 in Andromeda. For imaging competitions like the Astronomy Photographer of the Year competition, these wide field scopes are perfect for the beautiful skyscapes they can create.

Scopes like the Faulkes Telescope North, even though it has a huge 2m (almost the same size as the one on the Hubble Space Telescope) mirror, is configured for smaller fields of view, literally only around 10 arcminutes, which will nicely fit in objects like Messier 51, the Whirpool Galaxy, but would take many separate images to image something like the full Moon (If Faulkes North were set up for that, which it’s not). It’s advantage is aperture size and immense CCD sensitivity. Typically our team using them is able to image a magnitude +23 moving object (comet or asteroid) in under a minute using a red filter too!

A field of view with a scope like the twin Faulkes scopes, which are owned and operated byLCOGT is perfect for smaller deep sky objects and my own interests which are comets and asteroids.Many other research projects such as exoplanets and the study of variable stars are conducted using these telescopes.Many schools start out imaging nebulae, smaller galaxies and globular clusters, with our aim at the Faulkes Telescope Project office, to quickly get students moving on to more science based work, whilst keeping it fun. For imagers, mosaic approaches are possible to create larger fields, but this obviously will take up more imaging and telescope slew time.

Each robotic system has its own set of learning curves, and each can suffer from technical or weather related difficulties, like any complex piece of machinery or electronic system. Knowing a bit about the imaging process to begin with, sitting in on other’s observing sessions on things like Slooh, all helps. Also make sure you know your target field of view/size on the sky (usually in either right ascension and declination) or some systems have a “guided tour mode” with named objects, and make sure you can be ready to move the scope to it as quickly as possible, to get imaging. With the commercial robotic scopes, time really is money.
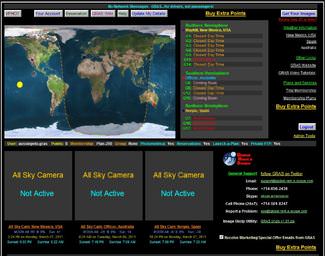
Global Rent-A-Scope interface

Magazines like Astronomy Now in the UK, as well as Astronomy and Sky and Telescope in the United States and Australia are excellent resources for finding out more, as they regularly feature robotic imaging and scopes in their articles. Online forums like cloudynights.com and stargazerslounge.com also have thousands of active members, many of whom regularly use robotic scopes and can give advice on imaging and use, and there are dedicated groups for robotic astronomy like the Online Astronomical Society. Search engines will also give useful information on what is available as well.

To get access to them, most of the robotic scopes require a simple sign up process, and then the user can either have limited free access, which is usually an introductory offer, or just start to pay for time. The scopes come in various sizes and quality of camera, the better they are, usually the more you pay. For education and school users as well as astronomical societies, The Faulkes Telescope (for schools) and the Bradford Robotic scope both offer free access, as does the NASA funded Micro Observatory project. Commercial ones like iTelescope, Slooh and Lightbuckets provide a range of telescopes and imaging options, with a wide variety of price models from casual to research grade instrumentation and facilities.

So what about my own use of Robotic Telescopes?

Personally I use mainly the Faulkes North and South scopes, as well as the Liverpool La Palma Telescope. I have worked with the Faulkes Telescope Project team now for a few years, and it’s a real honour to have such access to research grade intrumentation. Our team also use the iTelescope network when objects are difficult to obtain using the Faulkes or Liverpool scopes, though with smaller apertures, we’re more limited in our target choice when it comes to very faint asteroid or comet type objects.

After having been invited to meetings in an advisory capacity for Faulkes, late in 2011 I was appointed pro am program manager, co-ordinating projects with amateurs and other research groups. With regards to public outreach I have presented my work at conferences and public outreach events for Faulkes and we’re about to embark on a new and exciting project with the European Space Agency whom I work for also as a science writer.

My use of Faulkes and the Liverpool scopes is primarily for comet recovery, measurement (dust/coma photometry and embarking on spectroscopy) and detection work, those icy solar system interlopers being my key interest. In this area, I co-discovered Comet C2007/Q3 splitting in 2010, and worked closely with the amateur observing program managed by NASA for comet 103P, where my images were featured in National Geographic, The Times, BBC Television and also used by NASA at their press conference for the 103P pre-encounter event at JPL.

The 2m mirrors have huge light grasp, and can reach very faint magnitudes in very little time. When attempting to find new comets or recover orbits on existing ones, being able to image a moving target at magnitude 23 in under 30s is a real boon. I am also fortunate to work alongside two exceptional people in Italy, Giovanni Sostero and Ernesto Guido, and we maintain a blog of our work, and I am a part of the CARA research group working on comet coma and dust measurements, with our work in professional research papers such as the Astrophysical Journal Letters and Icarus.

The Imaging Process

When taking the image itself, the process starts really before you have access to the scope. Knowing the field of view, what it is you want to achieve is critical, as is knowing the capabilities of the scope and camera in question, and importantly, whether or not the object you want to image is visible from the location/time you’ll be using it.

First thing I would do if starting out again is look through the archives of the telescope, which are usually freely available, and see what others have imaged, how they have imaged in terms of filters, exposure times etc, and then match that against your own targets.

Ideally, given that in many cases, time will be costly, make sure that if you’re aiming for a faint deep sky object with tenuous nebulosity, you don’t pick a night with a bright Moon in the sky, even with narrowband filters, this can hamper the final image quality, and that your choice of scope/camera will in fact image what you want it to. Remember that others may also want to use the same telescopes, so plan ahead and book early. When the Moon is bright, many of the commercial robotic scope vendors offer discounted rates, which is great if you’re imaging something like globular clusters maybe, which aren’t as affected by the moonlight (as say a nebula would be)

Forward planning is usually essential, knowing that your object is visible and not too close to any horizon limits which the scope may impose, ideally picking objects as high up as possible, or rising to give you plenty of imaging time. Once that’s all done, then following the scope’s imaging process depends on which one you choose, but with something like Faulkes, it’s as simple as selecting the target/FOV, slewing the scope, setting the filter, and then exposure time and then waiting for the image to come in.

The number of shots taken depends on the time you have. Usually when imaging a comet using Faulkes I will try to take between 10 and 15 images to detect the motion, and give me enough good signal for the scientific data reduction which follows. Always remember though, that you’re usually working with vastly superior equipment than you have at home, and the time it takes to image an object using your home setup will be a lot less with a 2m telescope. A good example is that a full colour high resolution image of something like the Eagle Nebula can be obtained in a matter of minutes on Faulkes, in narrowband, something which would usually take hours on a typical backyard telescope.

For imaging a non moving target, the more shots in full colour or with your chosen filter (Hydrogen Alpha being a commonly used one with Faulkes for nebula) you can get the better. When imaging in colour, the three filters on the telescope itself are grouped into an RGB set, so you don’t need to set up each colour band. I’d usually add a luminance layer with H-Alpha if it’s an emission nebula, or maybe a few more red images if it’s not for luminance. Once the imaging run is complete, the data is usually placed on a server for you to collect, and then after downloading the FITS files, combine the images using Maxim (or other suitable software) and then on in to something like Photoshop to make the final colour image. The more images you take, the better the quality of the signal against the background noise, and hence a smoother and more polished final shot.

Between shots the only thing that will usually change will be filters, unless tracking a moving target, and possibly the exposure time, as some filters take less time to get the requisite amount of light. For example with a H-Alpha/OIII/SII image, you typically image for a lot longer with SII as the emission with many objects is weaker in this band, whereas many deep sky nebula emit strongly in the H-Alpha.

The Image Itself
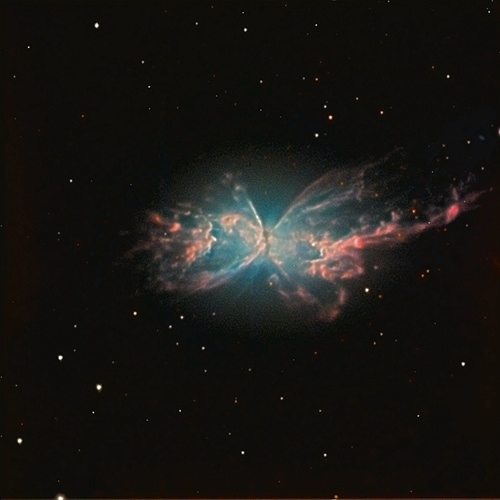
NGC 6302 taken by Thomas Mills High School with the Faulkes Telescope

As with any imaging of deep sky objects, don’t be afraid to throw away poor quality sub frames (the shorter exposures which go to make up the final long exposure when stacked). These could be affected by cloud, satellite trails or any number of factors, such as the autoguider on the telescope not working correctly. Keep the good shots, and use those to get as good a RAW stacked data frame as you can. Then it’s all down to post processing tools in products like Maxim/Photoshop/Gimp, where you’d adjust the colours, levels, curves and possibly use plug ins to sharpen up the focus, or reduce noise. If it’s pure science your interested in, you’ll probably skip most of those steps and just want good, calibrated image data (dark and flat field subtracted as well as bias)

The processing side is very important when taking shots for aesthetic value, it seems obvious, but many people can overdo it with image processing, lessening the impact and/or value of the original data. Usually most amateur imagers spend more time on processing than actual imaging, but this does vary, it can be from hours to literally days doing tweaks. Typically when processing an image taken robotically, the dark and flat field calibration are done. First thing I do is access the datasets as FITS files, and bring those in to Maxim DL. Here I will combine and adjust the histogram on the image, possible running multiple iterations of a de-convolution algorithm if the start points are not as tight (maybe due to seeing issues that night).

Once the images are tightened up and then stretched, I will save them out as FITS files, and using the free FITS Liberator application bring them in to Photoshop. Here, additional noise reduction and contrast/level and curve adjustments will be made on each channel, running a set of actions known as Noels actions (a suite of superb actions by Noel Carboni, one of the worlds foremost imaging experts) can also enhance the final individual red green and blue channels (and the combined colour one).

Then, I will composite the images using layers into a colour final shot, adjusting this for colour balance and contrast. Possibly running a focus enhancement plug in and further noise reduction. Then publish them via flickr/facebook/twitter and/or submit to magazines/journals or scientific research papers depending on the final aim/goals.

Serendipity can be a wonderful thing

I got in to this quite by accident myself…. In March 2010, I had seen a posting on a newsgroup that Comet C/2007 Q3, a magnitude 12-14 object at the time, was passing near to a galaxy, and would make an interesting wide field side by side shot. That weekend, using my own observatory, I imaged the comet over several nights, and noticed a distinct change in the tail and brightness of the comet over two nights in particular.
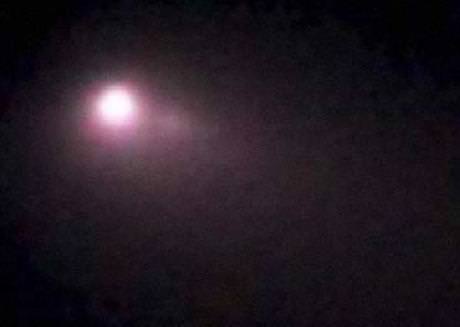
Comet C/2007 Q3. Credit: Nick Howes

A member of the BAA (British Astronomical Association), seeing my images, then asked if I would submit them for publication. I decided however to investigate this brightening a bit further, and as I had access to the Faulkes that week, decided to point the 2m scope at this comet, to see if anything unusual was taking place. The first images came in, and I immediately, after loading them in to Maxim DL and adjusting the histogram, noticed that a small fuzzy blob appeared to be tracking the comet’s movement just behind it. I measured the separation as only a few arc-seconds, and after staring at it for a few minutes, decided that it may have fragmented.

I contacted Faulkes Telescope control, who put me in touch with the BAA comet section director, who kindly logged this observation the same day. I then contacted Astronomy Now magazine, who leapt on the story and images and immediately went to press with it on their website. The following days the media furore was quite literally incredible.

Interviews with national newspapers, BBC Radio, Coverage on the BBC’s Sky at Night television show, Discovery Channel, Radio Hawaii, Ethiopia were just a few of the news/media outlets that picked up the story.. the news went global that an amateur had made a major astronomical discovery from his desk using a robotic scope. This then led on to me working with members of the AOP project with the NASA/University of Maryland EPOXI mission team on imaging and obtaining light curve data for comet 103P late in 2010, again which led to articles and images in National Geographic, The Times and even my images used by NASA in their press briefings, alongside images from the Hubble Space Telescope. Subscription requests to Faulkes Telescope Project as a result of my discoveries went up by hundreds of % from all over the world.

In summary

Robotic telescopes can be fun, they can lead to amazing things, this past year, a work experience student I was mentor for with the Faulkes Telescope Project, imaged several fields we’d assigned to her, where our team then found dozens of new and un-catalogued asteroids, and she also managed to image a comet fragmenting. Taking pretty pictures is fun, but the buzz for me comes with the real scientific research I am now engaged in, and it’s a pathway I aim to stay on probably for the rest of my astronomical lifetime. For students and people who don’t have the ability to either own a telescope due to financial or possibly location constraints, it’s a fantastic way to do real astronomy, using real equipment, and I hope, in reading this, you’re encouraged to give these fantastic robotic telescopes a try.

Weekly SkyWatcher’s Forecast: February 19-25, 2012

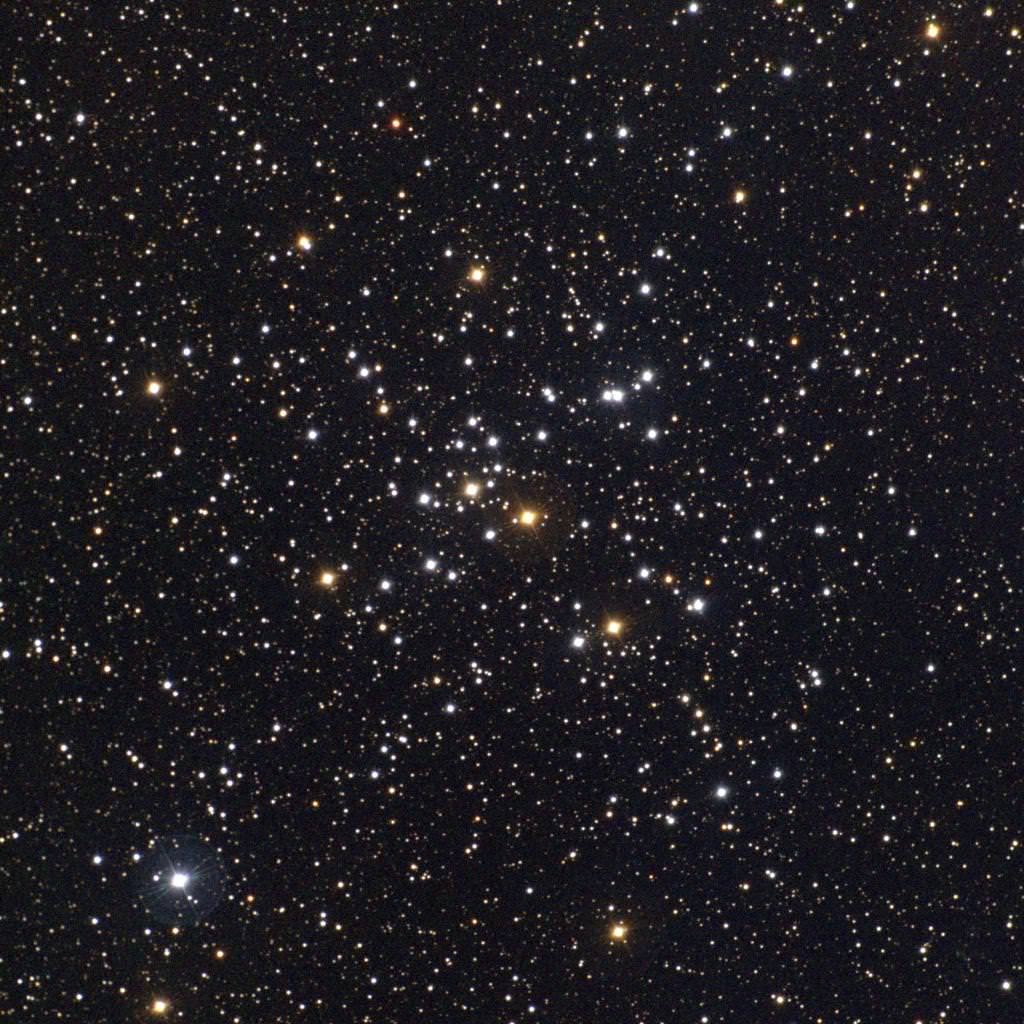
Messier 41 - Credit: NOAO/AURA/NSF

[/caption]

Greetings, fellow SkyWatchers! It’s going to be an awesome week as we watch the planets – Mars, Saturn, Jupiter, Venus and Mercury – dance along the ecliptic plane. You don’t even need a telescope for this show! But that’s not all. We’ll take a look at a wealth of bright star clusters, challenging studies and lots more. I’ll see you in the back yard…

Sunday, February 19 – Today is the birthday of Nicolas Copernicus. Born in 1473, he was the creator of the modern solar system model which illustrated the retrograde motion of the outer planets. Considering this was well over 530 years ago, and in a rather “unenlightened” time, his revolutionary thinking about what we now consider natural is astounding.

Have you been observing retrograde motion while keeping track of Mars? Good for you! You may have also noticed that Mars has dimmed slightly over the last few weeks. Right now it’s around -1.0. Keep track of its many faces!

While we still have dark skies on our side, let’s head for a handful of difficult nebulae in a region just west of Gamma Monocerotis. For binoculars, check out the region around Gamma, it is rich in stars and very colorful! You are looking at the very outer edge of the Orion spiral arm of our galaxy. For small scopes, have a look at Gamma itself – it’s a triple system that we’ll be back to study. For larger scopes? It’s Herschel hunting time…

NGC 2183 (Right Ascension: 6 : 10.8 – Declination: -06 : 13 ) and NGC 2185 (Right Ascension: 6 : 11.1 – Declination: -06 : 13 ) will be the first you encounter as you move west of Gamma. Although they are faint, just remember they are nothing more than a cloud of dust illuminated by faint stars on the edge of the galactic realm. The stars that formed inside provided the light source for these wispy objects and at their edges lay in intergalactic space.

To the southwest is the weaker NGC 2182 (Right Ascension: 6 : 09.5 – Declination: -06 : 20), which will appear as nothing more than a faint star with an even fainter halo about it, with NGC 2170 (Right Ascension: 6 : 07.5 – Declination: -06 : 24) more strongly represented in an otherwise difficult field. While the views of these objects might seem vaguely disappointing, you must remember that not everything is as bright and colorful as seen in a photograph. Just knowing that you are looking at the collapse of a giant molecular cloud that’s 2400 light-years away is pretty impressive!

Monday, February 20 – Today in history celebrates the Mir space station launch in 1986. Mir (Russian for “peace”) was home to both cosmonauts and astronauts as it housed 28 long duration crews during its 15 years of service. To date it is one of the longest running space stations and a triumph for mankind. Spasiba! Today in 1962, John Glenn was onboard Friendship 7 and became the first American to orbit the Earth. As Colonel Glenn looked out the window, he reported seeing “fireflies” glittering outside his Mercury space capsule. Let’s see if we can find some…

The open cluster M41 (Right Ascension: 6 : 46.0 – Declination: -20 : 44) in Canis Major is just a quick drift south of the brightest star in the northern sky – Sirius. Even the smallest scopes and binoculars will reveal this rich group of mixed magnitude stars and fill the imagination with strange notions of reality. Through larger scopes, many faint groupings emerge as the star count rises to well over 100 members. Several stars of color – orange in particular – are also seen along with a number of doubles.

First noted telescopically by Giovanni Batista Hodierna in the mid-1500s, ancient texts indicate that Aristotle saw this naked-eye cluster some 1800 years earlier. Like other Hodierna discoveries, M41 was included on Messier’s list – along with even brighter clusters of antiquity such as Praesepe in Cancer and the Pleiades in Taurus. Open cluster M41 is located 2300 light years away and recedes from us at 34km/sec – about the speed Venus moves around the Sun. M41 is a mature cluster, around 200 million years old and 25 light years in diameter. Remember M41… Fireflies in night skies.

Tuesday, February 21 – Tonight is New Moon! Tonight let’s take a journey just a breath above Zeta Tauri and spend some quality time with a pulsar embedded in the most famous supernova remnant of all. Factually, we know the Crab Nebula to be the remains of an exploded star recorded by the Chinese in 1054. We know it to be a rapid expanding cloud of gas moving outward at a rate of 1,000 km per second, just as we understand there is a pulsar in the center. We also know it as first recorded by John Bevis in 1758, and then later cataloged as the beginning Messier object – penned by Charles himself some 27 years later to avoid confusion while searching for comets. We see it revealed beautifully in timed exposure photographs, its glory captured forever through the eye of the camera — but have you ever really taken the time to truly study M1 (Right Ascension: 5 : 34.5 – Declination: +22 : 01)? Then you just may surprise yourself…

In a small telescope, M1 might seem to be a disappointment – but do not just glance at it and move on. There is a very strange quality to the light which reaches your eye, even though initially it may just appear as a vague, misty patch. Allow your eyes to adjust and M1 will appear to have “living” qualities – a sense of movement in something that should be motionless. The “Crab” holds true to many other spectroscopic studies. The concept of differing light waves crossing over one another and canceling each other out – with each trough and crest revealing differing details to the eye – is never more apparent than during study. To observe M1 is to at one moment see a “cloud” of nebulosity, the next a broad ribbon or filament, and at another a dark patch. When skies are stable you may see an embedded star, and it is possible to see six such stars.

Many observers have the ability to see spectral qualities, but they need to be developed. From ionization to polarization – our eye and brain are capable of seeing to the edge of infra-red and ultra-violet. Even a novice can see the effects of magnetism in the solar “Wilson Effect.” But what of the spinning neutron star at M1’s heart? We’ve known since 1969 that M1 produces a “visual” pulsar effect. About once every five minutes, changes occurring in the neutron star’s pulsation affect the amount of polarization, causing the light waves to sweep around like a giant “cosmic lighthouse” and flash across our eyes. M1 is much more than just another Messier. Capture it tonight!!

Wednesday, February 22 – Today in 1966, Soviet space mission Kosmos 110 was launched. Its crew was canine, Veterok (Little Wind) Ugolyok (Little Piece of Coal); both history making dogs. The flight lasted 22 days and held the record for living creatures in orbit until 1974 – when Skylab 2 carried its three-man crew for 28 days.

Since we’ve studied the “death” of a star, why not take the time tonight to discover the “birth” of one? Our journey will start by identifying Aldeberan (Alpha Tauri) and move northwest to bright Epsilon. Hop 1.8 degrees west and slightly to the north for an incredibly unusual variable star – T Tauri.

Discovered by J.R. Hind in October 1852, T Tauri and its accompanying nebula, NGC 1555 (Right Ascension: 4 : 22.9 – Declination: +19 : 32), set the stage for discovery with a pre-main sequence variable star. Hind reported the nebula, but also noted that no catalog listed such an object in that position. His observations also included a 10th magnitude uncharted star and he surmised that the star in question was a variable. On each count Hind was right, and both were followed by astronomers for several years until they began to fade in 1861. By 1868, neither could be seen and it wasn’t until 1890 that the pair was re-discovered by E.E. Barnard and S.W. Burnham. Five years later? They vanished again.

T Tauri is the prototype of this particular class of variable stars and is itself totally unpredictable. In a period as short as a few weeks, it might move from magnitude 9 to 13 and other times remain constant for months on end. It is about equal to our own Sun in temperature and mass – and its spectral signature is very similar to Sol’s chromosphere – but the resemblance ends there. T Tauri is a star in the initial stages of birth!

T Tauri are all pre-main sequence and are considered “proto-stars”. In other words, they continuously contract and expand, shedding some of their mantle of gas and dust. This gas and dust is caught by the star’s rotation and spun into an accretion disc – which might be more properly referred to as a proto-planetary disc. By the time the jets have finished spewing and the material is pulled back to the star by gravity, the proto-star will have cooled enough to have reached main sequence and the pressure may have allowed planetoids to form from the accreted material.

Thursday, February 23 – If you have an open western horizon, then be out at twilight! Right now the speedy inner planet – Mercury – will make a brief appearance. Depending on your time zone, you might also spot a very young Moon just above it! For curiosity seekers, you can also find asteroid Vesta to the south of the Moon, along with planet Uranus to the south-east. How cool is that?!

In 1987, Ian Shelton made an astonishing visual discovery – SN 1987a. This was the brightest supernova in 383 years. More importantly, before it occurred, a blue star of roughly 20 solar masses was already known to exist in that same location within the Large Magellanic Cloud. Catalogued as Sanduleak -69-202, that star is now gone. With available data on the star, astronomers were able to get a “before and after” look at one of the most extraordinary events in the universe! Tonight, let’s have a look at a similar event known as “Tycho’s Supernova.”

Located northwest of Kappa Cassiopeia, SN1572 appeared so bright in that year that it could be seen with the unaided eye for six months. Since its appearance was contrary to Ptolemaic theory, this change in the night sky now supported Copernicus’ views and heliocentric theory gained credence. We now recognize it as a strong radio source, but can it still be seen? There is a remnant left of this supernova, and it is challenging even with a large telescope. Look for thin, faint filaments that form an incomplete ring around 8 arc minutes across.

Friday, February 24 – Tonight the slender first crescent of the Moon makes its presence known on the western horizon. Before it sets, take a moment to look at it with binoculars. The beginnings of Mare Crisium will show to the northeast quadrant, but look just a bit further south for the dark, irregular blotch of Mare Undarum – the Sea of Waves. On its southern edge, and to lunar east, look for the small Mare Smythii – the “Sea of Sir William Henry Smyth.” Further south of this pair and at the northern edge of Fecunditatis is Mare Spumans – the “Foaming Sea.” All three of these are elevated lakes of aluminous basalt belonging to the Crisium basin.

For telescope users, wait until the Moon has set and return to Beta Monocerotis and head about a fingerwidth northeast for an open cluster challenge – NGC 2250 (Right Ascension: 6 : 32.8 – Declination: -05 : 02). This vague collection of stars presents itself to the average telescope as about 10 or so members that form no real asterism and makes one wonder if it is indeed a cluster. So odd is this one, that a lot of star charts don’t even list it!

Today in 1968, during a radar search survey, the first pulsar was discovered by Jocelyn Bell. The co-directors of the project, Antony Hewish and Martin Ryle, matched these observations to a model of a rotating neutron star, winning them the 1974 Physics Nobel Prize and proving a theory of J. Robert Oppenheimer from 30 years earlier.

Would you like to get a look at a region of the sky that contains a pulsar? Then wait until the Moon has well westered and look for guidestar Alpha Monocerotis to the south and bright Procyon to its north. By using the distance between these two stars as the base of an imaginary triangle, you’ll find pulsar PSR 0820+02 at the apex of your triangle pointed east.

Saturday, February 25 – As the Moon begins its westward journey after sunset in a position much easier to observe. The lunar feature we are looking for is at the north-northeast of the lunar limb and its view is often dependent on libration. What are we seeking? “The Sea of Alexander von Humboldt”…

Mare Humboldtianum can sometimes be hidden from view because it is an extreme feature. Spanning 273 kilometers, the basin in which it is contained extends for an additional 600 kilometers and continues around to the far side of the Moon. The mountain ranges which accompany this basin can sometimes be glimpsed under perfect lighting conditions, but ordinarily are just seen as a lighter area. The mare was formed by lava flow into the impact basin, yet more recent strikes have scarred Humboldtianum. Look for a splash of ejecta from crater Hayn further north, and the huge, 200 kilometer strike of crater Bel’kovich on Humboldtianum’s northeast shore.

When the Moon begins to wester, let’s head for Beta Monocerotis and hop about 3 fingerwidths east for an 8.9 magnitude open cluster that can be spotted with binoculars and is well resolved with a small telescope – NGC 2302 (Right Ascension: 6 : 51.9 – Declination: -07 : 04). This very young stellar cluster resides at the outer edge of the Orion spiral arm. While binoculars will see a handful of stars in a small V-shaped pattern, telescope users should be able to resolve 40 or so fainter members.

Until next week, may all of your journeys be at light speed!

If you enjoy the weekly observing column, then you’ll love the book, The Night Sky Companion 2012 written by Tammy Plotner. This fully illustrated observing guide includes star charts for your favorite objects and much more!

New Comet Discovered by Amateur Astronomer

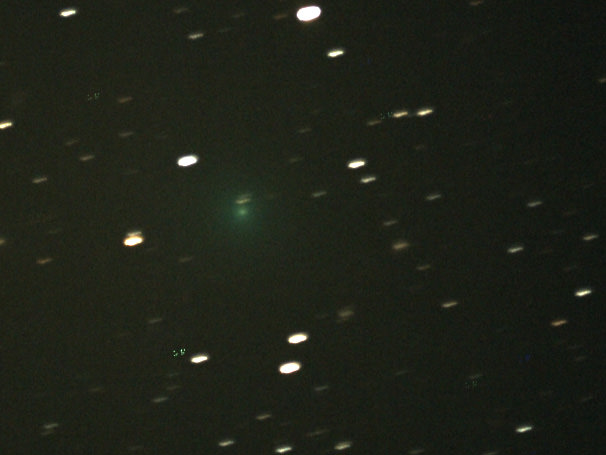
Image of Comet C/2012 C2 (Bruenjes) made from ten 60 sec. exposures on Feb. 11, 2012. (Fred Bruenjes)

[/caption]

“Friday, February 10th 2012 just felt like the perfect night for a comet to be discovered by an amateur astronomer,” writes Fred Bruenjes on his astronomy blog. And, this past Friday night, that’s exactly what Fred did.

Here’s how he did it:

Using custom-written software to operate a 14″ Meade LX200GPS telescope in his self-built observatory in Warrensburg, Missouri, Fred set his system up to capture images of the sky on that cold evening, not allowing himself to be chased inside by the low temperatures or the bright, rising moon. After some technical difficulties with his dSLR, Fred managed to acquire some quality images. While making a cursory look through the blink data, Fred was surprised to spot a faint burry object visible moving across three frames. A check of online databases of known objects brought up no positive hits — this was something that hadn’t been seen before.

Raw-color discovery image. (Fred Bruenjes)

Fred describes the “eureka” moment on his blog:

A check of known objects in the region had a lot of results in the area, but all were moving eastward while my fuzzy was moving westward. Rocks don’t make U-turns. This was really getting exciting. I had Jen, my better half, an accomplished astro imager, take a look at the images and before I could point out the faint smudge she exclaimed “That’s a comet!”

Still, Fred notes, “it wasn’t a slam-dunk.” The images were faint and there could have been other causes of blurry spots in digital images. But a check of the raw color data revealed a greenish coloration to the object’s glow, which is indicative of cyanogen and carbon emission — typical hallmarks of comets. “Very encouraging,” Fred added.

Another night’s observation was needed. If it was a comet, it would appear again along its expected trajectory. Of course, with an unidentified comet there would be no known orbit, so Fred had to manually extrapolate its position. When he trained his telescope onto his calculated coordinates the following evening and began taking images, there it was… the same faint, fuzzy green blur from the previous night, slowly appearing in the darkening sky right where it should be.

“Oh. Wow. It was dead nuts at where it was supposed to be,” Fred writes. “Wow. This thing is for real! It’s at about this time that it begins to sink in that a lifelong quest has just been fulfilled. I just crossed another thing off the bucket list!”

Fred spent the next hour gathering images to send in to the IAU’s Minor Planet Center, in the hopes of having the object cataloged so that others could locate and observe it. He didn’t have to wait long; within five minutes the object was listed on the Near-Earth Object Confirmation Page, and dubbed C/2012 C2 (Bruenjes), in honor of its discoverer.

Now that’s just got to feel good.

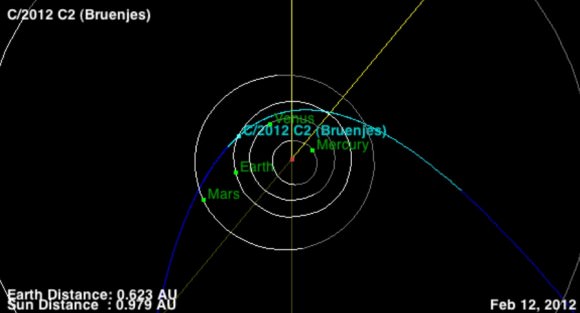
Comet Bruenjes is an NEO currently about 0.555 AU away from Earth. Its exact size and orbital period isn’t known, and it may even be a returning comet or piece from a larger one… the official report isn’t out yet. It appears to have a fairly inclined orbit relative to the ecliptic, based on the current diagram created by JPL’s Small-Body Database.

Currently plotted orbit of C/2012 C2 (Bruenjes) (NASA/JPL)

The comet’s total magnitude is 16.6, so it is dim and not visible to the naked eye. Fred told Universe Today in an email: “it’s in the constellation Aries, about six degrees north of Jupiter. Just after sunset in the Northern hemisphere it’s high in the southwest, nearly overhead.”

Stay tuned for more updated information on this newly-discovered member of our solar system. And congratulations to Fred Bruenjes, comet-hunter extraordinaire!

Read Fred’s full story on his astronomy site here.

Images © 2012 Manfred Bruenjes. All rights reserved. Used with permission.


A Continent Ablaze in Auroral and Manmade Light

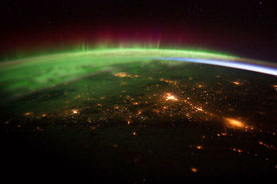
Aurora Borealis over Western Canada from the ISS Expedition 30 crew. Credit: NASA


Video Caption: Up the East Coast of North America. Credit: NASA

The North American continent is literally set ablaze in a confluence of Auroral and Manmade light captured in spectacular new videos snapped by the astronauts serving aboard the International Space Station (ISS).

The Expedition 30 crew has recently filmed lengthy sequences of images that are among the most stunning ever taken by astronauts flying in orbit some 240 miles (385 kilometers) over the United States and Canada.

[/caption]
Teams working at the Crew Earth Observations center at NASA’s Johnson Space Center in Houston, Texas have assembled hundreds of individual still images taken onboard the ISS into a series of amazing videos.

Two videos collected here focus on the East and West coasts of North America and show the path traveled by the station from the crew’s perspective as they photographed the light emitted by hundreds of millions of humans living below and the brilliant light of the Aurora Borealis shining above them.

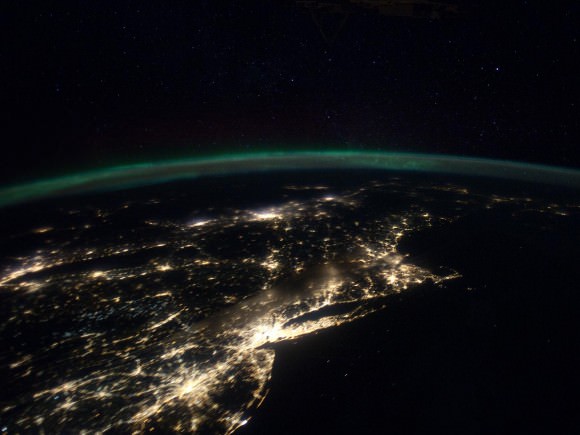
Recently we highlighted a single night time snapshot of the East Coast and tens of millions of humans.

Night time Panorama of US East Coast from the ISS
Astronauts captured this stunning nighttime panorama of the major cities along the East Coast of the United States on Jan. 29. Credit: NASA

Now the NASA team has assembled the entire sequence of images taken on January 29, 2012 from 05:33:11 to 05:48:10 GMT into a video -see above.

The orbital pass runs from Central America just southwest of Mexico and continues to the North Atlantic Ocean, northeast of Newfoundland. It begins by looking over Central America towards the Gulf of Mexico and the southeastern United States. As the ISS travels northeast over the gulf, some southeastern United States cities can be distinguished, like New Orleans, Mobile, Jacksonville, and Atlanta. Continuing up the east coast, some northeastern states, like Washington, D.C., Baltimore, Philadelphia, and New York City stand out brightly along the coastline. The Aurora Borealis shines in the background as the pass finishes near Newfoundland

The 2nd video is titled “Across Southwest Canada at Night”

This sequence of shots was taken January 25, 2012 from 12:34:11 to 12:36:28 GMT, on a pass from near the border of British Columbia, Canada and Washington state, near Vancouver Island, to southern Alberta, near Calgary.

The main focus of this video is the Aurora Borealis over Canada, which appears very near the ISS during this short and exciting video.

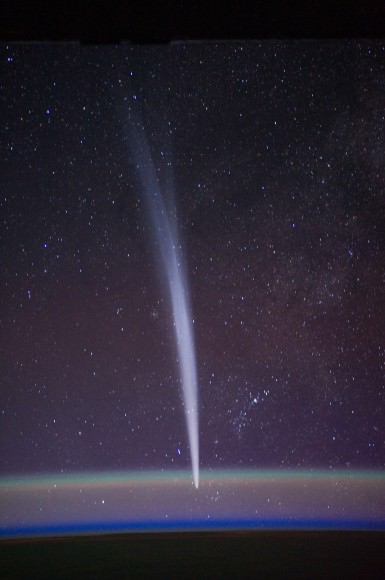
And don’t forget the fabulous ISS shots of Comet Lovejoy taken in December 2011 by Expedition 30 Commander Dan Burbank.

Comet Lovejoy on 22 Dec. 2011 from the International Space Station. Comet Lovejoy is visible near Earth’s horizon in this nighttime image photographed by NASA astronaut Dan Burbank, Expedition 30 commander, onboard the International Space Station on Dec. 22, 2011. Credit: NASA/Dan Burbank

For an otherworldly and eerie perspective, click here to see what a Manmade artifact on the surface of Mars looks like as seen from Mars Orbit – also taken just a few days ago on Jan. 29, 2012, but this time by a robot in place of a human !

Weekly SkyWatcher’s Forecast – February 12-18, 2012

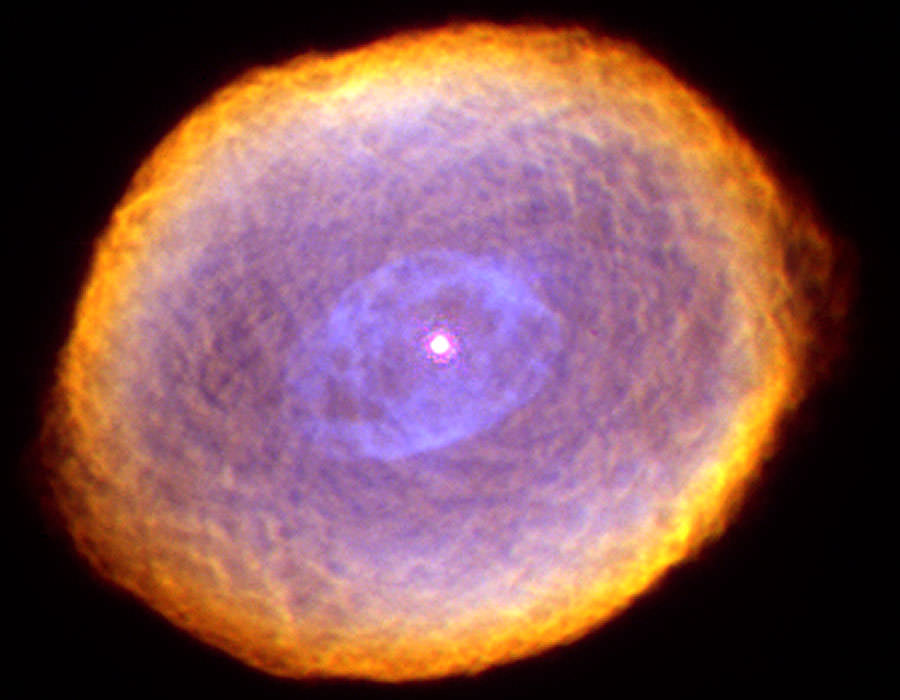
Spirograph Nebula Courtesy of the Hubble Space Telescope

[/caption]

Greetings, fellow SkyWatchers! As the Moon fades away, dark sky studies return and so do we as we take a look at a great collection of nebulae this week and expand your Herschel studies. Get out your binoculars and telescopes, because here’s what’s up!

Sunday, February 12 – Today is the anniversary (2001) of NEAR landing on asteroid Eros. The Near Earth Asteroid Rendezvous (NEAR) mission was the first to ever orbit an asteroid, successfully sending back thousands of images. Although it was not designed to land on Eros, it survived the low speed impact and continued to send back data. Would you like to view Eros for yourself? It will be visible a few hours after sky dark. At somewhere between magnitude 11 and 12, Eros will require at least a mid-sized telescope, but is very viewable to both hemispheres along the Hydra/Crater border… and about a handspan southwest of Mars! Be sure to check resources for a planetarium program or on-line service which will give you a precise location for your time and area.

Tonight we’ll continue onward with our studies of Lepus as we head for two more of the coveted Herschel 400 objects. Our hop starts with beautiful Gamma and NGC 2073. Located less than a fingerwidth northeast of Gamma (RA 05 45 53.90 Dec -21 59 59.0), NGC 2073 might be magnitude 12.4, but its small size makes it anything but easy. Even if it does have some highly studied molecular cloud structure, be prepared to see nothing but a tiny, egg-shaped contrast change in the elliptical Herschel 241.

Continue northeast a little more than 2 degrees (RA 05 54 52.30 Dec -20 05 03.0) to encounter Herschel 225 – NGC 2124. Although it is slightly fainter, we are at least picking up something with more recognizable structure. Oriented north/south, Herschel 225 is an inclined spiral with a bright nucleus. Set in a wonderfully rich star field, it’s difficult to spot at first with low power, but its slim structure holds up well to magnification. This one is really a pleasure.

Monday, February 13 – Today is the birthday of J.L.E. Dreyer. Born in 1852, the Danish-Irish Dreyer came to fame as the astronomer who compiled the New General Catalogue (NGC) published in 1878. Even with a wealth of astronomical catalogs to chose from, the NGC objects and Dreyer’s abbreviated list of descriptions still remain the most widely used today.

Tonight let’s make Dreyer proud as we finish up our Herschel 400 studies for Herschel 267. At magnitude 13, NGC 2076 (Right Ascension: 5 : 46.8 – Declination: -16 : 46 ) is a lot less forgiving of scope size and sky conditions than some galaxies, but if aperture and sky cooperate, you are in for a real treat! Although it is fairly small and somewhat faint, NGC 2076 is an edge-on that will show indications of a dark dustlane across its brighter nucleus, when using aversion. The lane itself has been highly studied for dust extinction and star forming properties and as recently as 2003 a supernova event was reported just south of the nucleus.

Now let’s drop south about one degree and pick up Herschel 270! Far brighter at magnitude 11.9, don’t let the ordinary elliptical NGC 2089 (Right Ascension: 5 : 47.8 – Declination: -17 : 36) fool you. What would appear to be a stellar nucleus is indeed stellar. Studies done by AAVSO have shown that the bright point of light is actually a line of sight star. Congratulations on your studies and be sure to write down your Herschel “homework!”

Tuesday, February 14 – Happy Valentine’s Day! Today is the birthday of Fritz Zwicky. Born in 1898, Zwicky was the first astronomer to identify supernovae as a separate class of objects. His insights also proposed the possibility of neutron stars. Among his many achievements, Zwicky also catalogued galaxy clusters and designed jet engines.

In mythology, Lepus the Hare is hiding in the grass at Orion’s feet. As we have seen, there are many objects of beauty hidden within what seems to be a very ordinary constellation. Before we leave the “Rabbit” for this year, there is one last object that is worthy of attention. If you look to the feet of Orion and the brightest star of Lepus, you will see that they make a triangle in the sky. Tonight we are headed towards the center of that triangle for a singular object – the Spirograph Nebula.

Shown in all its glory through the eye of the Hubble Telescope, the light you see tonight from the IC 408 (Right Ascension: 5 : 17.9 – Declination: -25 : 05) planetary nebula left in the year 7 AD. Its central star, much like our own Sol, was in the final stages of its life at that time, and but a few thousand years earlier was a red giant. As it shed its layers off into about a tenth of a light-year of space, only its superheated core remained – its ultraviolet radiation lighting up the expelled gas. Perhaps in several thousand years the nebula will have faded away, and in several billion years more the central star will have become a white dwarf – a fate that also awaits our own Sun.

At magnitude 11, it is well within reach of a small to mid-size telescope. Like all planetary nebulae, the more magnification – the better the view. The central star is easily seen against a slightly elongated shell and larger telescopes bring an “edge” to this nebula that makes it very worthwhile studying. Spend some quality time with this object. With larger scopes, there is no doubt a texture to this planetary that will delight the eye…and touch the heart!

Wednesday, February 15 – Born on this day in 1564 was the man who fathered modern astronomy – Galileo Galilei. Two and a half centuries ago, he became first scientist to use a telescope for astronomical observation and his first target was the Moon. Just before dawn this morning you will have the opportunity to observe the waning crescent and the tiny crater named for Galileo. Almost central along the terminator and caught near the edge of Oceanus Procellarum, you will see a small, bright ring. This is Reiner Gamma and you will find Galileo just a short hop to the northwest as a tiny, circular crater. What a shame the cartographers did not pick a more vivid feature to name after the great Galileo!

With absence of the Moon in our favor tonight, it’s time to learn the constellation of Monoceros as the skies darken and Orion begins to head west. By using the red giant Betelgeuse, diamond-bright Sirius and the beacon of Procyon, we can see these three stars form a triangle in the sky with Sirius pointing towards the south. The “Unicorn” is not a bright constellation, and most of its stars fall inside this area with its Alpha star almost a handspan south of Procyon.

Using the belt of Orion as a guide, look a handspan east, this is Delta. A fistwidth away to the southeast is Gamma; with Beta about two fingerwidths further along. About a palmwidth southeast of Betelguese is Epsilon. Although this might seem simplistic, knowing these stars will help you find many wonderful objects. Let’s start our journey tonight two fingerwidths northwest of Epsilon… NGC 2186 (Right Ascension: 6 : 12.2 – Declination: +05 : 2) is a triangular open cluster of stars set in a rich field that can be spotted with binoculars and reveals as many as 30 or more stars to even a small telescope. Not only is this a Herschel 400 object that can be spotted with simple equipment, but a highly studied galactic cluster that contains circumstellar discs!

Thursday, February 16 – On this day in 1948, Gerard Kuiper was celebrating his discovery of Miranda – one of Uranus’ moons. Just 42 years earlier on this day, both Kopff and Metcalf were also busy – discovering asteroids! Today is the birthday of Francois Arago. Born in 1786, Arago became the pioneer scientist in the wave nature of light. His achievements were many and he is also credited as the inventor of the polarimeter and other optical devices.

Tonight let’s celebrate Arago’s achievements in polarization as we return again to Epsilon Monocerotis. Our destination is around a fingerwidth east as we seek out another star cluster that has an interesting companion – a nebula!

NGC 2244 (Right Ascension: 6 : 32.4 – Declination: +04 : 52) is a star cluster embroiled in a reflection nebula spanning 55 light-years and most commonly called “The Rosette.” Located about 2500 light-years away, the cluster heats the gas within the nebula to nearly 18,000 degrees Fahrenheit, causing it to emit light in a process similar to that of a fluorescent tube. A huge percentage of this light is hydrogen-alpha, which is scattered back from its dusty shell and becomes polarized.

While you won’t see any red hues in visible light, a large pair of binoculars from a dark sky site can make out a vague nebulosity associated with this open cluster. Even if you can’t, it is still a wonderful cluster of stars crowned by the yellow jewel of 12 Monocerotis. With good seeing, small telescopes can easily spot the broken, patchy wreath of nebulosity around a well-resolved symmetrical concentration of stars. Larger scopes, and those with filters, will make out separate areas of the nebula which also bear their own distinctive NGC labels. No matter how you view it, the entire region is one of the best for winter skies.

Friday, February 17 – Tonight is a good time for us to go hunting some obscure objects that will require the darkest of skies. Once again, we’ll use our guide star Epsilon and tonight we’ll be heading about three fingerwidths northeast for a vast complex of nebulae and star clusters.

To the unaided eye, 4th magnitude S Monocerotis is easily visible and to small binoculars so are the beginnings of a rich cluster surrounding it. This is NGC 2264 (Right Ascension: 6 : 41.1 – Declination: +09 : 53). Larger binoculars and small telescopes will easily pick out a distinct wedge of stars. This is most commonly known as the “Christmas Tree Cluster,” its name given by Lowell Observatory astronomer Carl Lampland. With its peak pointing due south, this triangular group is believed to be around 2600 light-years away and spans about 20 light-years. Look closely at its brightest star – S Monocerotis is not only a variable, but also has an 8th magnitude companion. The group itself is believed to be almost 2 million years old.

The nebulosity is beyond the reach of a small telescope, but the brightest portion illuminated by one of its stars is the home of the Cone Nebula. Larger telescopes can see a visible V-like thread of nebulosity in this area which completes the outer edge of the dark cone. To the north is a photographic only region known as the Foxfur Nebula, part of a vast complex of nebulae that extends from Gemini to Orion.

Northwest of the complex are several regions of bright nebulae, such as NGC 2247, NGC 2245, IC 446 and IC 2169. Of these regions, the one most suited to the average scope is NGC 2245 (Right Ascension: 6 : 32.7 – Declination: +10 : 10), which is fairly large, but faint, and accompanies an 11th magnitude star. NGC 2247 (Right Ascension: 6 : 33.2 – Declination: +10 : 20) is a circular patch of nebulosity around an 8th magnitude star, and it will appear much like a slight fog. IC 446 is indeed a smile to larger aperture, for it will appear much like a small comet with the nebulosity fanning away to the southwest. IC 2169 is the most difficult of all. Even with a large scope a “hint” is all!

Enjoy your nebula quest…

Saturday, February 18 – On this day in 1930, a young man named Clyde Tombaugh was very busy checking out some photographic search plates taken with the Lowell Observatory’s 13″ telescope. His reward? The discovery of Pluto! And just where is the planet that isn’t a planet any more? You can find it before dawn! The little rascal is hiding out in a very stellar field just east of M25 and a couple of degrees northwest of the slender crescent Moon. How do you know which faint “star” is Pluto? Well, if you set a computerized telescope to RA 18h 24m 59s – Dec 19°18’44”, it will be precisely in the center of the field if you are perfectly polar aligned. If you are using a manual telescope, you will need to sketch the field and return over a period of several days to see which “star” moves. It would be a great lesson – since early astronomers did it that way!

This evening let us return to the realm of binoculars and small telescopes as we head now for Beta Monocerotis and a little more than a fingerwidth north for NGC 2232 (Right Ascension: 6 : 26.6 – Declination: -04 : 45). This wonderful collection of stars sparkles with chains and various magnitudes – the brightest of which is 5th magnitude 10 Monocerotis. Well resolved with a small telescope, its apparent size of about a full moon-width makes it a true delight and it can even be spotted unaided from a dark sky site. Be sure to note it, because it is on many open cluster study lists.

Now head back to Beta and about the same distance west for Class D cluster NGC 2215 (Right Ascension: 6 : 21.0 – Declination: -07 : 17). At magnitude 8, it is still within the realm of binoculars, but will look like a small fuzzy patch beyond resolution. Try this one with a telescope! Set in a rich field, the compressed area of near equal magnitude stars isn’t the most colorful in the sky, but you can add another to your Herschel hits!

Until next week, may all your journeys be at light speed!

Night Sky Guide: February 2012

Special thanks to Ninian Boyle astronomyknowhow.com for information in parts of this guide

This month, the Solar System gives us a lot to observe and we’ll even start to see the ‘spring’ constellations appear later in the evenings. But February still has the grand constellations of winter, with mighty Orion as a centrepiece to long winter nights.

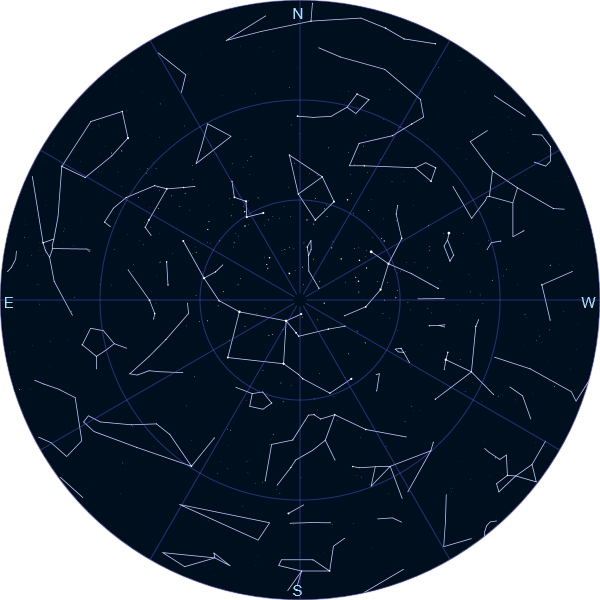
The Sun has finally started to perform as it should as it approaches “Solar Maximum.” This means we get a chance to see the northern lights (Aurora), especially if you live in such places as Scotland, Canada, Scandinavia, or Alaska or the southern light (Aurora Australis) if you live in the southern latitudes of South America, New Zealand and Australia. Over the past few weeks we have seen some fine aurora displays and will we hope to seesome in February!

We have a bit of a treat in store with a comet being this month’s favourite object with binoculars as well, so please read on to find out more about February’s night sky wonders.

You will only need your eyes to see most of the things in this simple guide, but some objects are best seen through binoculars or a small telescope.

So what sights are there in the February night sky and when and where can we see them?

Aurora

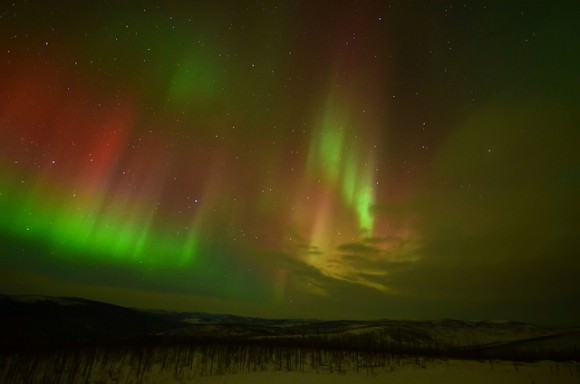
Looking north from the science operations center at Poker Fla,Alaska. Credit: Jason Ahrns.

The Aurora or Northern Lights (Aurora Borealis) have been seen from parts of Northern Europe and North America these last few weeks. This is because the Sun has been sending out huge flares of material, some of which have travelled towards us slamming into our magnetic field. The energetic particles then follow the Earth’s magnetic field lines towards the poles and meet the atoms of our atmosphere causing them to fluoresce, similar to what happens in a neon tube or strip light.

The colours of the aurora depend on the type of atom the charged particles strike. Oxygen atoms for example usually glow with a green colour, with some reds, pinks and blues. So the more active the Sun gets, the more likely we are to see the Northern (or Southern) Lights.

All you need to see aurora is your eyes, with no other equipment is needed. Many people image the aurora with exposures of just a few seconds and get fantastic results. Unfortunately auroras are “space weather” and are almost as difficult to predict as normal terrestrial weather, but thankfully we can be given the heads up of potential geomagnetic storms by satellites monitoring the Sun such as “STEREO” (Solar TErrestrial RElations Observatory).

Spaceweather.com is a great resource for aurora and other space weather phenomenon and the site has real-time information on current aurora conditions and other phenomenon.

Planets

Mercury is too close to the Sun to be seen at the beginning of the month, but will be visible very low in the south west from the 17th onwards. At the end of February Mercury will be quite bright at around mag -0.8 and will be quite a challenge. It can be seen for about 30 minutes after sunset.

Venus will improve throughout the month in the south west and will pass within half a degree of Uranus on the 9th of February. You can see this through binoculars or a small telescope. On the 25th Venus and the slender crescent Moon can be seen together a fabulous sight. At the end of month Venus closes in on Jupiter for a spectacular encounter in March.

Venus

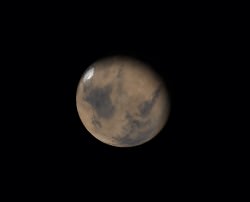
Mars can easily be spotted with the naked eye as a salmon pink coloured “star” and starts off the month in the constellation of Virgo and moves into Leo on the 4th. Mars is at opposition on March 3rd but is also at its furthest from the Sun on the 15th February making this opposition a poor one with respect to observing due to its small apparent size. The planet will still be visually stunning throughout the month.

Mars

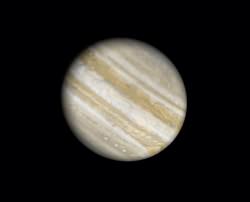
Jupiter starts off the month high in the south as darkness falls and is still an incredibly bright star-like object. Through good binoculars or a small telescope you can see its four Galilean moons – a fantastic sight. On the 8th at around 19:50 UT, Europa will transit Jupiter and through a telescope you will see the tiny moons shadow move across its surface. Throughout February, Jupiter moves further west for its close encounter with Venus in March.

Jupiter

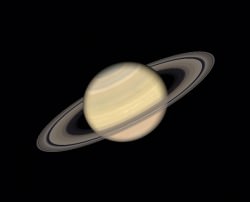
Saturn rises around midnight in the constellation of Virgo and appears to be a bright yellowish star. Through a small telescope you will see the moon Titan and Saturn’s rings as well.

Saturn

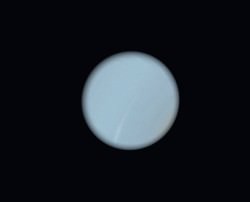
Uranus is now a binocular or telescope object in the constellation of Pisces. On the 9th Uranus and the planet Venus will be within half a degree of each other.

Uranus

Neptune is not visible this month.

Comets

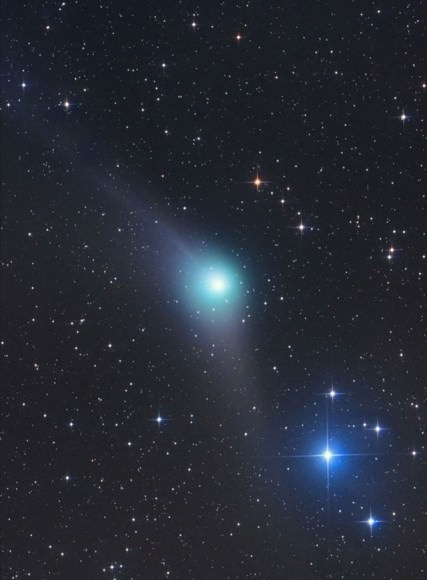
Comet Garradd Credit: astronomy.com

Comet Garradd is still on show early in the month — if you have binoculars — and as the month progresses the viewing should improve. You can find the comet in the constellation of Hercules not far from the globular cluster M92. It is about a half a degree away or around the same width as the full Moon. The comet is around magnitude 7 or a little fainter than the more famous globular cluster M13 also to be found in Hercules, so you will definitely need binoculars to see it. The comet is heading north over the course of the month which should mean that it will become a little easier to see. At the beginning of the month you will have to get up early to see it, the best time being around 5:30 to 6:30 GMT. By the end of the month though, it should be visible all night long.

Moon phases

  • Full Moon – 7th February
  • Last Quarter – 14th February
  • New Moon – 21st February

Constellations

In February, Orion still dominates the sky but has many interesting constellations surrounding it.

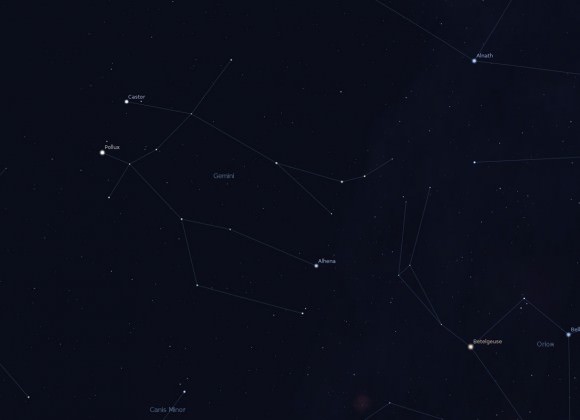
Above and to the left of Orion you will find the constellation of Gemini, dominated by the stars Castor and Pollux, representing the heads of the twins with their bodies moving down in parallel lines of stars with each other.

Legend has it that Castor and Pollux were twins conceived on the same night by the princess Leda. On the night she married the king of Sparta, wicked Zeus (disguised as a swan) invaded the bridal suite, fathering Pollux who was immortal and twin of Castor who was fathered by the king so was mortal.

Castor and Pollux were devoted to each other and Zeus decided to grant Castor immortality and placed Castor with his brother Pollux in the stars.

Gemini has a few deep sky objects such as the famous Eskimo nebula and some are a challenge to see. Get yourself a good map, Planisphere or star atlas and see what other objects you can track down.

Credit: Adrian West


Help Astronomers Measure the Solar System!

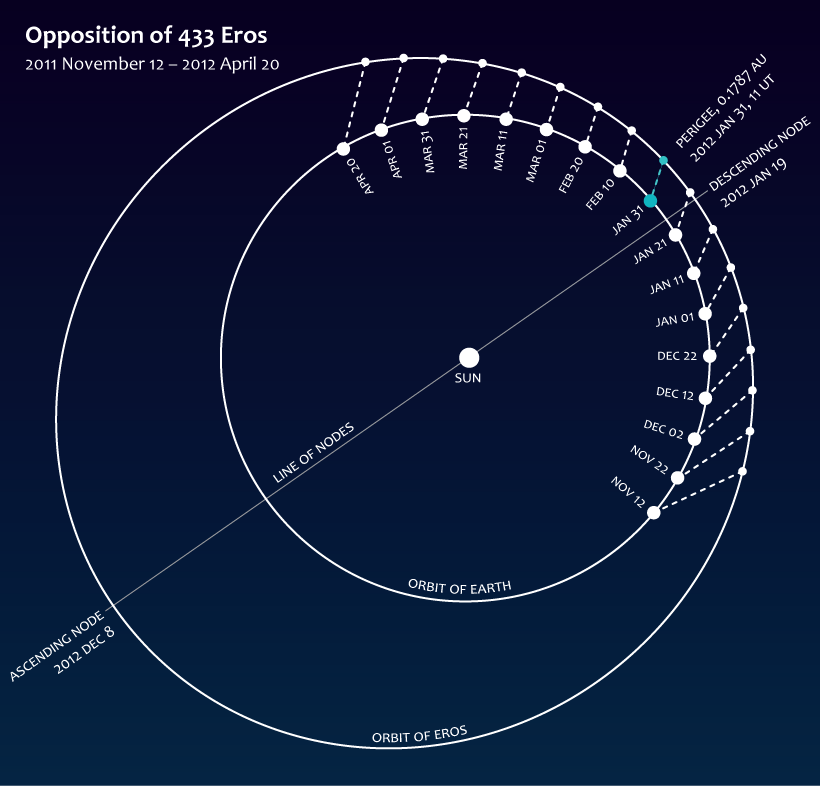
The orbit of asteroid 433 Eros brings it close to Earth on Jan. 31. (www.astronomerswithoutborders.org)

[/caption]

As the bright Mars-crossing asteroid 433 Eros makes its closest approach to Earth since 1975, astronomers around the globe are taking the opportunity to measure its position in the sky, thereby fine-tuning our working knowledge of distances in the solar system. Using the optical principle of parallax, whereby different viewpoints of the same object show slightly shifted positions relative to background objects, skywatchers in different parts of the world can observe Eros over the next few nights and share their images online.

The endeavor is called the Eros Parallax Project, and you can participate too!

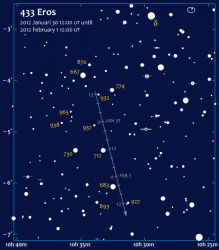
433 Eros' path from jan. 30 - Feb. 1, 2012. (transitofvenus.nl)

Discovered in 1898, Eros was the largest near-Earth asteroid yet identified. Its close and relatively bright oppositions were calculated by astronomers of the day and used, along with solar transits by Venus (one of which, if you haven’t heard, will also occur this year on June 5!) to calculate distances in the inner solar system.

Having both events take place within the same year offers today’s astronomers an unparalleled opportunity to obtain observational measurements.

Through the efforts of the Astronomers Without Borders organization, along with Steven van Roode and Michael Richmond from the Transit of Venus project, anyone with moderate astrophotography experience can participate in the observation of Eros and share their photos via free online software.

Using the data gathered by individual participants positioned around the world, each with their own specific viewpoints, astronomers will be able to precisely measure the distance to Eros.

The more accurately that distance is known, the more accurately the distance from Earth to the Sun can be calculated – via the orbital mechanics of Kepler’s third law.

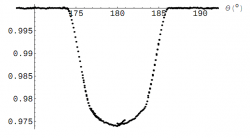
The tumbling motion of elongated 33-km-long Eros creates a changing brightness. (via transitofvenus.nl)

The last time such a bright pass of Eros occurred was in January of 1931. Observations of the asteroid made at that time allowed astronomers to calculate a solar parallax of 8″ .790, the most accurate up to that time and the most accurate until 1968, when data acquired by radar measurements gave more detailed measurements.

In many ways the 2012 close approach by Eros – astronomically close, but still a very safe 16.6 million miles (26.7 million km) away – will allow for a re-eneactment of the 1931 event… with the exception that this time amateur skywatchers will also contribute data, instantly, from all over the world!

One has to wonder…when Eros comes this close again in 2056, what sort of technology will we use to watch it then…

Find out more about the Eros Parallax Project and how to participate here.

And be sure to check out the article about the project on Astronomers Without Borders as well.

How Well Can Astronomers Study Exoplanet Atmospheres?

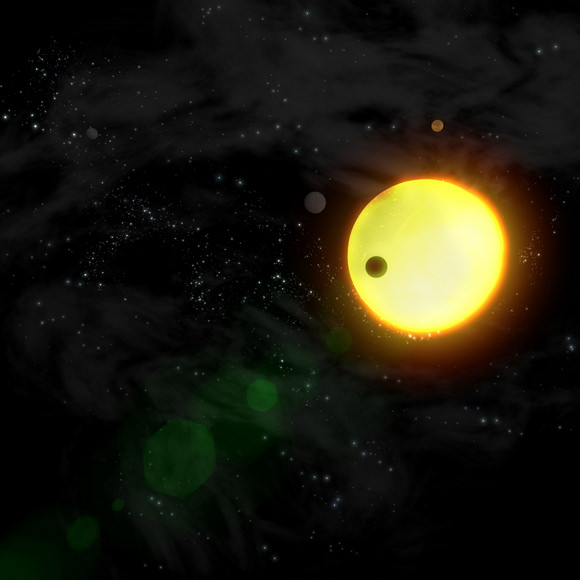
Artist's impression of exoplanets around other stars. Credits: ESA/AOES Medialab

[/caption]

Exoplanet discoveries are happening at a frenetic pace, and some of the latest newly discovered worlds are sometimes described as “Earth-Like” and “potentially habitable.”

The basis of this comparison is, in many cases, based on the distance between the exoplanet and its host star. Unfortunately the distance between a planet and its host star is only half the picture. The other half is determining if an exoplanet has an atmosphere, and what the contents of said atmosphere may be.

Basically, just because an exoplanet is in the “habitable zone” around its host star, it may not necessarily be habitable. If an exoplanet has a thick, crushing, Venus-Like atmosphere, it would most likely be too hot for surface water. The opposite holds true as well, as it could be entirely possible for an exoplanet to have a thin, wispy Mars-like atmosphere where any water would be locked up as ice.

At this point, how well can astronomers study the atmosphere around an exoplanet?

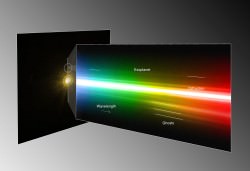
The spectrum from a giant exoplanet, orbiting around the bright, young, star HR 8799. Image Credit: ESO/M. Janson
Currently, there are only a handful of methods researchers can use to make estimates of exoplanet atmospheres. Interestingly enough, one method makes use of the light coming from the host star. The basic principle is that the light from a star can be analyzed both before and after an exoplanet crosses in front of the star. By comparing the spectrum from the host star, and the spectrum of an exoplanet, the tell-tale signs of atmospheric contents can be detected.

Methods to detect the atmospheric composition of such distant worlds are fairly new, as shown by work done with the Spitzer Space Telescope and ESO’s Very Large Telescope

Recently, astronomers from The Sternberg Astronomical Institute at Moscow State University used data from the Hubble Space Telescope in an attempt to better detect atmospheres around exoplanets. Abubekerov and team created mathematical models to analyze light curves from distant stars. In the case of Abubekerov’s research, the selected star was HD 189733 – a K-class star a bit cooler and smaller than our Sun.

About 60 light-years from Earth, HD 189733 also happens to have a binary companion orbiting it at a radius of about 200 A.U. So far, one exoplanet is known to orbit HD 189733. Discovered in 2005, HD 189733 b is a roughly Jupiter-size exoplanet which orbits its host star in just over two days. While not mentioned directly in Abubekerov’s paper, other studies have detected methane, carbon monoxide, water vapor and sodium in HD 189733 b’s atmosphere.

Light curve from HD 189733 in 5500 - 6000 angstrom range.
By applying their models to the light curves from HD 189733, Abubekerov’s team was able to better understand how light at different wavelengths behaves when an exoplanet crosses in front of its host star.

According to Abubekerov and team, the end result of their research was unsuccessful. The team suspects dark spot activity on HD 189733 was a contributing factor to their models not agreeing with actual observations.

The team stressed that additional observational data from HD 189733 when spot activity is negligible would be required to further refine their work. Despite their models not being successful, the team is confident that exoplanet radius increases with decreasing wavelength, which may imply the presence of an atmosphere.

Research such as Abubekerov’s will help astronomers build better models and pave the way for “sniffing” exoplanet atmospheres. Newer technology such as the James Webb Space Telescope and the European Extremely Large Telescope will also provide better data. In the not-too-distant future, astronomers and astrobiologists should be able to examine the atmospheres of exoplanets in the habitable zone.

If you’d like to read the full research paper, you can access a pre-print version at: http://arxiv.org/pdf/1201.4043v1.pdf

Source(s): Analysis of Light Curves of Eclipsing Systems with Exoplanets:
HD 189733. M. K. Abubekerov, N. Yu. Gostev, and A. M. Cherepashchuk
, Extrasolar Planets Encyclopaedia

Asteroid To Make Closest Approach Since 1975

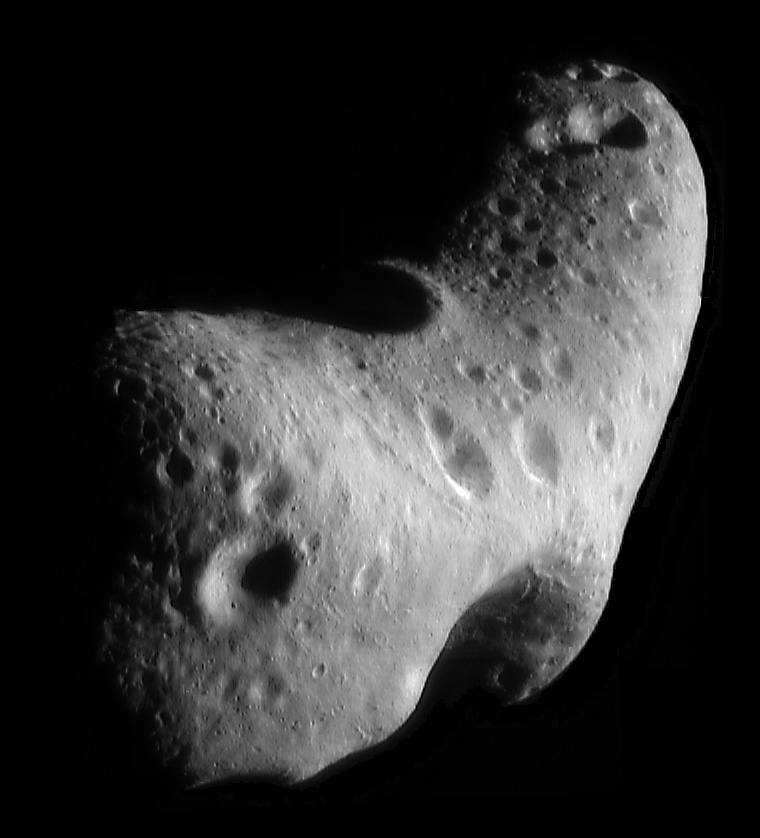
Asteroid 433 Eros, seen by NASA's NEAR spacecraft on Feb. 29, 2000. (NASA/JPL/JHUAPL)

[/caption]

On Tuesday, January 31, asteroid 433 Eros will come closer to Earth than it has in 37 years, traveling across the night sky in the constellations Leo, Sextans and Hydra. At its closest pass of 16.6 million miles (26.7 million km) the relatively bright 21-mile (34-km) -wide asteroid will be visible with even modest backyard telescopes, approaching magnitude 8, possibly even 7. It hasn’t come this close since 1975, and won’t do so again until 2056!

433 Eros is an S-type asteroid, signifying a composition of magnesium silicates and iron. S-types make up about 17 percent of known asteroids and are some of the brightest, with albedos (reflectivity) in the range of 0.10 – 0.22. S-type asteroids are most common in the inner asteroid belt and, as in the case of Eros, can even pass within the orbit of Mars.

Occasionally Eros’ orbit brings it close enough to Earth that it can be spotted with amateur telescopes. 2012 will be one of those times.

Eros was discovered on August 13, 1898, by astronomers Carl Gustav Witt in Berlin and Auguste Charlois in Nice. When Eros’ orbit was calculated it was seen to be an elongated oval that brought it within the orbit of Mars. This allowed for good observations of the bright asteroid, and eventually led to more accurate estimates of the distance from Earth to the Sun.

In February 2000 NASA’s NEAR Shoemaker spacecraft approached Eros, established orbit and made a soft landing on its surface, the first mission ever to do so. While in orbit NEAR took over 160,000 images of Eros’ surface, identifying over 100,000 craters, a million house-sized boulders (give or take a few) and helped researchers conclude that the cashew-shaped Eros is a solid object rather than a “rubble pile” held together by gravity.

View NEAR images of Eros’ surface.

Studying pristine objects like Eros gives insight into the earliest days of our solar system, and also allows scientists to better understand asteroid compositions… which is invaluable information when deciding how best to avoid any potential future impacts.

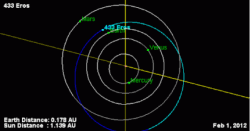
Orbit of 433 Eros for Jan. 31, 2012

Although Eros will be making a “close” approach to Earth on Jan. 31/Feb. 1, there is no danger of a collision. It will still remain at a very respectable distance of about 16.6 million miles (26.7 million km), or 0.178 AU. This is over 80 times the distance of the much smaller 2005 YU55, which safely passed within a lunar orbit radius on November 8, 2011.

If you do want to try viewing 433 Eros as it passes, you can find a diagram charting its path from Sky and Telescope here. According to the Sydney Observatory’s website “the coordinates on 31 January (from the BAA 2012 Handbook) are 10 hours 33 minutes 19.0 seconds RA and -4° 48’ 23” declination. On 10 February the RA is 10 hours 20 minutes 27.6 seconds and the declination is -14° 38’ 49 seconds.”

Also there’s an updated chart on Heavens Above showing Eros’ current position.

Eros should remain visible up until Feb. 10.

Thanks to Skyscrapers, Inc., for a report on 433 Eros by Glenn Chaple. Skyscrapers, Inc. is an amateur astronomy society in Rhode Island that operates the Seagrave Observatory, whose centerpiece is a beautiful 8 1/4″ Alvan Clark telescope built in 1878. I saw Halley’s Comet through that telescope in 1986 and have been hooked on astronomy ever since.

Citizen Science: GLOBE at Night

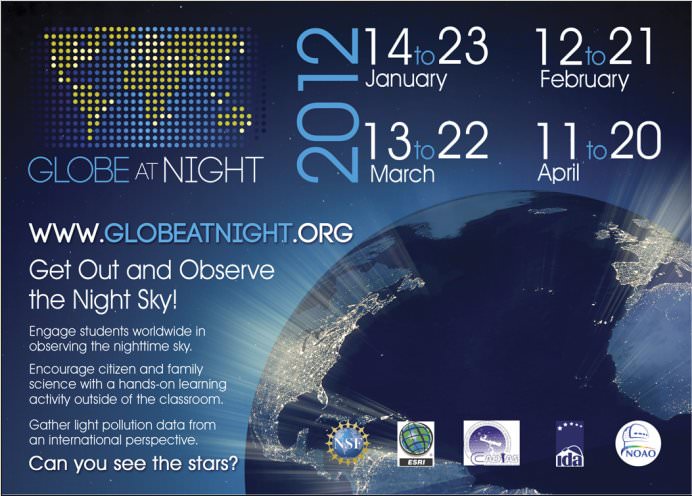
Image Credit: GLOBE at Night/NOAO

[/caption]Are you a fan of Citizen Science? Do you enjoy participating in projects that help researchers and possibly the environment?

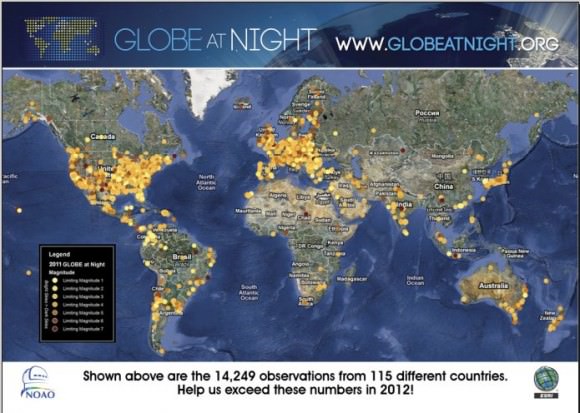
GLOBE at Night is one such program! By taking naked-eye observations of the night sky in your area, you can help a world-wide effort to track the effects of light pollution.

Here’s all the info you need in order to participate in GLOBE at Night during 2012.

For starters, what is GLOBE at Night?

The GLOBE at Night program is an international citizen-science campaign designed to raise public awareness of the impact of light pollution on our night skies. GLOBE at Night aims to raise awareness by inviting citizen-scientists to measure their night sky brightness and submit their observations to a website from a computer or smart phone.

Light pollution not only threatens our “right to starlight”, but also affects energy consumption, wildlife and health. For the past six years, the GLOBE at Night campaign has been involving people in 115 countries.

Participating in GLOBE at Night requires only five easy steps:

1) Find your latitude and longitude.

2) Find Orion, Leo or Crux by going outside more than an hour after sunset (about 8-10pm local time).

3) Match your nighttime sky to one of the provided magnitude charts.

4) Report your observation.

5) Compare your observation to thousands around the world.

Map of 2011 GLOBE at Night participation. Image Credit: GLOBE at Night / NOAO

You can also use the new web application data submission process. The GLOBE at Night website is easy to use, comprehensive and holds an abundance of background information. The database is usable for comparisons with a variety of other databases, like how light pollution affects the foraging habits of bats.

If you’d like to learn more about GLOBE at Night, visit: http://www.globeatnight.org/ , or the 365 Days of Astronomy Podcast: GLOBE at Night Kickoff: Seeing the Light.