The Sun on November 27, 2023, observed using the Unistellar eQuinox 2 and the new smart solar filter. Credit: Nancy Atkinson and Unistellar.
I recently had the chance to try out one of Unistellar’s smart telescopes, the eQuinox 2. Unparalleled in its ease of use, I was literally viewing distant nebula, galaxies, and star clusters within 15 minutes of opening the box.
I also had the opportunity to try out Unistellar’s new Smart Solar Filter, which I’ll discuss more below. But first, more about the telescope itself:
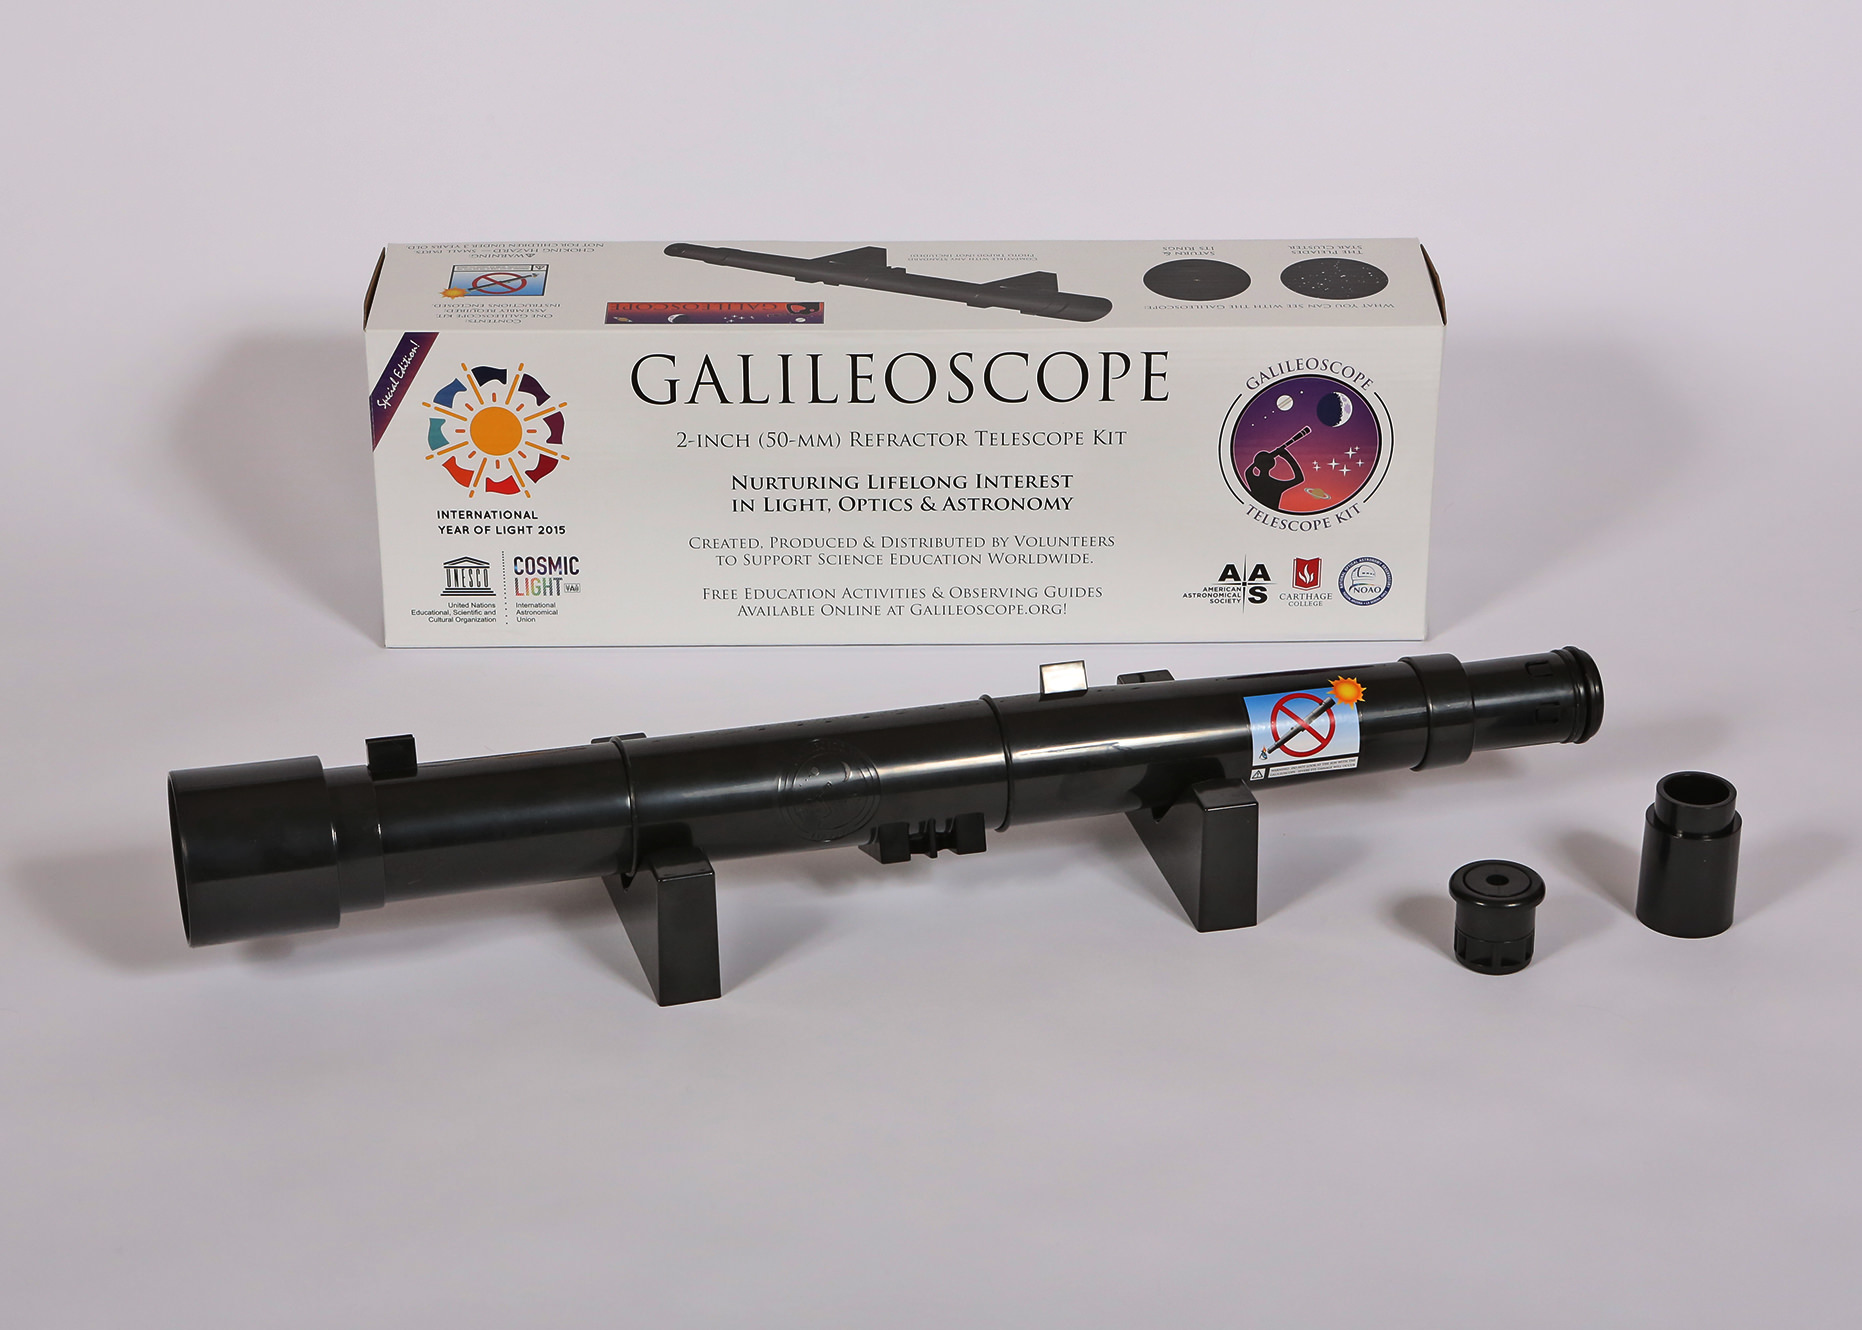
The Galileoscope is a a high-quality, low-cost telescope kit suitable for both optics education and celestial observation.
Remember the wonderful Galileoscopes that were developed in 2009 for the International Year of Astronomy? This high-quality, low-cost telescope kit is back for the 2015 International Year of Light (IYL), and new inventory is now available for delivery worldwide. Plus, thanks to generous donations to support science education, thousands of K-12 teachers and students in the United States could receive free telescope kits.
When the Galileoscope first came out in 2009, there was a waiting list to get one. But now, newly arrived IYL 2015 inventory is readily available and ready to be shipped.
“The new inventory takes us over the top of 250,000 Galileoscopes manufactured since the program began in 2009,” said Rick Fienberg, from the American Astronomical Society, and one of the people who leads the volunteer effort to make these telescope kits available.
Galileoscope kits have been distributed in more than 100 countries for use in science teaching and public outreach. They are suitable for both optics education and celestial observation. They are available for purchase and for donation through the Telescopes4Teachers program.
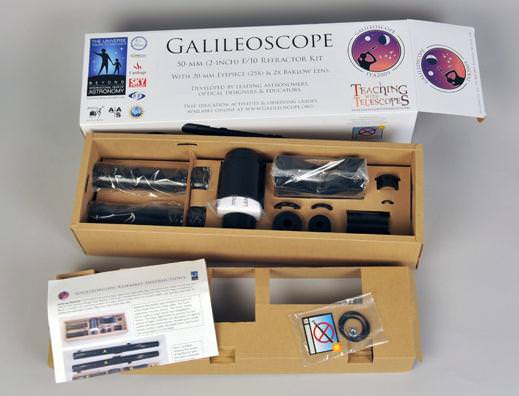
A look at the components in the Galileoscope kit. Credit: Galileoscope.
Fienberg told Universe Today’s Tammy Plotner in 2011 that the Galileoscope is extremely durable, and “is designed to be disassembled and reassembled repeatedly. This feature is essential for a product intended (at least in part) for classroom use — schools with limited funds are able to buy only a small supply of Galileoscopes and have to use them over and over again.”
From personal experience, I know the Galileoscope is perfect for beginners – as well as seasoned astronomers! It gives you an observational experience like Galileo had — except for having much, much better optics! You can get great, sharp views of things like lunar craters abd mountains, Jupiter’s moons, Saturn’s rings, the phases of Venus, and other bright celestial objects.
The Galileoscope is a 50-mm (2-inch) diameter, 25- to 50-power achromatic refractor. It attaches to any photo tripod. The Galileoscope comes unassembled so that students can explore fundamental optical concepts such as how lenses form images.
IYL 2015 is a global initiative adopted by the United Nations that promotes public understanding of the central role of light in the modern world, and to raise awareness of how optical technologies promote sustainable development and provide solutions to worldwide challenges in energy, education, agriculture, communications and health.
Did you ever have a T-shirt that you really enjoyed and wore until you wore it out? How about a favorite pair of slippers? You know, the ones with the duct tape soles? Then I think you’re going to feel the same way about this telescope. It’s darn near the perfect combination of power, portability and price. Just right for casual observing… Be it on a rooftop or from your suburban yard. What makes it even more attractive is its ability to track its subject matter!
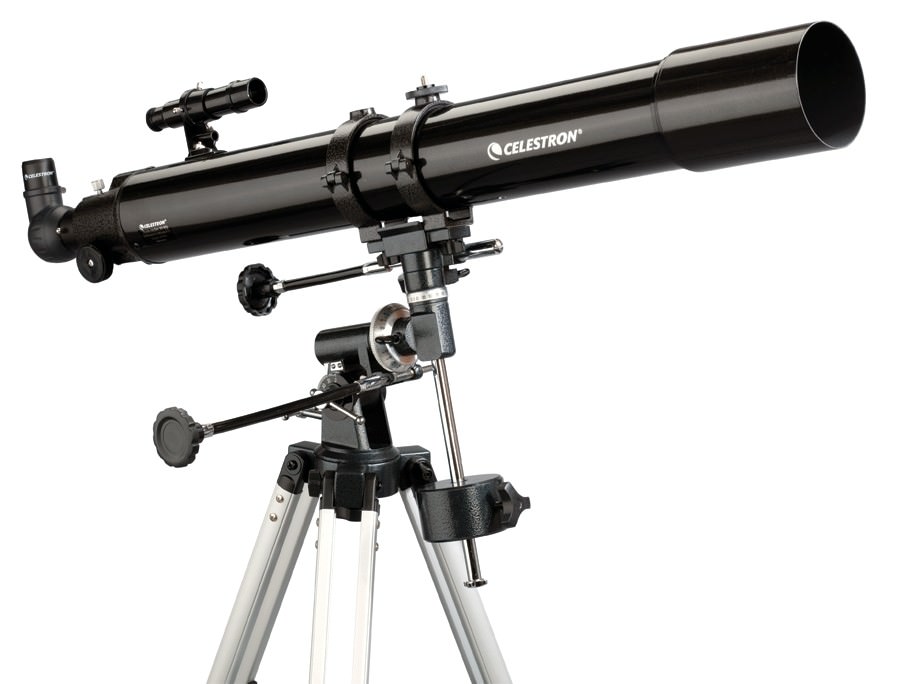
What’s new on the Tammy-testing homefront? This time it’s an Optics Planet Celestron PowerSeeker 80EQ refractor telescope. With 80mm of aperture and a 900mm focal length, it is not a small tube. It is elegant in both lines and size and does not appear “spindly”. Unlike most small aperture refractors which favor the alt/az, it comes with a light weight equatorial mount with a delightful addition – a drive unit. This means this special edition PowerSeeker 80EQ is going to make your time with lunar and planetary studies much more pleasant, and make higher magnification much more user-friendly.
Assembly is quite easy and fairly intuitive if you are familiar with telescopes and equatorial mounts. One thing you will very much enjoy is how easy it is to handle – a manageable 19 lbs. (8.62 kg) total weight. This means it is light enough to be set up complete and ready to be set outside the door at a moment’s notice. (This is something that I very much enjoy and approve of in a telescope. While I find large aperture to be breathtaking and I demand it for serious study, I also want a telescope that’s on hand for a quick look at the Moon or a joyous half hour with a planet.) While a light weight mount is super, don’t forget you’re making a trade-off. It’s not going to support heavy camera equipment and it’s not going to take a lot of abuse, such as overtightening or stressing gears through imbalance. However, it is quite capable of adding on certain types of imaging equipment, such as a webcam or eyepiece camera, or piggybacking a smaller camera on the mounting rings.
Next up? The view. As always, Celestron comes through with quality optics. At 80mm you’re not going to be getting Hubble images, but bright objects are crisp and clean. The views of Saturn and Mars were quite satisfactory and thanks to the included drive unit, the Celestron Powerseeker 80EQ delivered a whisper of the Cassini division and the neat little apparition of Titan swinging around the outside. Even Mars was capable of showing some dark patches when the atmosphere held still! Unfortunately, there wasn’t any Moon at the time, but I was very pleased with the color correction on beautiful double stars such as Cor Caroli and Albireo. Even Collinder 399 – the “Coat Hanger” showed pleasing red hints! Again, I was very appreciative of the drive unit when trying to split Epsilon Lyrae. With smaller aperture, the f/11 focal ratio could handle it – but again, needed the moment of perfect steadiness to say it was a clean split. No offense, but both the included 3X barlow and 4mm eyepiece are simply too much magnification for this scope to handle. (But a nice 10mm Plossl sure fills the bill!)
As for the scope itself, you’ll find it feels very “healthy”. The focuser isn’t a Feathertouch, but it has a nice feel to it… positive and it doesn’t slop around with a heavier eyepiece in it. The included 5×24 finderscope might seem a little small to most observers, but I liked it for two reasons – it’s an optical finderscope (not one of them (&^^#%! red dots) and it’s appropriately sized to what the scope can achieve. It’s just enough to pick off fainter “star hop” marker stars and give a hint of brighter objects. The included 1.25″ diagonal is also quite satisfactory and the 20mm eyepiece is the perfect workhorse for the majority of observations. You would be impressed with the crisp quality of the views of the Double Cluster, the ethereal Wild Ducks and the slightly pincushion look of M2.
Next up? Try kicking in better eyepieces and you’ll surprise yourself. Without getting brand specific, a higher dollar Plossl and a high magnification ED. Surprise, surprise! Here again, Celestron telescopes show their optical quality as the view did improve. After having become so accustomed to fast telescopes, it was a real pleasure to work with a longer focal ratio and see just how far I could push it. The Celestron Powerseeker 80 is definately deserving of higher quality eyepieces and a diagonal. All in all, this is an inexpensive telescope that is well made and, with care, should last through years of observing. You some day may end up with a little duct tape here and there…
But it’s got soul.
My thanks go to Optics Planet for their generous donation of the Celestron Powerseeker 80EQ to our annual star party / fundraiser at Warren Rupp Observatory.
For many astronomers who are just getting started, dobsonian reflector telescopes are a popular choice. While many newcomers to Astronomy seek out computerized “go-to” telescopes, some prefer the “no-frills” setup a dobsonian telescope offers.
The Orion XT8 dobsonian is a mid-range reflector telescope. There are a few smaller and less expensive models available in Orion’s classic dobsonian series, and there are a few larger, more expensive models as well. The XT8 offers a good balance between portability, price and performance. In this review we’ll look at the build quality of the XT8, along with how it performs at planetary and “dark sky” objects.
For starters, let’s look at the raw specifications for the XT8. The XT8 features an 8″ (203mm) primary mirror. With a focal length of 1200mm, this gives a focal ratio of f/5.9. Advanced observers will enjoy the XT8’s 2″ focuser, which allows for larger eyepieces, or even a “T” adapter for short-exposure astrophotography. New observers (or those on a budget) will find the included 2″ to 1.25″ eyepiece adapter allows the use of 1.25″ eyepieces with no noticeable wiggle/slop.
The XT8 does come with a 25mm 1.25″ Plossl eyepiece which performs well as a medium-power eyepiece in the XT8. The XT8 features Orion’s EZ Finder II sight. While the EZ Finder II isn’t a terribly bad “red-dot” finder, some observers may see fit to replace the stock finder with something like a “correct image” finder scope, a laser pointer, or even a Telrad non-magnified finder.
Orion ships the XT8 in two boxes. One for the optical tube, and a second for the dobsonian mount base. The shipping box for the mount base was well thought out, minimizing potential damage to the base components. The shipping box for the optical tube was adequate, but as with any piece of delicate equipment – there can never be enough padding.
Assembling the XT8 took about half an hour by myself. With a helper, the XT8 could probably be assembled in ten minutes. Once assembled the mount base is quite sturdy and allowed for smooth rotation of the optical tube, due to the Teflon azimuth bearings. Adjusting the optical tube in altitude was equally effortless and the tension springs provided enough tension to maintain position (even pointed at the horizon) without making the tube difficult to raise or lower.
The mount base does include a carrying handle. At around 40lbs total weight, some users of the scope may prefer to carry the optical tube and base assemblies separately. Once assembled and put in place at an observing location, operation of the XT8 is fairly straight forward. Depending on what finder setup is used, aligning the finder may take just a few minutes, or slightly longer. Generally, using a very bright object (newcomers may want help with this step) in the finder makes the process of alignment easier and faster. When setting up the XT8 for this review, I aligned my Telrad finder and the telescope itself with Jupiter.
After aligning the finder, using the XT8 is simply a matter of moving the optical tube to whatever objects are desired. Once the telescope is pointed at an object, making focus and/or eyepiece adjustments are fairly trivial. The eyepiece holder features thumbscrews which do a good job of holding eyepieces in place. The focuser offers smooth operation with very little image “wobble”.
Putting the XT8 through a short observing session, I was able to obtain great views of the Moon, Jupiter, the Orion Nebula (M42), and the Andromeda Galaxy (M31). At the time of testing, the Moon was in a waning crescent phase and the XT8 brought out some great views of lunar craters near the terminator. Despite being close to the horizon, the view of lunar craters in the eyepiece were crisp and clear. Moving eastward to Jupiter revealed a delightful view of a few of Jupiter’s atmospheric bands, as well as the Galilean moons. While the view from an 8″ telescope can’t compare to the views of Jupiter from Voyager or the Hubble, the detail revealed is still quite impressive.
Saving the best for last, I pointed the XT8 at M42 (Orion Nebula) and M31 (Andromeda Galaxy). Star-hopping to M31 was fairly trivial, via Alpheratz (In Pegasus). I did switch from the stock 25mm to a lower power 40mm eyepiece, as M31 does tend to benefit from lower power eyepieces, at least visually. The view of M31 provided a fuzzy patch that clearly stood out from the background stars. Moving eastward to M42, the views were breathtaking for such a relatively small telescope. Significant detail (albeit without much color) of the gas and dust was visible, along with a bright trapezium.
In Summary, the Orion XT8 is a great mid-range telescope which balances price and performance quite well. Despite Orion classifying this telescope as an “Intermediate” telescope, the XT8 would be an excellent choice for a beginning astronomer, or even an experienced observer looking to add a new scope to their fleet.
Assembling the XT8 was a trivial task with the included wrenches, and after assembly the telescope felt very sturdy. At around 40lbs, most people will have little to no trouble carrying the XT8 from their car to their observing spot, or from the house to a spot in their backyard. The included 25mm eyepiece works well as a mid-range eyepiece, but some users may want to invest in additional eyepieces, or at the very least a 2X barlow lens.
Some users of the XT8 may choose to replace the stock finder with one of their own choosing, but the included red-dot sight is fairly adequate. With a scope as powerful as the XT8, those planning to regularly perform lunar observations may want to consider purchasing a lunar filter. Any users who choose to perform solar observations can easily obtain a glass filter lens for the XT8 at a cost of around $100.
Before you consider buying expensive equipment for viewing the wonders of the night sky, binoculars are one piece of equipment every amateur astronomer should have.
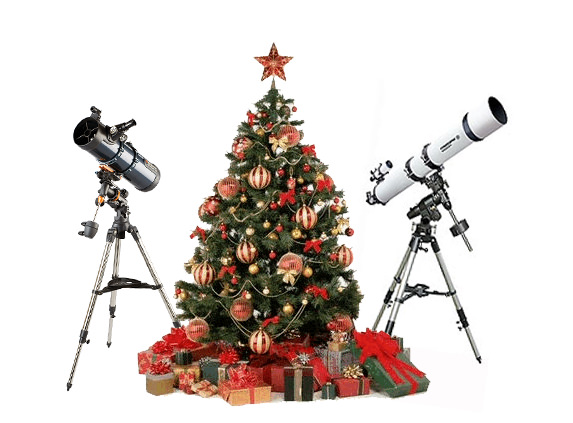
Many beginners to astronomy (especially around the holiday period) are sometimes dead-set on getting a telescope, but many aren’t aware that a good pair of binoculars can outperform many entry level telescopes for a similar cost, or much less.
Binoculars are simplicity in themselves — maintenance free, instantly available for use and very versatile, as they can be used for daytime, or “terrestrial viewing” just as well. It is difficult to say the same for with most telescopes.
Go into any photographic store, or website that sells binoculars and you will be met with literally hundreds of different makes, types and sizes – confusing for the beginner, but with a few pointers it can be easy to choose.
Credit: astronomybinoculars.com
So how do you choose a pair of binoculars that will give good results with astronomy?
When choosing binoculars for astronomy, the only variables you need to think about are size of the optics and weight.
Too small and they won’t be powerful enough or let enough light in; too big and heavy means they are almost impossible to use without a support or tripod. Beginners need to find a pair of binoculars which are just right.
The key is to get as much light into the binoculars as possible without making them too heavy. This will give sharp views and comfort when used.
Size and weight come hand in hand, the more light gathered, the heavier the binoculars will be.
All binoculars are measured or rated by two numbers, for example: 10 X 25 or 15 X 70. The first number is the magnification and the second number is the “objective diameter” which is the diameter of the objective lens and this determines how much light can be gathered to form an image.
Credit: Halfblue Wikipedia
The second number or objective diameter is the most important one to consider when buying binoculars for astronomy, as you need to gather as much light as possible.
As a rule of thumb, binoculars with an objective diameter of 50mm or more are more suited to astronomy than smaller “terrestrial” binoculars. In many cases a larger objective also gives better eye relief (larger exit pupil) making the binoculars much more comfortable to use.
For the beginner or general user, don’t go too big with the objective diameter as you are also making the binoculars physically larger and heavier. Large binoculars are fantastic, but — again — almost impossible to keep steady without a support or tripod.
Celestron Skymaster 15 X 70 Binoculars
Good sizes of binoculars for astronomy start at around or just under 10 X 50 and can go up to 20 X 80, but any larger and they will need to be supported when using them. Some very good supported binoculars have objective diameters of more than 100mm. Theses are fantastic, but not as portable as their smaller counterparts.
Binoculars are one of the most important items a new or seasoned astronomer can buy. They are inexpensive, easy to choose, use and will last a very long time.
The holidays are fast approaching, and you may be looking for gift ideas for your friends, loved ones and even yourself. Are you considering buying a telescope this year?
There are many different types of astronomical telescope available on the market and for the beginner, selecting one can be a bewildering experience. Before buying a telescope it is important to ask yourself: What objects do you want to see through your new telescope and how much can the person buying it afford to pay?
Not all telescopes are the same nor do they give the same results. Many amateur astronomers have two or more different telescopes for different types of observing, but there are some which offer a good compromise and most objects can be seen through them.
Once you have decided on the telescope’s main purpose and what you want to see through it, choosing one can become much easier. With the exception of the Moon, planets and close star clusters, interesting night sky objects are faint; in fact most will appear as just points of light. As a new observer you may be mainly interested in viewing the Moon and planets, and if this is the case, a telescope with a small objective (primary mirror or lens) may be sufficient.
Most observers quickly graduate to galaxies, nebulae, globular clusters, open clusters etc. To view these objects you will require a telescope with the largest aperture that is possible for your circumstances, which includes things like cost, weight, portability, etc.
Below are the 3 main types of telescope worth considering as a beginner:
Newtonian reflector telescopes are a popular choice for astronomical use because they have the lowest cost per inch of aperture. Observations of faint deep sky objects, such as Galaxies and Nebulae, can be achieved at a relatively reasonable cost by reflectors with mirror diameters of 150 to 200mm (6 to 8 inches). Celestron Astromaster 130 Refractor telescopes are good for achieving high power and contrast when viewing the planets and the moon. They have a reputation of providing crisp, sharp-quality images. Since they are virtually maintenance free, they are easy to operate, but due to high costs for the large aperture scopes, most beginners will choose a Newtonian reflector as a first scope for all round astronomy. Short-tube refractors are now another low cost option for beginners. Their smaller size makes them an excellent choice for a portable telescope and the beautiful wide-field star vistas which they provide are great for learning your way around the night sky. Bresser Refractor Telescope Dobsonian Telescopes are one of the best choices for a general telescope and have many advantages including simplicity, economy and large light gathering ability. Dobsonians are actually large Newtonian telescopes on a simple manual Alt/ Az (Up, down, side to side) mount. Due to the mount and optical tube assembly being so simple, Dobsonian telescopes are the most economical on a cost per inch basis. This enables massive apertures being made affordable, bringing fainter objects within the grasp of the amateur and usually well within budget with mirror diameters from 150mm to 400mm (6 to 16 inches) or much larger. The Meade 16" LightBridge
Another consideration when choosing a telescope is the mount – the part the optical tube assembly sits on. Usually a tripod with a head containing manual or motorised controls, which point the telescope and track an object observed.
The three main types are:
Equatorial – Usually found paired with all telescopes apart from Dobsonians. Equatorial mounts enable the telescope to follow the rotation of the sky with on axis parallel to the Earth’s axis of rotation. They can also be used in a basic manual mode which can be manually moved by hand in the Altitude (up/down) and Azimuth (left/right) axis. Many higher end mounts have computers and GoTo systems incorporated which are almost essential for astrophotography.
Hand operated Manual Alt/ Az (Altitude/ Azimuth) – Usually found on very cheap or small telescopes, Dobsonian telescopes, binocular mounts and photographic tripods. Simple and easy to use, however they do not track objects across the sky.
GoTo or Computerised – Found on many mid to high range telescopes of all sizes and extremely popular with astrophotographers and imagers. Unfortunately many beginners are drawn to the sexy marketing of scopes that are computerised and this can be an expensive mistake. Personally I believe it to be better to use manually guided telescopes when starting out instead of jumping in straight away with computerised ones. It is much better to concentrate on good optics and a solid mount rather than waste lots of money on often complicated and unnecessary electronics. For more info on mounts and GoTo Systems see the Beginners Guide to GoTo
Hopefully this guide has given you more insight into the complicated world of telescopes, and enable you to make a better decision when buying your new telescope. Your new purchase should be one that you can enjoy and get the most out of for many years.
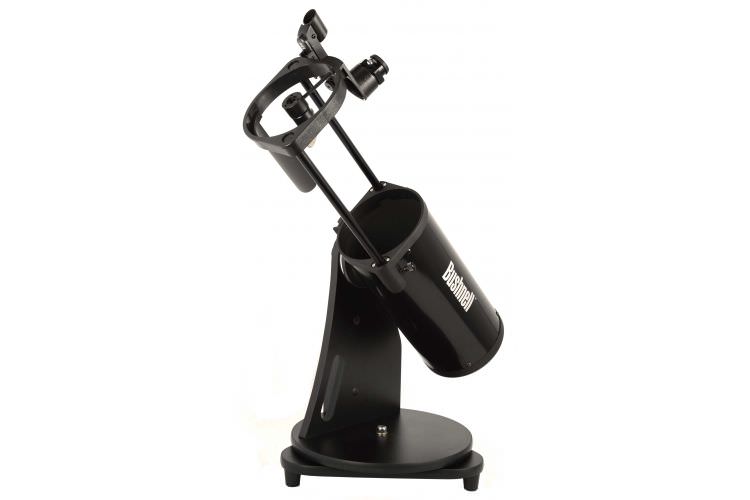
Time for me to play with some new equipment? You betcha’. And this time it’s a Bushnell proprietary design – a large, tabletop dobsonian model manufactured specifically for Optics Planet. It’s called the ARES… named for NASA’s Ares rocket… but I think it’s a regular little “lighthouse”!
First let’s start off with some facts and figures. The Bushnell ARES 5″ Truss Tube Dobsonian Telescope 785000 isn’t little. It is a 130mm clear aperture (5″) Newtonian reflector. It has a focal length of 650mm which makes it a sweet f/5. It has a 0.92 arc sec resolving capability and knocks off a very respectable limiting stellar magnitude of 12.7. So how does a lightweight, tabletop dobsonian telescope manage to pull off an f/5 rating when it’s such a compact package? It does what all good telescopes should do… It telescopes! First check out this video…
When I first unpacked the Bushnell ARES, I was pretty upset. It felt like it was going to fall apart in my hands and I was truly worried it had gone through some bad experiences in shipping. But the fault was not in the stars, dear Brutus… It was in my own lack of ability to see exactly how it was put together. My first impression was to tighten down the side bearing to make everything stable – totally overlooking the fact that the telescope’s balance is a long, side-mounted dovetail. Once I realized what I was doing wrong, all systems were then “Go” and it was time to do this little telescope’s magic act and utilize the incorporated truss tubes and slide it up into observing position. My, my… Look at that clean and perfect little ellipsoidal secondary!
Next step… Attach included red dot finderscope. It goes on its own little metal pedestal and attaches via a dovetail. After that, a quick, cursory collimation check (and a thoughtfully provided center-marked mirror) and make sure everything is snug. When we’re set here, it’s time to take off the dust cover, which I am very happy to say has a slight offset to it which means it opens somewhat like a medicine bottle. This isn’t a dustcap that’s just going to pop off at one good bump. It is heavy duty and was very thoughtfully designed to truly protect the optics tube. Before I put in an eyepiece, however, I’d like to report that there’s nothing cheap about this little dobsonian telescope. Body parts, focuser holder, etc. are metal – not plastic. Friction bearings on the altitude and the azimuth are very positive, and once you’ve balanced the Bushnell ARES, you’ll find its weight to be very positive, secure and even major moves can be made without the assembly bumbling around. The “dobsonian” cabinet is a composite wood with overlay – and it’s actually more of an alt-az arrangement rather than the double side bearings we normally associate with a dob design. However, it is also well-crafted and sturdy.
OK! So, now we’re down to what else is in the box and putting in an eyepiece for real. The Bushnell ARES 5″ Dobsonian comes equipped with a standard 1.25″ rack and pinion focuser. Here again we’ve got good, standard quality. No “cheapie” parts… Just a solid focuser with a nice firm touch that’s not slopping around with the supplied 25mm Plossl. (Just out of curiousity, I did drop a barlow and a 32mm in it to see what kind of lifting capabilities it had, and I’m happy to report the focuser did just fine.) The focuser also has quite sufficient back focus, so there shouldn’t be any problem with almost any eyepiece you would choose to use. Time for a quick alignment of the red dot finder – which is accomplished with X and Y axis knobs… ones which I will invariably turn instead of turning the finder off and on. However! That’s besides the point. The red dot reflex sight is also good quality, all knobs and adjustments are firm and it has a rolling switch which allows you to adjust the brightness level. (Just don’t do like I have done in the past, and turn it down and forget! The only problem with a red laser dot finder is if your batteries go and you don’t have a spare? That’s it for the night… dig?)
Where were we? Yes! Yes. The focuser and eyepieces. Here is one thing I will caution you on. The sliding truss tube design of the Bushnell ARES means the truss tubes are slightly lubricated. Just take care not to touch the trusses and then smear an eyepiece or get near that exposed secondary. I realize for an experienced telescope user that you’re going to know that you have something oily on your fingers if you should touch it… and that you’re not going to endanger your optics… but perhaps an inexperienced user or a child just might not have the same savvy. The little Bushnell Dob comes supplied with a 25mm and 10mm Plossl that are also of good quality which don’t want to “unscrew” themselves around the seams and have fold-up rubber eyeguards. Very satisfactory workhorse eyepieces.
My first adventures were under dark skies with an average limiting magnitude of 5.5 with seeing a nice, steady 8. I had to see the Andromeda Galaxy… and boy, did I. While the ARES isn’t capable of picking out NGC objects in M31, it delivered all the way across the eyepiece and it’s quite possible to see M32 and M110 with slight to moderate aversion. M33 was very sweet in rich field – there were even hints to the pinwheel spiral structure! M15 was beginning to show signs of resolution even at low power… and the Double Cluster would just knock your socks off. If you want some more fun, then check out M57 and M27 before they’re gone. Just spectacular…
What do I see in deep, wide star fields? There’s a bit of coma at the edges – but I defy you to show me any reflector telescope that doesn’t display some coma. It is simply design inherent and I personally don’t think this telescope displays enough to be distracting and that is that.
The next “star test” is planetary and double stars under LM5/8. Even at the modest magnification the 25mm provides, Jupiter jumps right to life – exhibiting some rusty coloration, limb darkening and the dimensional effect of the Galiean moons. While I am not a fan of high magnification, I did use the 10mm and was pleased again that when this telescope is well-balanced that you can set the friction tension to an absolute minimum and track an object smoothly without disrupting the whole set up. After having viewed Jupiter, it was time to tackle a few favorite double stars, like Kappa Piscium, Gamma Piscium, Gamma Andromeda, Eta Cassiopeia, Alberio and Polaris. They were all fine, clean splits and the Bushnell 5″ ARES dob provides very nice coloration.
The last of my “tests” were a few nights that I got up close and personal with the Moon. (ok, ok… i’m guilty of looking at other things, too.) I’m equally pleased to report that during very steady pockets of seeing that the resolution was very, very nice. While the Bushnell 5″ dobsonian telescope didn’t perform like a 150mm Intes Mak on the Moon, it had absolutely nothing to be ashamed of. Crater edges were crisp and well defined. Limb edges and terminator features were sharp. All in all, it performed very well – even with high magnification!
So what’s the long and short of the story? If I had to complain about something, I would say it’s the “unsteady” feeling the scope has when the locking mechanism for the sliding dovetail balance is loose. It feels like it’s going to fall off – even though it didn’t and the feeling was only an illusion. The second complaint would just be that you need to be careful around the lubrication on the truss rods. Points in favor? Wow… The Bushnell ARES collapses into a very small, light-weight and very secure portable package. At approximately $150, it might be inexpensive – but it is not cheap. All the parts have been thoughtfully made to work together… and work together for years and years of service. The supplied accessories are of good quality and about the only thing I would suggest is a 1.25″ Moon filter and a collimator (if you don’t already have one). If placed on a tabletop, the assembly is a little hard to aim in some positions because the table gets in the way of the fixed finderscope angle – but it does an awesome job if placed on a stool, wooden cable spool, or even a couple of concrete blocks. Once you’ve found your “comfort zone”, the telescope performs admirably and has enough light-gathering ability to go far beyond the objects that I star-tested. (I know, because I did… and it does.) All, in all the Bushnell ARES is a real “little lighthouse”…
Or is that a lighthouse “keeper”?
Many thanks go to Optics Planet for being so kind as to trust me with the Bushnell ARES 5″ Truss Tube Dobsonian Telescope 785000 until Ohio skies cooperated long enough to allow me to use it with the time and attention it deserves. This would make an outstanding Christmas present for an older child looking for a quality telescope and an equally fine addition as a worthy “Grab and Go” telescope for the seasoned SkyWatcher.
For many of us, the northern nights are getting longer and our minds and hands need something to keep them occupied. Star parties and public education nights are becoming fewer, but school is back in session and so is the opportunity to teach. In the south, warmer nights are coming up and so is the chance to share your knowledge of the skies and astronomy equipment with friends and family. It’s just the right time of year to take a close look at a telescope that really serves a purpose – the Galileoscope.
My first experience with the Galileoscope was during the 2009 “Year Of Astronomy”. I purchased one to be used in conjunction with outreach programs that dealt with history. Nothing more. Nothing less. In other words, I struggled to put the thing together, used it once or twice, and pretty much put it back in the box and put it away. I was too “busy” to really pay too much attention to it.
And that was a real shame on my part.
A couple of months ago it came to my attention that the Galileoscope was now readily available. When it first came out, it was a long waiting list – but not anymore. Now these basic replica telescope kits can be purchased by the case and be in your hands within weeks. Just seeing this advertisement was enough to motivate me to go on a search mission in my astronomy “stuff” and re-locate my own. A few boxes here, a couple of shuffles there and next thing you know, there it is. Still assembled and still in perfect condition. Now I didn’t need to be afraid of it. If something happened? Hey! It could be replaced.
With the instructions missing from the box, the next step was to find out some very pertinent information – and personal thoughts – that I couldn’t find on-line. Time to contact one of the Galilescope’s designers, Rick Fienberg. As former Editor in Chief of Sky & Telescope magazine, he’s an expert on astronomy education and popularization and is intimately familiar with the amateur-astronomy community, a critical component in the success of the Galileoscope… and a really nice guy, besides. What I needed to know was if it could be repeatedly assembled and disassembled without ruining it. After all, just one blown O-ring brought down a shuttle…
“The Galileoscope is designed to be disassembled and reassembled repeatedly. This feature is essential for a product intended (at least in part) for classroom use — schools with limited funds are able to buy only a small supply of Galileoscopes and have to use them over and over again rather than let students take them home to keep.” said Dr. Fienberg. “We always hoped that the Galileoscope wouldn’t end up as a one-shot, short-term product that would die at the end of IYA2009. We created something that simply didn’t exist before and for which there is a huge education-and-outreach need. The need remains, and the Galileoscope continues to fulfill it.”
Feeling the outreach fire beginning to burn again, I carefully laid the scope out on the table and began the process of reverse engineering. Once apart, I walked away for awhile and came back nervous. However, I didn’t need to be. All I needed to do was go over the Galileoscope Assembly Instructions and watch the Galileoscope Assembly Video. What I found this time wasn’t what I was expecting. My first experience with the scope was hurry up, get it done, get it to a program… and not really use it. This time was different. This time I was really looking at the optics, understanding how to explain how they worked and impressed with the simplicity and quality of the kit as a whole. It made me think… Just as it made the people who designed it think.
“Advice on the design of the telescope came from a variety of people not connected with the project. Optical designers, amateur and professional astronomers, and educational developers all provided input on what makes an effective, yet inexpensive telescope kit. It was critical that the telescope kit be educationally useful as well as astronomically useful. Thus great consideration was given as to how the educational uses of the telescope could be maximized. However, before we embarked on a new telescope design we needed to understand the limitations of previous inexpensive telescopes.” explains Fienberg. “The key optical requirements of the Galileoscope centered on usability and image quality. Since price was clearly going to be an issue, we needed a trim, justifiable set of requirements. The key imaging requirement was to be able to to create a “Wow” experience for kids, from nearly any location in the world.”
While the Galileoscope team’s original “Wow” intentions were meant to be visual – and meant for a younger audience – the real “Wow” happened for me when I realized exactly what I was doing as I put it together. It’s more than just assembling a working model. It is a valuable lesson in optics. Of course, many of you are politely yawning behind your hand at this point, knowing this was also one of the original intentions behind the Galileoscope, but ask yourself this… Just how many of you have honestly put together a working eyepiece or examined how crown and flint works? Looking at a diagram of how an eyepiece design functions, or what makes a refractor telescope… well… refract is one thing. Holding a quality lens in your hands is another. It awakens a natural curiosity inside you and sparks a sense of wonder.
“Designs were made using both glass and plastic achromatic objectives. Although each would have worked well, we felt that the conservative manufacturing approach would be to use glass, even though it was considerably more expensive. We felt that we might jeopardize the overall system quality using plastic.” says the Galileoscope team. “Because of the low price we were trying to achieve, we often relied on manufacturing practices and standards rather than manufacturing to tolerances. In this case we felt that the very mature refracting telescope industry could be counted on to manufacture a high-quality objective. Our testing of department store telescopes convinced us of this.”
Galileoscope Design Courtesy of Merit Models
As I finished construction again, a lot of points were driven home to me that I had simply missed on the first go round. Thought and care had been given to internal baffling so the scope could be used near a bright light source, such as found in urban settings. Snap-type assembly features were not used so that they would not break after repeated assembly. The focal ratio, eyepiece design and even the inclusion of a barlow were carefully considered. The team even realized the display stand could be doubled as an optical bench where the tube is assembled in two halves, rather than in a nested design. In other words, the Galileoscope might be inexpensive, but it’s certainly not cheap.
So how does it perform?
Well, at my age I have enough problem steadying a pair of 10X50 binoculars without assistance, so only the most brief of glimpses can had through using it in “hand-held” mode. Of course, the team had also taken this into account and the assembly comes with a quarter twenty fixture that allows it to be easily connected to any photo/video tripod. However, if you don’t have – or can’t afford – a tripod, it’s an easy problem to solve. Somewhere at some point in time I had run across a clever idea where a person had used a sturdy Galileoscope Cardboard Box Mount as a simple alt-az configuration. Just weigh down the bottom of the box and pass the quarter twenty bolt through the side near the top. Sandwich the bolt on either side with a washer, and place a nut on the inside to hold it. By loosening and tightening the nut, you can control the up and down motion, and just turn the box for side to side. Aiming is acquired through a reflex “notch”, much like a gun sight. Simulated views of the Moon, Pleiades and Jupiter as seen through a Galileoscope. Created with Starry Nights and additional images by Rick Fienberg
Once steadied, the view surpasses that of a “toy” telescope. While the Galileoscope isn’t going to perform like a Takahashi refractor, it gives very suitable views of the Moon, does indeed reveal the rings of Saturn and brings the four primary satellites of Jupiter out to play. I found it gave very acceptable images of bright, easy to aim at objects like M8, M44, M6, M7 and – later in the year – the Andromeda Galaxy, the Double Cluster, M42 and M44. With some coaxing and patience, other deep space objects can be found, but aren’t particularly impressive at this aperture. Here it’s not the quality that’s at fault, but image size and limited resolution. Mechanically, the Galileoscope is well crafted for a kit scope. While focusing is a “push – pull” arrangement, I found it easy to find good focus by twisting it slightly similar to using a helical focuser, while moving it in and out. The supplied 20mm eyepiece is also quite sufficient, with enough eye relief at 16mm to be comfortable and the included barlow lens is a lesson in itself!
All in all, the Galileoscope is a great experience. Through partnership programs like Galileo’s Classroom and Teaching With Telescopes, the educator can find a wealth of resources just waiting to be used. There’s even a Galileoscope Observing Guide! So where do you get the kits for your personal exploration or for your organization? At this point in time, the Galileoscope can be ordered through the Galileoscope Organization or through OPT as the Galileoscope Telescope Kit.
As for me, I can see future programs at the Observatory. On one side of the coin, I envision sharing how a telescope is made and what makes it work with children… On the other side I see an intimate group of adults, each working with their own Galileoscope and learning the principles behind the equipment they use in their hobby. After all, we weren’t born with this knowledge spurting out of our ears.
We gotta’ learn it some where.
My many thanks to Rick Fienberg of Galileoscope.org for patiently answering my questions and providing images and additional information for this article. When the original IYA project was in full swing, many Galileoscopes were donated to various classrooms around the world and it has been my pleasure to speak with some of those recipients over the months, ship them additional educational materials and watch their interest grow. When you have a moment, please check out Kodali AnilKumar:India: Astronomy Observation, where both students and teachers made great use of the Galileoscope!
The VLT Survey Telescope (VST) is the latest telescope to be added to ESO’s Paranal Observatory in the Atacama Desert of northern Chile. Credit: ESO/G. Lombardi
[/caption]We get this question the time. People want to get into astronomy, and they want to get their first telescope. So, to all you experienced astronomers reading Universe Today, what do you suggest people consider for their first starting telescope? We’ve heard lots of horror stories about bad quality department store telescopes, so where should people go? How much should they expect to spend? Who are some good telescope manufacturers? What should people avoid?
My first answer is always to suggest that people use a planisphere and their own eyes in the beginning, learning the constellations. Then graduating to binoculars if they’re still enjoying the hobby before even considering a telescope purchase. What’s your opinion?
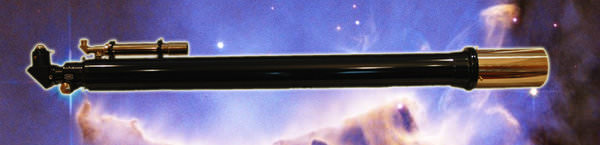
What you’re looking at isn’t a vintage telescope, but a modern day long focus refractor. Custom-built to exacting standards, this new twist on an old breed doesn’t make you one of the crowd… it makes you stand out in one.
Drive your car down the highway and how long does it take to spot a model that’s the same as yours? Get that new look in clothes and sure enough you’ll catch someone wearing the same shirt. When it comes to telescopes, walk through any star party and you’re sure to find a piece of equipment identical to what you own. Why not turn having a telescope into an ultra personal experience by choosing a one that’s totally unique? A Skylight Telescopes Custom Refractor can do that for you.
Hand-crafted and inspired directly by telescopes designed in the 19th Century, Skylight Custom Refractors show attention to detail and craftsmanship that are simply unsurpassed. They are the brainchild of Richard Day. “Being surrounded by interesting refractors made me a little jaded towards modern telescopes and the fairly obvious similarities found from brand to brand. I was particularly captivated by the beautiful refractors made by T. Cooke and Sons… not very well known in the USA, but revered in the UK and Europe.” says Day. “While stepping back and appreciating a particularly nice 3″/f15 example, I had a ‘why doesn’t anyone make anything like this anymore?’ moment, and so I decided that I would.”
From conception to finished product took Richard two years, but the end result quickly captivated the UK publication, Astronomy Now. “This telescope delivers a serious optical punch. Star testing under calm conditions at 187x showed nearly identical diffraction rings inside and outside focus. In focus, stars displayed a hard Airy disc with a pair of textbook perfect diffraction rings round them. I’m happy to report a cautious 1/8 wave for this optic. I could not detect coma, field curvature, astigmatism or distortion.” says Neil English. “The last quarter moon was mind-boggling. I had to charge the telescope with stupendously high powers (about 100x per inch) before any image breakdown manifested itself. At these excessive powers, image quality was still very good, with only mere traces of yellow and blue tinges visible around crater rims at areas of high contrast.”
With all of this comes a price – and Skylight Refractors don’t come cheap. But, there is a reason. Each one of these unique telescopes is custom built and quality optics are expensive. Only through mass production can a telescope company lower their prices and Richard isn’t a company… he’s an artisan. “Victorian design is now virtually lost in favour of mass produced, CNC machined white tubes, which I simply do not find terribly interesting.” says Day. “The Victorian design element is an exercise in elegance for me…many people have told me that my scopes are the most beautiful that they’ve ever seen, and this pleases me greatly.”
Originally a Vancouver native, Richard takes his telescope making seriously. Every telescope he designs is individually star tested from his London home, then signed and numbered before they are released. With the exception of the focuser and optics, it’s all handcrafted and when each limited number of a model is gone? It’s gone forever. Because of their exclusive nature, Skylight Refractors were never meant to be offered “wholesale” – but now a few of them are available around the world. Where can they be found? In Europe, it’s Skylight Telescopes. In Canada, it’s Vancouver Telescope Centre or Khan Scope Centre. In the United States, it’s from my home-zone, OPT.
When Skylight Refractors appeared at the 2011 NEAF gathering in Rockland, New York, it was all one could do to not want to take one home… permanently. Quite simply put, they are that beautiful and well-constructed. Lunar and planetary observing, double stars… You’re no longer just observing by rote, but practicing a time-honored craft. Just imagine yourself owning a telescope that matches the caliber of those used by the Cambridge Observatory, Coats Observatory, Carter Observatory or Yorkshire Philosophical Society. So enduring was this design that many are still in use today. Be assured that owning a classic telescope is like owning your own personal piece of history – one that will be around long after fancy has faded. I cannot thank Richard enough for allowing me to take a personal look at – and interest in – what he has to offer.
Why sail along the stars when you can sail with them?
Addendum: This review was intended to re-kindle the romantic and personal experience which observers feel for their equipment. Make no mistake – this is a high quality refractor which employs state-of-the-art components such as high quality Japanese glass objectives in a handmade collimateable countercell and a premium Baader Steeltrack focuser. Its design allows for high magnfication – above and beyond the call of duty, and the color correction is outstanding. This is not a “model” telescope, but a telescope modeled after a time-honored design. Its performance level – like all telescopes – relies on the eyepiece introduced. Use lesser quality and you’ll get diminuished performance. Use a premium occular and you’ll get the view you paid for! And its cost, by the way, is not only comparable to similar custom made refractors (such as Stellarvue), but even less in some instances.