Adventures With Starblinker

Image credit:

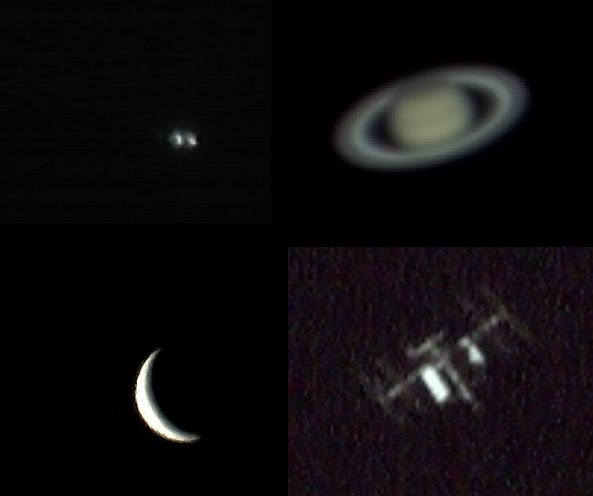
Observational astronomy is a study in patience. Since the introduction of the telescope over four centuries ago, steely-eyed observers have watched the skies for star-like or fuzzy points of light that appear to move. Astronomers of yore discovered asteroids, comets and even the occasional planet this way. Today, swiftly moving satellites have joined the fray. Still other ‘new stars’ turn out to be variables or novae.

Now, a new and exciting tool named Starblinker promises to place the prospect of discovery in the hands of the backyard observer.

Image credit:
Tombaugh’s mechanical ‘steampunk starblinker’ on display at the Lowell observatory. Image credit: Dave Dickinson

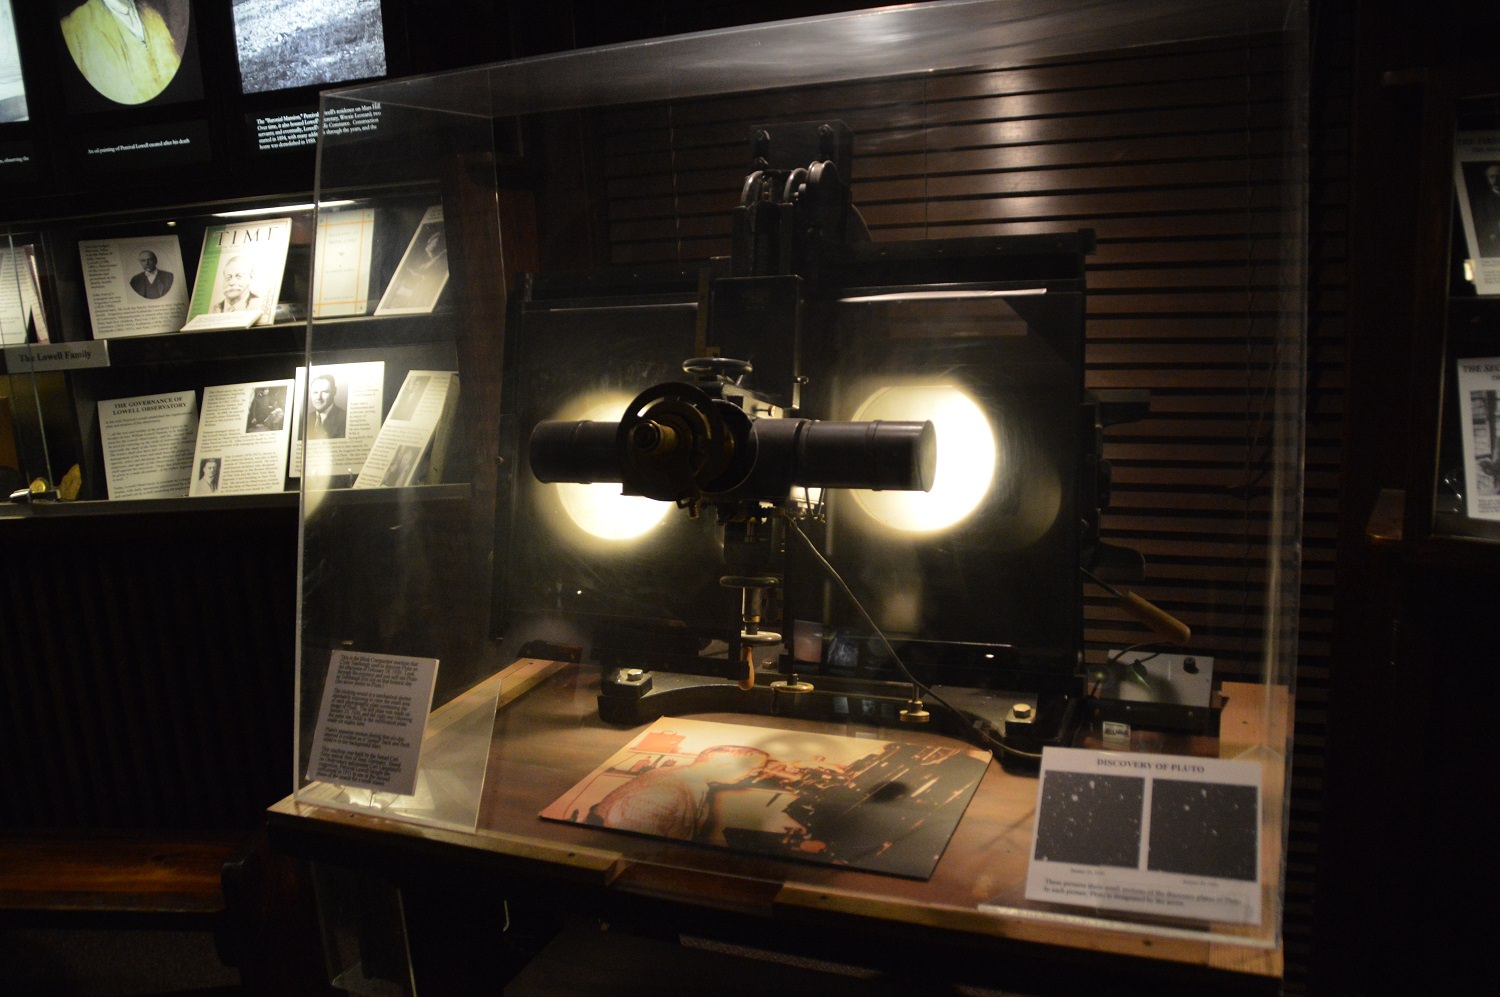
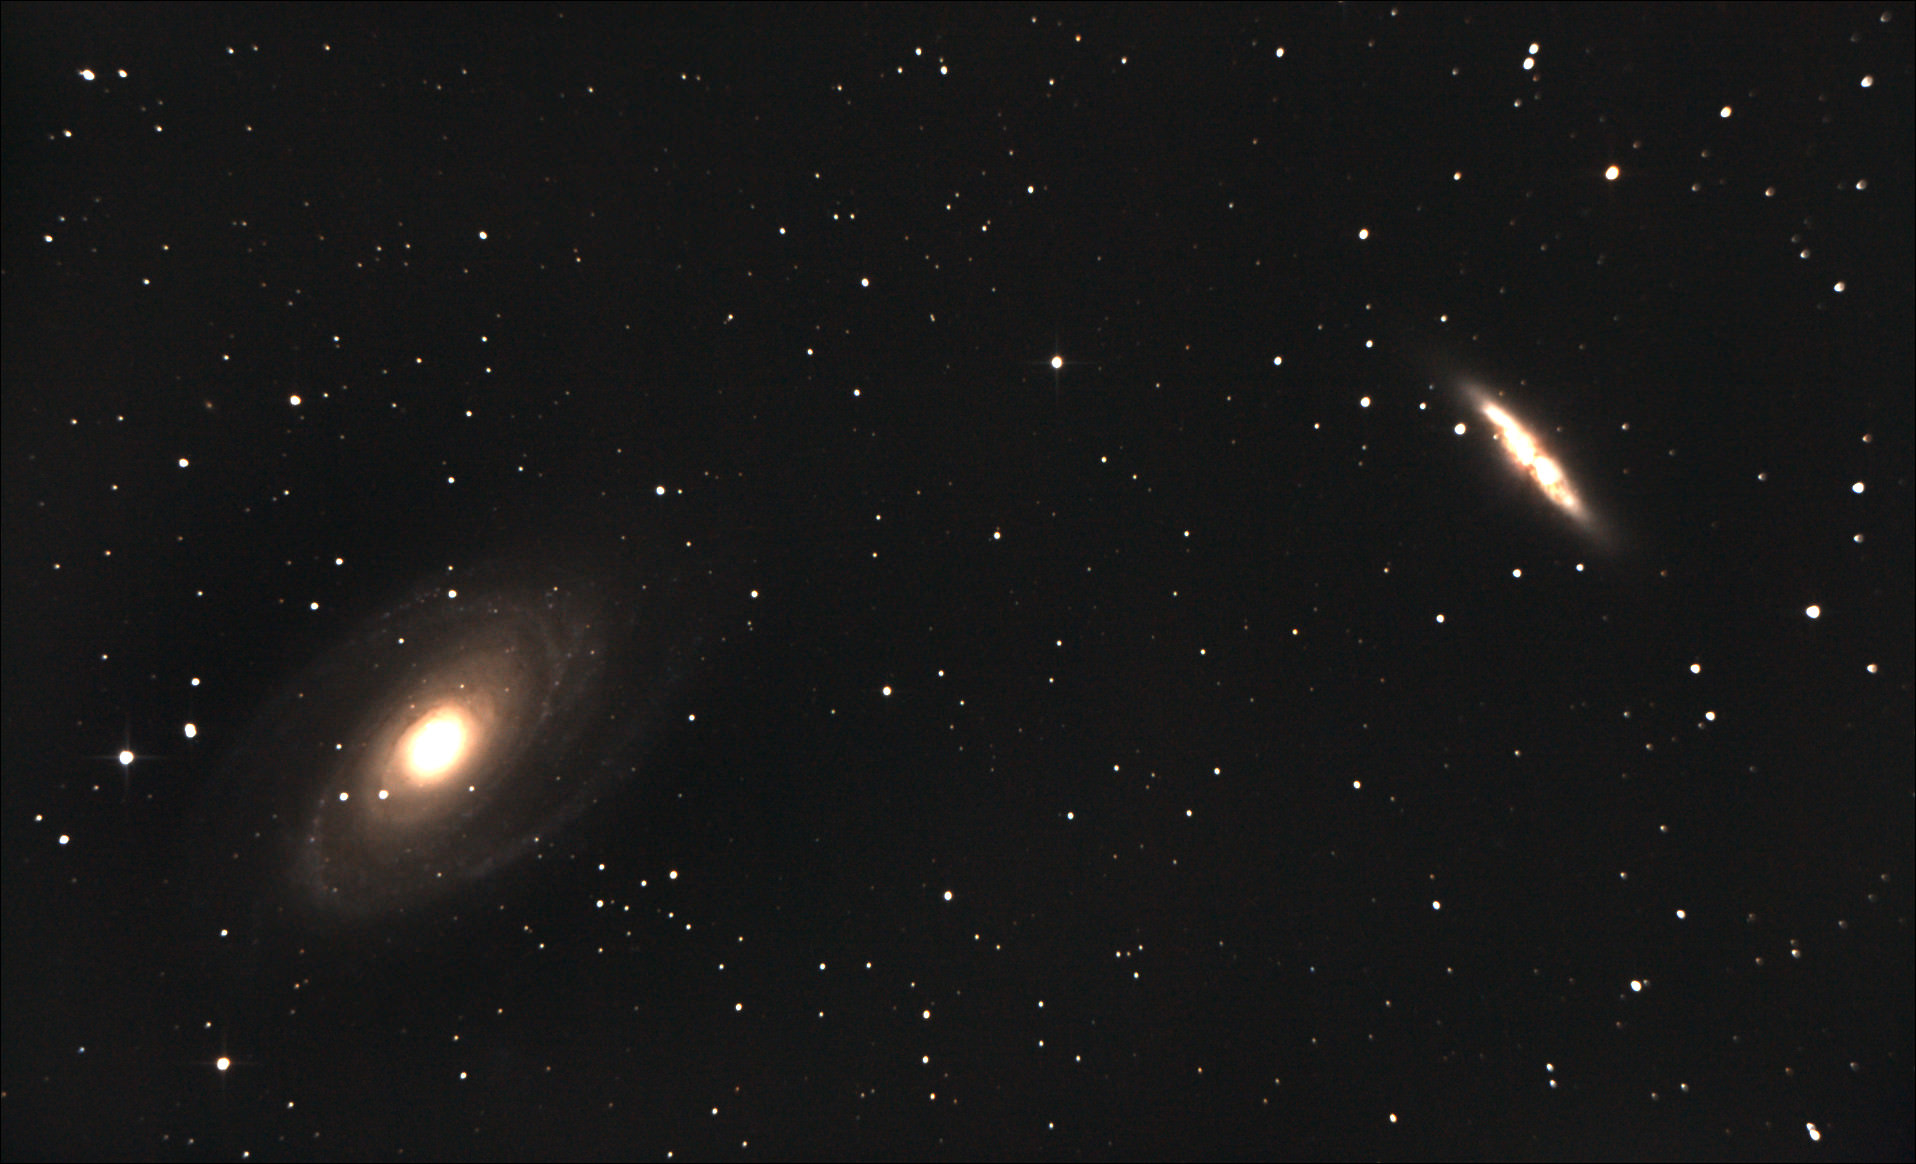
The advent of photography in the late 19th century upped the game… you’ll recall that Clyde Tombaugh used a blink comparator to discover Pluto from the Lowell Observatory in 1930. Clyde’s mechanical shutter device looked at glass plates in quick sequence. Starblinker takes this idea a step further, allowing astro-imagers to compare two images in rapid sequence in a similar ‘blink comparator’ fashion. You can even quickly compare an image against one online from, say, the SDSS catalog or Wikipedia or an old archival image. Starblinker even automatically orients and aligns the image for you. Heck, this would’ve been handy during a certain Virtual Star Party early last year hosted by Universe Today, making the tale of the ‘supernova in M82 that got away’ turn out very differently…

Often times, a great new program arises simply because astrophotographers find a need where no commercial offering exists. K3CCD Tools, Registax, Orbitron and Deep Sky Stacker are all great examples of DIY programs that filled a critical astronomy need which skilled users built themselves.

Image credit
M81 via Starblinker. Image credit: Marco Lorrai

“I started to code the software after the mid of last month,” Starblinker creator Marco Lorrai told Universe Today. “I knew there was a plugin for MaximDL to do this job, but nothing for people like me that make photos just with a DSLR… I own a 250mm telescope, and my images go easily down to magnitude +18 so it is not impossible to find something interesting…”

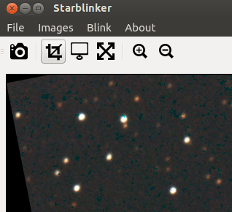
Starblinker is a free application, and features a simple interface. Advanced observers have designed other programs to sift through video and stacks of images in the past, but we have yet to see one with such a straight-forward user interface with an eye toward quick and simple  use in the field.

Image credit:
Starblinker screenshot.  Image credit: Marco Lorrai

“The idea came to me taking my astrophotos: many images are so rich with stars, why not analyze (them) to check if something has changed?” Lorrai said. “I started to do this check manually, but the task was very thorny, because of differences in scale and rotation between the two images. Also, the ‘blinking’ was done loading two alternating windows containing two different images… not the best! This task could be simplified if someone already has a large set of images for comparison with one old image (taken) with the same instrument… a better method is needed to do this check, and then I started to code Starblinker.”

Why Starblinker

I can see a few immediate applications for Starblinker: possible capture of comets, asteroids, and novae or extragalactic supernovae, to name a few. You can also note the variability of stars in subsequent images. Take images over the span of years, and you might even be able to tease out the proper motion of nearby fast movers such as 61 Cygni, Kapteyn’s or even Barnard’s Star, or the orbits of double stars.  Or how about capturing lunar impacts on the dark limb of the Moon? It may sound strange, but it has been done before… and hey, there’s a lunar eclipse coming right up on the night of September 27/28th. Just be careful to watch for cosmic ray hits, hot pixels, satellite and meteor photobombs, all of which can foil a true discovery.

Image credit:
The Dumbell Nebula (M27). Note the (possible) variable star (marked). Image credit: Marco Lorrai

“A nice feature to add could be the support for FITS images and I think it could be very nice that… the program could retrieve automatically a comparison image, to help amateurs that are just starting (DSLR imaging).” Lorrai said.

And here is our challenge to you, the skilled observing public. What can YOU do with Starblinker? Surprise us… as is often the case with any hot new tech, ya just never know what weird and wonderful things folks will do with it once it’s released in the wild. Hey, discover a comet, and you could be immortalized with a celestial namesake… we promise that any future ‘Comet Dickinson’ will not be an extinction level event, just a good show…

Image credit:
Not Starblinker… but it could be. Do you see the dwarf planet Makemake? Image credit: Mike Weasner/Cassiopeia observatory
Image credit: Mike Weasner/Cassiopeia observatory

Download Starblinker here.

Think you’ve discovered a comet? Nova? A new asteroid? Inbound alien invasion fleet? OK, that last one might be tweet worthy, otherwise, here’s a handy list of sites to get you started, with the checklist of protocols to report a discovery used by the pros:

How to Report New Variable Star Discoveries  to the American Association of Variable Star Observers (AAVSO)

-The Central Bureau of Astronomical Telegrams (they take emails, too!)

How to Report a Comet by veteran comet hunter David Levy

How to Report a Discovery via the International Astronomical Union

-And be sure to send in those Starblinker captures to Universe Today.

From Webcam to Planetcam: Planetary Imaging on the Cheap

Photo by Author

It’s a question we get often.

“What sort of gear did you use to capture that?” folks ask, imagining that I’m using a setup that required a second mortgage to pay for.

People are often surprised at the fact that I’m simply using a converted off-the-shelf webcam modified to fit into the eyepiece-holder of a telescope, along with freeware programs to control the camera, stack,and clean up images. And while there are multi-thousand dollar rigs available commercially that yield images that would have been the envy of professional observatories even a decade ago, you may just find that you have the gear lying around to start doing planetary and lunar photography tonight.

OK, I’ll admit: you do need a laptop and telescope, (things that we typically have “laying around” our house!) but these are the two priciest items on the list to get started. Living the vagabond life of a veteran, a teacher, and a freelance science writer assures that our preferred cameras for conversion are always in the double-digit dollar range.

Converted "Planetcam" installed on the 'scope.
Our first converted “Planetcam” installed on the ‘scope.

But converted webcam imaging is not new. We first read about the underground movement over a decade ago. Back in the day, amateur astrophotographers were hacking their Phillips Vesta and ToUcam Pro webcams with stunning results. Celestron, Meade and Orion later caught up to the times and released their own commercial versions for planetary imaging some years later.

A few freeware installations and the modification of a Logitech 3000 that I bought on rebate for 50$ later, and I was soon imaging planets that same night.

Photo by author
Modified webcams, old (right) and new (left).

Just about any webcam will yield decent results, though the discontinued Phillips ToUcam Pro webcams are still the heavily sought after Holy Grail of webcam astrophotography. The modification simply consists of removing the camera lens (don’t do this with any camera that you don’t want to gut and void the warranty) and attaching a standard 1 ¼” eyepiece barrel in its place using cement glue.

For camera control, I use a program called K3CCDTools. This was freeware once upon a time, now the program costs $50 to install. I still find it well worth using, though I’ve been turned on to some equally useful programs out there that are still free. (more on that in a bit).

K3CCDTools will process your images from start to finish, but I find that Registax is great for post-image processing. Plus, you don’t want to waste valuable scope time processing images: I do the maximum number of video captures in the field, and then tinker with them later on cloudy nights.

Screen cap
A screen capture of K3CCD tools during a daytime alignment test. Note the focusing dialog (FFT) box to the right.

Stacking video captures enables you to “grab” those brief moments of fine atmospheric seeing. Many astrophotographers will manually select the best frames from thousands one by one, but I’ll have to admit we’re often impatient and find the selection algorithm on Registax does an acceptable job of selecting the top 10% of images in a flash.

And like Photoshop, a college course could be taught around Registax. Don’t be intimidated, but do feel free to experiment! After stacking and optimizing, we find the true power in making the images “pop” often lies in the final step, known as wavelet processing.  A round of sharpening and  contrast boosting in Photoshop can also go a long way, just remember that the goal is to apply the minimum to get the job done, rather than looking unnatural and over-processed.

Photos by author
A photo mosaic of the historic Mars opposition of 2003.

At the eyepiece, the first target hurdle is object acquisition. A standard webcam can go after bright targets such as the Moon, the Sun (with the proper filter) planets, and bright double stars. We’ve even nabbed the International Space Station with our rig using a low-tech but effective tracking method. Your field of view, however, will typically be very narrow; my webcam coupled to a Celestron C8” Schmidt-Cassegrain typically yields a field of view about 10’ on a side. You’ll want to center the object in the eyepiece at the highest power possible, then plop the camera in place.

The next battle is centering and focusing the object on the screen. An out-of-focus planet scatters light: tweaking the focus back and forth sometimes reveals the silvery “doughnut” of the planet lurking just out of view.

From there, you’ll want the object in as razor sharp a focus as possible. K3CCDTools has a great feature for this known as a Fine Focusing Tool (FFT). Some observers also using focusing masks, which can also be easily built — remember, were being cheapskates! — out of cardboard. Be sure those reflector mirrors are properly collimated as well.

Photos by author
Objects shot over the years (clockwise from the upper left): the close double star Porrima, Saturn, the International Space Station, and Venus.

Don’t be surprised if the planet initially looks over-saturated. You’ll want to access the manual controls of via the camera software to take the brightness, contrast and color saturation down to acceptable levels. I typically shoot at about 15 frames a second. Fun Fact: the “shutter speed” of the dark adapted “Mark 1 human eyeball” is generally quoted around 1/20th of a second, slower than you’d think!

Note: all those thousands of frames of video go somewhere… be sure to occasionally clean them off your hard-drive, as it will swiftly fill up!

When you image makes a big difference as well. The best time to shoot an object is when it transits the local north-south meridian and is at its highest point above the horizon. The reason for this is that you’re looking through the thinnest possible cross-section of the often turbulent atmosphere.

Universe Today reader Scott Chapman of Montpelier, Virginia also recently shared with us his exploits in planetary webcam imaging and his technique:

Credit-Scott Chapman
A webcam image of the Mare Crisium region on the Moon. Credit-Scott Chapman

“Recently, while looking for an affordable basic telescope, to see if I really had any interest in astronomy, searches and reviews led me to purchase a 70mm refractor. The last thing on my mind was that I could expect to take any pictures of what I might see.

Previously, I had assumed that the only way to take even basic pictures of sky objects was with equipment that was way out of my price range. Imagine my surprise to learn that I could use a simple webcam that I already had sitting around!”

Like many of us mere mortal budget astrophotographers, Scott’s goal was great images at low cost. He also shared with us the programs he uses;

SharpCap2: For capturing .avi video files from the webcam connected to the telescope.

VirtualDub: For shortening the .avi video.

PIPP: For optimization of stacked images.

AutoStakkert2: Selects and stacks the best frames into a single .tiff file using a simple 3-step process. Scott notes that its “MUCH easier for a beginner to use than Registax!”

-Registax6: The latest version of the software mentioned above.

JPEGView: For final cropping and file conversion. (I sometimes also use ye ole Paint for this).

Even after a decade of planetary imaging, some of these were new to us as well, a testament to just how far the technique has continued to evolve. Astrophotography and astronomy are lifelong pursuits, and we continue to learn new things every day.

The current camera I’m shooting with is a Logitech c270 that I call my “Wal-Mart 20$ Blue Light Special.” (Yes, I know that’s Kmart!) Lots of discussion forums exist out there as well, including the QuickCam and Unconventional Imaging Astronomy Group (QCUIAG) on Yahoo!

Some observers have even taken to gutting and modifying their webcams entirely, adding in cooling fans, more sensitive chips, longer exposure times and more.

All great topics for a future post. Let us know of your trials and triumphs in webcam planetary photography!

-Watch Dave Dickinson pit his 20$ webcam against multi-thousand dollar rigs weekly in the Virtual Star Party.

-Be sure to send those webcam pics in to Universe Today!