Pentax Eyepieces – Observatory Quality

Back awhile ago I did a review on plossl eyepieces. In that article I was trying to reach for the average individual looking for a high quality eyepiece on a limited budget. This time I asked for an example of observatory quality eyepieces that I know some of our readers own and enjoy. Is there a difference between how a very expensive eyepiece behaves in average equipment as opposed to an average eyepiece? Is there a difference in how it behaves in observatory class equipment? Step inside and let’s take a look…

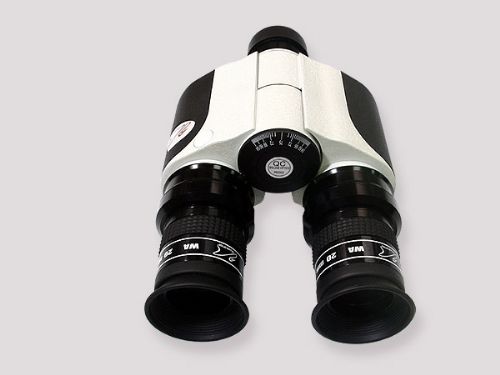
The reputation of certain eyepieces sometimes precedes itself and the case is certainly true when it comes to Pentax Eyepieces. Known widely for delivering superb color correction and outstanding contrast, I was very anxious for these beauties to arrive and put them to the test. In this case, I have asked for the Pentax XW series, which would put it in the Erfle category – alongside such popular brands as the Nagler, the Panoptic, the Ultima LX and the QX series. In dollar amounts, the Pentax figures roughly in the same category as the first two aforementioned products, and roughly three times more expensive than the last two. But is the performance worth the price?

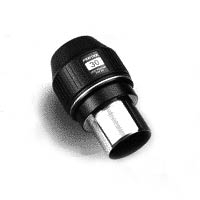
High dispersion, low refraction lanthanum glass… These are great words, but nothing can match the precision machined quality of the outward appearance of a Pentax eyepiece. Absolutely nothing in its construction appears to be left to chance and I very much approved not only of how the body of the eyepieces appears to be “sealed”, but the fact that they have very positive grip surfaces and little safety grooves cut right into the barrel so they can’t accidentally fall out of the focuser. I can also see from examination that the insides are blackened to reduce internal reflections and that the eyepieces are fully threaded for filters… But how do they perform?

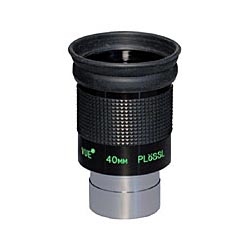
The last of the three eyepieces I asked to test was the Pentax 40mm XW 2″ Eyepiece. If you are looking for a true observatory quality eyepiece, look no further. Combined with aperture, the 40mm delivers a wide, true field that only marginally suffers from vignetting around the edges with fast focal ratio telescopes and virtually disappears as the focal length increases. Once again, we are talking about an eyepiece that was made to perform with eye sight limitations and with just a few minor adjustments, a total pinpoint panorama of stars can be yours. While I’ve used a lot of Erfle design eyepieces, this is perhaps the first low power, wide field Erfle that I’ve used that didn’t require me to hold my head just right to take in the view. With or without glasses…

My next step was to take this eyepiece arrangement and put them to the test in a true observatory telescope – a 31″ f/7. Eyepiece after eyepiece… Outstanding performance, perfect color correction and incredible eye relief. Is seeing believing? Yes and no. In my mind to deem something “observatory quality”, it has to measure up to the bar that I set for it – and that means the durability of use that an observatory eyepiece will go through in years of service. While I can field test an eyepiece for performance qualities, what I can’t tell you is what will happen to it ten years down the road. So… I investigated.

There’s a good reason why I admired the construction of the Pentax eyepieces when I first examined them – they are weather-proof. While you would not want to drop them in a bucket of water, these eyepieces are all rated JIS Class 4. Just what does that mean? It means that dust and particles sized 1.0mm in diameter or more cannot infiltrate. It means water splashed against the enclosure from any direction shall have no harmful effects. It means that by Pentax standards they actually sprayed these eyepieces down with a stream of water for 10 minutes and nothing reached the internal lenses. It means Pentax guarantees these eyepieces for life.

In the long run, Pentax eyepieces are an investment – a worthy investment in observatory quality.

The Pentax Eyepieces provided for this review were supplied by Oceanside Photo and Telescope.

William Optics Binoviewers – A Class Act

I like using binoculars… and I like using a telescope. So what happens when you combine both? For savvy telescope users, the result is called a binoviewer – but using one can sometimes introduce problems. Dark images, fast focal ratio telescopes, problems with focusing and outright expense… But can these problems be overcome in a binoviewer that’s easy to afford, works with all telescopes, doesn’t cost an arm and a leg and is high quality? The answer is yes…

Say hello to the William Optics Binoviewer.

At first I really wasn’t very interested in working with a binoviewer because the 3D effect definitely throws my mind a curve when studying at the telescope. Oh, yes. I had all kinds of excuses. More difficulty focusing with one eye than another, my favorite scope has a fast focal ratio, I use reflectors… You name it. But William Optics changed my mind.

When I opened the well-made little carton with it’s pretty embossed logo, I was stunned at the craftsmanship. Pictures do not do it justice. The William Optics Binoviewers are very precision in appearance with sterile white powder coat paint, heavy – but not too heavy, big, easy-to-grip thumbscrews and brass compression ring fittings for the eyepieces. Instead of needing to purchase two additional eyepieces, it comes already equipped with twin William Optics Wide Angle (66º) 20mm occulars. Just to state a case in point here, I know for a fact these two eyepieces alone are worth more than half of what the binoviewers cost! But, back to the task in hand…

The William Optics Binoviewers spread easily to accommodate interpupillary distance and each eyepiece holder has its own separate helical focuser. What’s more – and this is a feature that sets them apart – they come already equipped with a 1.6X barlow nosepiece. What’s inside? According to the manufacturer specs, we’re talking about a true BaK4 prism with a genuine 20.2mm of clear aperture. So what does terms like that mean to just the average Joe? It means we aren’t talking about a pair of binoviewers that are going to lay around in your eyepiece case because they deliver cruddy images… We’re talking about a class act.

I’m not exactly sure what makes the William Optics Binoviewers work so well, maybe it’s the 4″ optical path, but whatever it is, they are unlike any inexpensive binoviewers I’ve ever used. Combine it with a h-alpha solar telescope and once you’re in tune you’ll get an image that will blow your mind. Put it in a refractor telescope and go for Jupiter… the effect of sheer dimensionality and being able to tell distance in the galiean moons will make you a planetary observer. Use it in your workhorse reflector and study the Moon. You’ll feel like you’re there, dude. Drop the binoviewer into a big dob and check out something familiar – like the M27. Holy guacamole… It looks like something you’d see in an IMAX theatre! Put it in a little rich field telescope and look at a star cluster… You can see the light years between the stars. Put it in an observatory telescope and look at a galaxy?

And you’ll become a believer.

How do I feel about the William Optics Binoviewer now? While it may never surpass the Denkmeier or Bino Vue in some folks opinion, it’s not going to take part of your life savings to afford and you won’t regret the purchase. As far as compatibility goes, it worked with every telescope I happen to own and provided sharp clarity, bright images and an absolutely stunning three-dimensional effect on every object I chose. For $199 you get the complete package and no surprises. You won’t need to buy eyepieces, adapters or a special nosepiece – it works with any 1.25″ focuser and probably any telescope you choose to put it in. Small wonder I’ve never heard anyone say anything bad about William Optics Binoviewers…

They’re a real class act.

We would like to thank Oceanside Photo and Telescope for providing the William Optics Binoviewers for this product review. If you’re interested in purchasing a pair of William Optics Binoviewers from OPT, please remember to put “Universe Today Astronomers” in the club affiliation box when you check out to receive your special UT discount on your final bill!

The Meade ETX80 Backpack Observatory – In A Heartbeat…

It’s time you and I sat down and had us a long and quiet talk about the Meade Backpack Observatory. Astronomer to astronomer, you know? Over the years I’ve had my fair share of problems with Meade products and I didn’t want to be accused of “Meade bashing”, so I displayed the patience of a saint with this product. Despite some initial disappointments and frustrations, I was soon to learn a few very valuable lessons…

Don’t believe absolutely everything you read and if you can’t figure it out, read the instructions.

As always, I like to begin with using any piece of equipment with “intuitive set-up”. (For those of you who aren’t familiar with all the ins and outs of the English language, intuitive set-up stands for too proud and sure of yourself to read the included instruction manual.) When I opened the box, I was delighted with the Meade ETX80 Backpack Observatory. Nice, rip-stop nylon, self-healing zippers, and every little place in the backpack has a compartment to store every component that comes with the unit. The ETX80 is self-contained, lightweight and looks ready to go. I packed everything up, (including the instruction manual) and headed out to a friend’s observatory for its first light and made my initial mistake.

I didn’t leave before dark and I really should have read the instruction manual or watched the video.

While I have played with a great many GoTo telescopes over the years, and the Meade ETX80 Backpack Observatory is very similar to most, it does operate slightly differently. Just how much of the set-up doesn’t require instructions? Well, most of it actually. The little lightweight tripod is a real triumph in engineering design. Instead of screws that will strip out, this is a three-part telescoping design that “buckles” together, the center twists and slides down for a positive spread and lock and it has a built-in level. The last is a great feature I didn’t catch just because of my own stupidity.

The battery compartment on the ETX80 is built right into the base. It’s hard to find in the dark while fumbling with a flashlight and even harder to open if your fingers are a bit on the older side… But I gotta’ hand it to Meade on this one – it doesn’t eat batteries like other models I’ve used. The AutoStar hand controller plugs into a port on the side just like a phone jack, there’s an off/on switch and an additional port. Sweet… This is the entire mount! Even in the dark and uninformed, this one is easy to connect to the tripod. All you do is partially thread two thumbscrews into the base, set them into the tripod top into the holes, give a twist until it locks home and tighten the screws.

Even a blond can do this.

Next stop? Alignment. Thanks to a provided compass that fits right into the eyepiece holder, we level off the tube, point it north and we’re good to go. In my own arrogance, I soon found out that AutoStar isn’t quite like other hand controllers, but it is similar enough that I did figure it out. Off and running? Evenutally, yes. And right to Arcturus. But it wasn’t in the eyepiece… It wasn’t even close. Guess what? No finderscope. OK. How hard can it be? It is Arcturus, after all. I slew this way. I slew that way. My back hurt. My eyes bugged out. And yes. I should have read the instructions. I chose another star and the same thing happened. After an hour or two of being photon-deprived, I simply gave up and used my friend’s dob. We had a good laugh over how any company would make a telescope with no finder and I let it go for the night.

But I didn’t give up.

Now, if you’ll permit an old StarGeezer to ramble a bit? At that point I would have cheerfully thrown it back in the box and let it go, but the Meade Backpack Observatory was donated to me for a reason. Each year I serve thousands upon thousand of people in public astronomy outreach. While I’m at the Observatory, my own physical limitations don’t present any problems, but when called upon to visit at other locations I have difficulties at times. Thus, the Meade Backpack Observatory came into my hands. Sometimes others know things about products that I don’t know, so I was determined to swallow my pride, take out my Tammy-determination and try again.

Once away from my peers, I read the instruction manual and watched the video. You know what? I was doing a few things wrong. The Meade Backpack Observatory is 100% wheelchair friendly. By starting before dark I was able to put the tripod at a comfortable height and use the built-in level to get it right. Then it was a matter of attaching the scope and AutoStar controller, putting the compass in the eyepiece and readying the home position to wait on dark. While waiting, I attached the diagonal and high power eyepiece to the rear of the telescope and located the flip mirror switch that would allow me to either use the low power eyepiece or high power at whim. Now I knew… When it went to star align, all I had to do was punch a button and it would run a spiral search pattern and all I had to do was stop it when my star popped up and center it to align.

StarGazers Using Tammy's Little Scope

From that point on, the Meade ETX80 Backpack Observatory has became my constant companion when called upon to do astronomy outreach programs away from the observatory. I don’t care too much for GoTo telescopes, but I do like having one that tracks the objects when I have 150 people waiting in line to see Jupiter. I like having a telescope that’s self-contained in one very easy to transport unit and one that easy on batteries. We’ve served thousands of kids and adults. My eyepiece smells like ‘smores and the universe has sparkled in the eyes of young and old alike.

So what’s the word? The Meade ETX80 has sparkling optics and the included eyepieces are high quality. Don’t believe everything you read about AutoStar. While it is a fine system, it isn’t as accurate as they would like you to believe – no matter how carefully you align and level things. While the spiraling search is fine and dandy, Meade really should have included some sort of finderscope – even if it was just a cheap reflex finder. The battery life is awesome, the tripod is a little miracle and the backpack is worth its weight in gold.

What’s my recommendation? Sigh… The Meade ETX80 Backpack Observatory isn’t for beginners. If you didn’t have a clue as to what an object looked like when the scope begins its spiraling search pattern, you would miss it… Plain and simple. Even though the true aperture is slightly more than 80mm, it just isn’t enough for someone who isn’t familiar with the sky to easily pick out fainter star clusters and deep sky objects with ease. The same holds true of the alignment stars. It’s one thing for me to know what Altair looks like in the eyepiece – but do you? I might know M29 from a random pattern of stars in Cygnus, but will the average consumer? I recognize M57 at 35X in a small scope, but can everyone? Once it’s in the eyepiece and centered, I can easily tell someone to avert and look for a little glowing patch, or a group of stars that looks like a tiny dipper… but if you didn’t know? I think you get the drift.

If you’re looking for a very fine little GoTo telescope that’s capable of traveling and you’ve got some experience, then look no further. The Meade ETX80 Backpack Observatory is an asset for folks with disabilities, for those who frequently need to travel to remote locations to give outreach presentations, or for those who have experience and are looking for a scope to take camping or hiking. Would I recommend it?

In a heartbeat…

The Meade BackPack Observatory was donated by Meade Corporation and product photographs and purchase information provided for this review by Oceanside Photo and Telescope.

Celestron Sky Maps and Star Finder – Start Out Right

I’m often asked about what I’d recommend as a very basic book for beginner’s to help them learn their way around the constellations and how to put their binoculars or small telescopes to good use. Needless to say, there’s an endless array of books for the beginning stargazer and no one particular volume is going to excel by a wide margin over another. However, I after taking a look around, I started asking questions at what could be had for about $20 and what I think would work well for the novice as a complete package. This time my choice was well-bound and colorful volume called “Celestron Sky Maps and Luminous Star Finder.” Here’s why…

Over the years it has been my distinct pleasure to own a great many books geared towards the first time astronomer. My bookshelves are graced with timeless classics like “Turn Left At Orion”, “SkyWatching” and “365 Starry Nights”. Heck, those of you that know me also know I write astronomy books, so it makes it even harder to find and recommend a particular volume! While my own stellar navigation abilities have progressed tremendously over my lifetime and my own books are geared towards all readers, I’ve never forgotten what it was like to be totally new at the game and just how confusing and big a dark, starry sky can look. Long before I ever graduated to using a telescope, I’d stand outside with those clever monthly star charts that come in the astronomy periodicals and a flashlight – just trying to make sense of it all. What I didn’t know at the time was that I was blinding myself by using a flashlight and I was having an even more difficult time coming to grips trying to compare the chart to the sky. Of course, I learned – and so can you – but there’s no reason for the process to be painful or confusing.

Enter the Celestron Sky Maps and Luminous Star Finder…

Ordinarily my first recommendation to anyone who doesn’t know the night sky is a planisphere. Again, there’s a whole range of planispheres available and every last one of them does exactly the same thing. For those of you not familiar with the term, a planisphere is a very basic star map arranged on a calibrated wheel. Turn the wheel and match the calibrations to the correct date and time and what you see in the “window” is what the skies look like for either the northern or southern hemisphere (depending on the edition). The planisphere is so basic that I actually print off plans and make planispheres with guests at the Observatory to take home – but my “freebies” are flimsy – accurate, but not lasting. In the case of the Celestron Sky Maps and Luminous Star Finder, the planisphere is part of the book itself. Again, it is very basic – but it’s also very durable and has a nice twist… It glows in the dark! Before heading out to use it, leave the planisphere under a lamp or in a bright light source, but protect your own eyes so you’ll dark adapt more quickly. I found the ideal arrangement (for me) was to put it in a room with doors I could shut and a bright overhead light which I could turn off with my eyes closed. Once “charged”, the glow-in-the-dark planisphere is ready to tackle the night.

Without the distraction of using a flashlight (either white or red) the luminous star finder was really a ingenious addition. While the constellation imprints (when held at arm’s length) aren’t to the same scale as the sky, the pleasing glow made it very easy for me to hold up the book and reference the stars at the same time. Because it’s user friendly, total beginners to the night sky should be able to quickly match the stellar patterns with this clever aid. Again, there’s lots of planispheres out there – and even ones that glow – but there’s more to the total package.

The Celestron Sky Maps and Planisphere book is a bit more, for it also contains an Illustrated Star Map Atlas and Deep-sky Objects Reference Guide. Yes, it’s very basic… And yes, the listings of the deep sky objects and coordinates are a bit dated – but there’s a reason this book has sold over 2 million copies – it’s very easy to use. Throughout the seasonal listings, you’ll find over 1,000 objects to explore with binoculars and small telescopes and the illustrated reference section provides basic information about various types of stars, nebulae and galaxies. They aren’t Hubble photographs, just very ordinary film photos which closely resemble the view in a larger telescope. To me, this is an awesome feature for a beginner. I remember all too well the first time I found the Andromeda Galaxy and how I wished someone would have told me that it looked like a little glowing cloud! It’s one thing to see a spectacular color image of a deep space object and it’s another to see it through binoculars or a small telescope for the first time. Someone needs to show you what to expect and Celestron has done an admirable job.

So what’s inside? The star charts are arranged by season with two charts – divided north and south – to use. Rather than be crammed full of things you can’t see, it’s parsed down to what you need, white pages with black stellar images, magnitude listings, proper symbols for deep sky objects and inset boxes to give you more detailed information on objects in the area, including star names. Here you’ll find your way towards double stars, bright nebula, interesting clusters and achievable galaxies. Looking for a planet? Celestron has thought of that, too. There’s even a table to help you locate the planets through the year 2016. All of this is very easy to read in the dark with a red flashlight and very easy to understand and put to use.

Is it a big book? Yep. At 11″ X 13″ this is what’s considered a “coffee table” size – but what it isn’t is a thick book. It only has 21 pages including the charts and reference material, but those 21 pages are also extremely well done. Unlike most of the beginner’s star gazing books, the Celestron Illustrated Star Map Atlas and Deep-sky Objects Reference Guide was meant to be taken outdoors and used. The pages are heavy card-stock, durable and moisture proof. This means you can lay it down while using it to explore a certain region of space with a specific chart and the wind won’t take your place away! You can lay it on the damp grass and the pages won’t curl or the ink smear. It’s a durable and lasting volume – all the way around.

Is it the perfect book for beginners? I can’t tell you that. Maybe one person will learn better from planetarium software – while another might benefit more quickly from the new electronic sky navigators. What I can tell you is the book is absolutely worth the $20 asking price. Chances are if you enjoy it and use it – you’ll outgrow it in a year or two… But then, that’s a good thing, isn’t it? What you’ll learn using Celestron Sky Maps and Luminous Star Finder will prepare you to use a more detailed star atlas and even more dedicated star charts. Even if you never outgrow it, there’s a thousand things both in there and out there…

Just waiting on you to find them.

At request, the Celestron Sky Maps and Luminous Star Finder Book was provided for this review by Oceanside Photo and Telescope. My many thanks to Chris Hendren for his assistance. Please remember that should you decide to order from OPT to put “Universe Today Astronomers” in the club afflilation of your order to receive your UT rewards discount on your final bill!

The TeleVue Plossl – Unsung Eyepiece Hero

If you’re into telescopy, then you know the name Televue needs little or no introduction at all. The name is absolutely synonymous with the most outstanding quality and high performance optics in the business and every product is backed by uncompromising standards. Of course, if you’re like me, the moment I see the name Televue little dollar signs start swimming around in front of my eyes. Would you like me to shoo them away for you?

I’ve been playing the astronomy game for a long time now and I know when it comes to optics that you get what you pay for. But, one of my favorite things to do is to find products that give you more than what you expect. Go anywhere. Look any place. Check out plossl eyepieces. The four element Plossl design is perhaps the most popular telescope eyepiece design on today’s market and just about every manufacturer makes one. It provides excellent image quality, good eye relief and just about all of them have an apparent field of view of about 50 degrees. But is one plossl really better than another?

The answer is yes. And here’s why…

The names TeleVue and Al Nagler are synonymous among the international astronomy community with revolutionary telescope and eyepiece designs in production since 1977. Beginning his career with amateur astronomy and telescope making, Mr. Nagler enjoyed an illustrious career in optics and eventually became involved in the design of the NASA Apollo program astronaut lunar landing visual simulator by designing a probe which simulated a field of up to 140 degrees! Establishing TeleVue Optics Incorporated in 1977, Uncle Al’s mind eventually turned to a field which hadn’t progressed in nearly a century – telescope eyepiece designs – and thus was born a legend. Says Mr. Nagler in his Company 7 interview: “I have worked on eyepieces, telescopes and viewing devices with two major goals: to make astronomy as easy and versatile as possible to encourage, rather than discourage, newcomers, and secondly, to provide a visual experience as close to a “space walk” as possible by obtaining the widest, sharpest, highest contrast views. I am deeply gratified that my work has enhanced the pleasure and growth of the hobby.”

Televue demands a certain standard that can and will be met – and nothing says it more clearly than their very affordable line of Televue Plossl Eyepieces. At right around $100 per eyepiece, this is not only competitive with other manufacturers – it’s meeting their price point and delivering far better performance. In a side by side comparison with a 2″ Meade 26mm QX Wide Angle Eyepiece which supposedly offers a 70 degree field of view, the 1.25″ Televue 25mm Plossl absolutely buried it. Why? By all design rights, the QX should have outperformed it – yet it did not. Telescope after telescope, focal length after focal length… The results were the same. The Televue Plossl consistently gave outstandingly better edge of eyepiece performance, far more contrast and sharper images.

Now for a 1.25″ Celestron 12mm Omni Plossl compared to a 1.25″ Televue 11mm Plossl. Again, we have near dead-ringers in design, magnification, field of view and eye relief – but not performance. Putting in the Televue Plossl was like the different between day and night. Contrast improved significantly and image sharpness doubled. When Jupiter would near the edge of the eyepiece field, it didn’t distort! Telescope after telescope… Focal length after focal length… Same results.

Did I spend several evenings switching out eyepieces? Yes. Refractor, reflector and SCT… I went through a very serious collection of eyepieces that ranged from Antares to William Optics and I am very impressed with what these very affordable plossl eyepieces can do. Before anyone even considers buying a plossl eyepiece from another manufacturer, stop and think Televue. Their prices are exactly the same and I guarantee you the performance is far superior. Now… There’s only one eyepiece left to try, and that test belongs to my much beloved Meade 12.5″ study grade reflector.

Let’s dance.

The 2″ Televue 55mm Plossl is a serious chunk of glass. But when you look through this one, you’ll be blown away. The eye relief is simply outstanding! Can you imagine seeing entire vistas like the Lagoon and Trifid Nebulae together? Can you picture the Sagittarius Star Cloud spraying out across the night? Holy cow… Have you ever seen all the stuff that’s really around the Ring Nebula? Have you spotted the little galaxy that’s near the M13 at the same time? You can’t image what the Dumbbell really looks like until you’ve captured it with the whole field around it…

Is it the same spacewalk effect produced by Nagler’s other famous eyepieces? Yes. But to a lesser degree. I have seen through even wider field Televue eyepieces and I can tell you that my eye can never take it all in. To me, the plossl is perfect. Here I see such a large, true field that I wish I had this around when it was galaxy season! Yes, I’m babbling. Every one that has a light bucket telescope should own one of these! What all this distills down to is this particular eyepiece is just slightly over $200 (US), ships anywhere in the world and comes with a 5-year Televue warranty and it’s not going back.

It’s a keeper.

The Televue Plossl Eyepieces for this product review were provided by Oceanside Photo and Telescope. We thank them for their generous loan and the check for the 55mm is in the mail. If Universe Today readers should choose to order from OPT, please type in “Universe Today Astronomers” into the Club Affiliation section of your order to receive your rewards discount!

Big Things Come In Small Packages – The Celestron C65 Mini-Mak

Have you been wanting to get your hands on a telescope that’s easy to use, very portable and best of all only costs $55? Don’t you dare go to a department store and pick up a “toy”. I’m here to tell you when you decide to play with a Celestron C65 Mini-Mak, you’ll soon find out that big things really do come in small packages.

So what’s a little telescope like you doing in a dark place like this? I can tell you what you’re doing. You’ve come to let me put you through your paces, use and abuse you, and find fault where I can. You look awfully small in that box. Not much larger than a good sized binocular tube. After all, you are a spotting scope, aren’t you? So, come on… Let me relieve you of that wrapping and show me what you can do.

The Celestron C65 Mini-Mak is a tiny little creature – about the size of a wine bottle minus the neck. However, the moment you lay eyes on it, quality screams right out. Raven black finished perfection, pristine Celestron optics and deep, quality coatings. The eyepiece is angled off the back at 45° so the viewing is user friendly and the zoom eyepiece shows three magnification levels – 30X, 60X and 90X. A little (ahem) testing shows it can be t-thread camera compatible, as well. With it comes a clever little tabletop tripod. Surprisingly enough, it’s a steady affair, with rubber tipped feet and even slow motion controls. The optical tube itself could easily be mounted on a larger camera tripod, too… But we’re thinking economy here. Digging further into the box, I was also delighted to discover it comes with its own soft carrying case, too. Very nice. Not much larger than the average lunch kit, this would easily be considered airline carry-on.

Set up was a breeze. Park it on my patio table and I’m off and running. But there is a slight problem. There’s absolutely no way of aiming it. Sure, I can poke and hope with the best of ’em at 30X… But guess work isn’t exactly relaxing. Back to the box we go and out comes a Celestron StarPointer Finderscope. Now we’ve upped the ante from $55 to $80 and less than $100 plus shipping. Still… that’s not a bad price… If it performs.

Make no mistake. The Celestron C65 Mini-Mak is a high quality, image correct 65mm aperture Maksuktov Cassegrain telescope with a 835mm focal length and f/12.85 focal ratio. Just like its “big brothers”, the astronomical telescopes, this Celestron Mak uses high quality optical glass for excellent image quality and provides bright views of both terrestrial and celestial objects. The StarPointer finder adjusts to both daylight and night and within seconds I was watching a gold finch with unparalleled detail. A hummingbird at the feeder 50 feet away was an iridescent green marvel and the large bird I saw touch down in the woods some 1000 yards away was quickly revealed as a red-tailed hawk. But this is day. What about night?

Over a period of a few weeks, I was equally happy to see what the Celestron C65 Mini-Mak could do for astronomy. I was very pleasantly surprised to find that it performed every bit as well at 90X on Jupiter as my Orion ShortTube reflector that costs over twice as much and didn’t have a tripod! The equatorial bands of Jupiter were easily visible and so were all the galiean moons. As for deep sky, brighter galaxies and globular clusters were within the Mini-Mak’s reach, as well as a surprising amount of open clusters. Happy objects, such as the Lagoon Nebula, the Swan Nebula, the Wild Duck Cluster, Brocchi’s Cluster, NGC 457, Omega II Cygni, the Butterfly Cluster, M7, M13 and many more were easily captured. The Celestron C65 also did an outstanding job on the Moon as well, revealing major craters in crisp detail with a full disk image.

Would it pass the Tammy Time Test? In this case, yes. The very best part about this small package is Celestron’s “No Fault” warranty. No matter what you do to it, Celestron will repair or replace it without any questions being asked. That means if it gets knocked off the table and breaks… It gets replaced. If the airplane cabin pressure messes it up? Celestron replaces it. It the neighbor’s dog runs off with your C65? Snatch it and send it back. Celestron will send you a new one.

Parting words? You cannot go wrong with the Celestron C65 Mini-Mak. For those with limited space and a limited budget, there’s no reason to compromise on performance. It’s a very real telescope and it works like one. Sometimes big things really do come in small – and inexpensive – packages!

The Celestron C65 Mini-Mak Telescope was provided for review by Oceanside Photo and Telescope. We thank you!

Coronado PST – Personal H-Alpha Solar Telescope

Coronado PST - Courtesy of OPT

[/caption]Are you interested in taking an in-depth look at our nearest star in a specific wavelength of light? H-alpha has a wavelength of 656.281 nanometers and is visible in the red part of the electromagnetic spectrum. A hydrogen-alpha filter is an optical filter designed to transmit a narrow bandwidth of light generally centered on the H-alpha wavelength. These special filters are great, but they are difficult to use because of temperature and f-ratio requirements… not to mention expense! If you’ve ever been curious as to whether or not a Coronado PST was worth the price, then follow along.

At around $500, the Coronado Personal Solar Telescope isn’t an investment you take lightly for such limited use. Because almost all telescopes and binoculars can be outfitted with a relatively inexpensive white light solar filter, it’s almost an extravagance to view in this manner – or is it? For those who are able to afford specific Ha filters to fit their existing refractor telescopes, the luxury provides an incredible wealth of details unseen in white light – but also opens up a world of over-heating and sensitive adjustments. It’s a scary thought to trust your permanent vision to a tiny piece of glass, but human curiosity is what it is. There are those of us who want and need more…

So enter the Coronado H-Alpha Personal Solar Telescope. For years I’ve wanted to get my hands on an h-alpha solar filter and the thought of having a dedicated solar telescope was simply too good to pass up. The refractor telescopes I own were meant for nighttime viewing and I knew this milled aluminum beauty was meant for only one thing – the Sun. But would this amazingly small little gold telescope give me everything that I had hoped for? All I needed was a sunny day…

Setting up a Coronado PST was everything it was promised to be. It is no more difficult to use than a spotting scope and the built-in “Sun Finder” is definitely a bit easier than using the shadow-aim method. Happy as a little clam, I draped a black towel over my head and bent to the eyepiece. I kept sliding the focus up and down, but was met with nothing but a rotten, blurry image. Where’s this great solar telescope, huh? Where’s the excitement? I was disapointed at first.

But it wasn’t the telescope’s fault… It was mine.

PST Image - Lorenzo Mezzimi
What I had forgotten about was using an h-alpha telescope wasn’t the same as using an astronomical refractor. Because solar features that are visible in h-alpha light are moving at high velocities, you “tune” rather than focus the image. Duh! Once I caught on to sensitive adjustments, a whole new world opened up right before my eyes. Where I had once seen the Sun with a crisp, razor sharp edge, I now saw the soft glow of the chromosphere. White light (depending on which filter I used) gave the Sun a blue-white or flat yellow appearance – but now it glows vibrant red and the chromosphere is like a network of fine lace that covers the entire surface! Tiny streamers of material would show here and there and the appearance of looking at something “living” was incomparable. There’s clouds of gas up there!

Over a period of several months, the Coronado PST and I have done a lot of exploring. I’ve learned to identify plages and fibrils. I’ve seen prominences and filaments. What sunspots there are have taken on a whole new dimension. The PST has awakened my curiosity to what can be observed with even more sophisticated equipment! Was it worth what it cost?

Every last cent…

Note to Readers: The Coronado Personal Solar Telescope used for this review was purchased at Oceanside Photo and Telescope – an exclusive Coronado dealer.

The 16″ Meade LightBridge – That’s What I Like About You…

Dobsonian Telescope
The Meade 16" LightBridge

At around $2000, this “light bucket” telescope isn’t for everyone, but if you are interested in big, big aperture and have a little practical knowledge of how to correct some design flaws, then step inside and check out the Meade 16″ LightBridge Truss Tube Dobsonian…

Affordable Big Aperture Telescopes

Affordable aperture – that’s the catch phrase for all dobsonian style telescopes. You trade in drive motors, GoTo systems and the slow motion controls of an equatorial mount for the ease and simplicity of the altaz dobsonian design. Once upon a time, these monsters were all solid tube construction, but new lines of thinking have introduced the truss tube over several telescope models and Meade was one of the first to make it affordable. However, $2000 is a significant amount of money… Is what you get for the buck worth it?
Other Truss Tube Dobsonian Telescopes to choose from:

Inside the Design of a Truss Tube Dobsonian…

Make no mistake. It might resemble two other very notable manufacturer’s truss tube telescopes – but it isn’t. There is a reason the Meade 16″ LightBridge costs about half the price of the competitor models. It has a few design flaws. Let’s address these issues:

According to Meade: “It’s a big telescope that goes anywhere. New LightBridge truss-dobs from Meade take down and set up quickly. So you can take one of these massive windows on the universe out to your favorite dark sky locations with ease.” Maybe YOU can, but for most of us, the near 70 lbs. of the primary mirror cell isn’t going to be easy to to wrestle in and out of a car… and even left fully assembled at home, close to 130 lbs. isn’t going to be easy to move in and out. But, let’s be fair here. Part of the beauty of this telescope design is that it can be dismantled with ease. Yes. That part is true. It can be assembled and reassembled. But even most experienced hands will find that the upper optical tube assembly is very unstable with a narrow lip and one set of hands to work with – it requires two people to feel secure. The mounting hardware isn’t the greatest and should be replaced. Once assembled, I think you’ll find yourself reluctant to take it apart again, and therefore a good telescope dolly is required.

The next thing you’re going to find is the interior non-reflective coatings can use some help. Again, for experienced telescope users, this isn’t a problem – just an inconvenience. Now that it’s together, protection becomes an issue… And another expense. Meade no longer makes their own brand shroud and cover for the 16″ LightBridge, so you’re off and looking for after market accessories. Hey. No problem. It’s little things like this that a telescope user knows and expects. Now, let’s take it out and use it!

Using the Meade 16″ LightBridge…

“Steel RA Roller Bearings make movements smooth and effortless.” Yep. They sure do. The Meade 16″ LightBridge moves just as smooth as silk. So smooth, in fact, that the included altitude and azimuth tension adjustment knobs won’t stop it from gently drifting its way down to level when aiming at anything lower than about 30 degrees. Again, we have a slight design flaw – felt roller bearings instead of teflon. Again, it is something that can be corrected, but requires a little knowledge of telescope workings. (And don’t be too shocked when you remove them to find that one is even thicker than the other!) Even with the change, the supplied Meade 26mm QX Wide Angle 2″ Eyepiece will make it slowly drop when aiming low. Correction? You got it. Add weight to the back end.

Final Thoughts on the Meade 16″ LightBridge…

And now that all of these changes have been made, just what do I think about the Meade 16″ LightBridge?

Over the years I’ve come to expect things not to be perfect when ordering a telescope that costs a little less – so I don’t fault Meade. These are all minor issues that will work themselves out with time and tender loving care. What I can tell you is Meade’s boast of “Prepare to cross the universe.” is being modest. Prepare yourself to be blown away! As always, Meade mirrors are single-handedly some of the finest optics I’ve ever had the pride and joy to own. There is no coma. There is no issue. Knife edge test?: More like a razor. The mirror on this telescope is absolutely optically perfect. What’s more, the Meade 16″ LightBridge was sweet and easy to collimate. Aluminum coated with magnesium fluoride over coat on both primary and secondary mirrors have withstood the test of time on my other large Meade dobsonian telescopes, and I expect the same performance from this one. The focuser works like a charm and is welcome upgrade from Meade’s original 2″ focusers. The finder leaves a bit to be desired, but hey… I’m an optical finder kinda’ person. You might like the illuminated bullseye.

All in all? The Meade 16″ LightBridge is a great telescope. Since first light it has collected countless open clusters and resolved double handfuls of globular clusters. It has made its way to the distant galaxies, and shown me spiral arms, dustlanes and stellar cores. It has walked across the central star in the Ring Nebula, blasted the blue right out of the Saturn Nebula, and revealed the braiding in the ring of the Helix. The Meade 16″ LightBridge has shown the Casinni Division of Saturn’s rings as wide as a highway, and Jupiter’s Red Spot and black holes of galiean transits.

What’s more, the Meade 16″ LightBridge is one helluva comet hunter… And that’s what I like about you.

Telescope Review – Celestron NexStar 102 SLT

Celestron NexStar 102 SLT

Are you looking for a sweet little telescope that can take abuse and keep coming back for more? Designed for the advanced beginner, or for those interested in a highly portable telescope referred to as “Grab and Go”, the Celestron NexStar 102 SLT automated telescope goes through a year-long Tammy Test and graduates with honors…

First off, I’m not too keen on the idea of a GoTo telescope – much less a refractor. In my early years I found refractors to be uncomfortable to use, easy to dew, and just plain not as much deep sky fun as a reflector. As for the GoTo? I genuinely feel you do yourself a disservice by not learning to use an equatorial mount and a star chart. Misgivings aside, it was time to take a look at new technology and see what a year’s worth of use would do to it.

Assembling the Celestron NexStar 102 SLT

Unlike the variety of telescopes I’ve used over the years with complicated equatorial mounts and drive units, the Celestron NexStar is swift and efficient. The tripod is lightweight aluminum, and stands up to time. Despite repeated uses and even overtightening, the legs extend quickly and lock securely using the hand turn knobs. No wing nuts here to get dropped and lost in the dark. The center accessory tray bracket is permanently connected and folds down when the tripod is opened. What’s more, the knob that connects the accessory tray is captive – it can’t get lost. Even though these particular parts are some type of polymer, they are extremely durable and even the occasional cross-threading doesn’t strip them out.

At the top of the tripod is the mount cradle. Again, extremely simple and captively elegant. There is simply no “wrong way” to attach the mount to the tripod and no way to lose the parts that connect it. The mount itself is fully contained. Nothing is exposed to chance or wear. As for durability? Surprise, surprise. The drive motors are contained inside the mount and despite being dropped hard enough to make the exterior cover come off, it popped right back on and absolutely no damage was done.

Once the mount is connected, the telescope optical tube assembly (OTA) comes next. Again, captive screws mean even arthritic hands will not fumble these parts. The OTA attaches to the mount with what is called a “clamshell”. It’s a hinged affair that you simply fold over the telescope body and tighten down.

Last, but not least, are the accessories. Supplied with the Celestron NexStar SLT is a red dot finder that slides on easily on a dovetail mount, a cheap – but serviceable – 1.25″ star diagonal, and two excellent SMA eyepieces. The controller is easily attached into a port on the side of the mount with what looks like a telephone jack and the battery pack is internal to stop cord wrap. Set up time? Twenty minutes the first time… Less than five when you get used to it.

Aligning and Using the Celestron NexStar 102 SLT

So, here’s where my misgivings with GoTo units usually start. I’ve played with a lot of encoders and a lot of different units over the years and I’d usually get frustrated because it would take longer to get the units working than it took just to starhop. In the case of the Celestron NexStar, I was pleasantly surprised to find that it didn’t take a whole lot of learning to use the system. Simply use the keypad to level the scope pointed north (remotely close is fine), and set the date, time and location. Press Go, and the little beast is off and running on its own – seeking out an alignment star. Use the keypad to move the red dot center on the star and enter again. Now, go to the eyepiece, center the star as much as possible and enter. Guess what? That’s all it takes.

The more accurate you are with your time, location (latitude and longitude) and centering – the more accurate the scope becomes. Even loosely set, and I do mean loosely here, folks… A low power, wide field eyepiece will bring almost everything into the field of view on the first try. After that, it’s a joy ride of selecting objects from the data base. If it tries to go to something below the horizon? It will tell you. If it might tangle itself trying to go to what you tell it? It won’t let you. If you try to slew it towards the Sun? A little hand reaches right out of the keypad and slaps you upside the head. It knows better! And it learns… Oh, yes… It learns each time you center a new object up and corrects itself.

What Can You See With the Celestron NexStar 102 SLT?

Everything in the database? No way, Jose. Before you go getting all excited about a 4,000 celestial objects database, remember you are using a 4″ telescope here. We’re talking about a limiting stellar magnitude of around 12 here, so objects much fainter than about magnitude 10 or 11 under average skies are about as good as you’re going to get. However, if you ask it to go to an object, it says it’s there and you don’t see it? Try looking at the on-screen data. Chances are you’re trying for something that is beyond this sweet little telescope’s grasp.

Lunar and planetary performance is outstanding. Being a refractor, it could be no less. Because the Celestron NexStar 102 is driven, it’s possible to drop in some ridiculously high power and get a decent image. Double stars are crisp and clean, and here’s the kicker… Deep sky (nebulae, galaxies, and star clusters) are surprisingly well resolved for such small aperture. When I can pick out the dark dust lane in the Sombrero Galaxy with a 4″ aperture? I’m delighted. When open star clusters sparkle? I’m enchanted. When globular clusters try to resolve? I’m fascinated. When nebulae smoke out of the sky? I’m hooked. A little scope that can!

Final Words On The Celestron NexStar 102 SLT: What’s Good And What Isn’t

The supplied 1.25″ eyepieces are excellent – but the diagonal needs an upgrade. On a happy note, it comes with a 2″ focuser, so do yourself a favor when you’re ready to step up your optics to the next level and go with the bigger accessories. If you can’t afford the full 2″ line, at least start with the 2″ diagonal and use a reducer to accept the 1.25″ eyepieces. You’ll have this scope for a long time and the upgrade is worth it.

Word of warning… It’s a battery eater. Even the high buck batteries don’t last. Having battery power is great when you’re in the field where no electrical outlet is available, but it won’t be long until you’re purchasing a power tank. Happy note? You can connect it to your car battery via the lighter, and the AC converter is very inexpensive.

Dew? Yep. It’s a refractor’s worst enemy. But, surprisingly, Celestron thought of that and the dew shield is included. Just remember, that won’t keep the fog monster away from your eyepieces, but taking care to cover them during the critical point means being able to stay outside and play a lot longer.

Again, don’t ever forget this is a small aperture telescope and it’s not going to reveal every heavenly treasure you dream of and what you see is going to be small. It does rich field, so picture yourself looking at the Ring Nebula about as big as a Cheerio on a dinner plate, ok? But small aperture has it’s advantages… The whole thing only weighs 14 pounds, so it is incredibily easy to take with you as a carry on, or to sling over your shoulder and walk. There’s definitely something to be said about a scope that you can carry everything, including your eyepiece case, folding chair and cooler in one trip!

Usability factor? Don’t give the Celestron NexStar 102 to a small child – but do give it to anyone old enough to read and follow a few simple instructions. Durability factor? It’s been carried around in a car trunk for weeks at a time, strapped on the back of a motorcycle, knocked over at a public outreach event, and traveled to many star parties and still performs flawlessly. It is not a Takahashi, but Celestron produces quality optics and you will not be disappointed with your investment in this $500 telescope.

I wasn’t.

Equipment Review: Meade 8X42 Travel Binoculars

My Mother always told me that if I couldn’t say something good about somebody, that I shouldn’t say anything at all. Well, after a few weeks of using a pair of Meade 8X42 Travel Binoculars, I guess it’s about time I said something… I just hope you want to hear it.

First Impression of the Meade 8X42 Travel Binoculars

I opened the box and there they were… a pair of Meade binoculars in a plastic blister pack like you’d find hanging on a peg in your nearby discount department store. I couldn’t help but ask myself if I was going to get the same quality as a Meade department store telescope, but I knew I had to be fair. After all, you can’t judge a cake by its frosting, right? Darn, right.

So, I open them up and examined them. According to their advertising blurb; “They are light and portable, and include a carrying case and neck strap.” Well, they’re right about that. These 8X42 binoculars certainly are light. Actually, they’re probably the lightest pair I’ve ever held that had that kind of aperture. Carrying case? Check. Neck strap? Check. Now for the binoculars themselves…

“A rubber coated exterior helps protect your Meade Travel binoculars from bumps and dings, and offers a slip-proof grip.” Right again, the tubes are rubberized and I will give them credit – they definitely are easy to securely grip. Let’s see now. It says “Optics Fully Coated”. Yep. They are. At least the surfaces I’m looking at are coated and apparently well done. What’s next? Right eye diopter? Gotcha’ . It’s there, too… And functional. Interpupillary distance? Check. Spreads wide… Goes to narrow. Everything seems to be functioning perfectly… So let’s have a look!

Viewing Through the Meade 8X42 Travel Binoculars

Well, surprise surprise! With or without eyeglasses, I have no problem hitting focus and the Meade 8X42 Travel Binoculars have sweet eye relief. It boasts closes focus of 21 feet, but I actually got it down to around 10 feet with a nice image. According to their advertising; “Meade 8X42 Travel Binoculars offer bright, clear images for a host of observing opportunities, from nature viewing and birding to sporting events and travel.” Well, let’s just see, huh?

So, out we go. During the daylight I was picking up bright, crisp images of birds, well defined looks at distant objects and am pleased to announce that the claim of “8X is the perfect compromise for those who want to hand-hold their binoculars for an extended period of time but want more magnification than low power models” is correct. The light weight does make them easy to hold and to steady. But, what about twilight viewing? Again, I’m impressed. I was watching deer a good thousand yards away and I could easily distinguish their different coat markings. Yeah, Meade!

Now, what about astronomical implications? Not bad on the Moon. I can see crater detail and hold them steady. Jupiter? Steady enough to see two jovian moons. Star clusters? Yep. M44 is nice and crispy. M67 isn’t resolved, but then I didn’t expect it to be. Globular clusters show up nicely. Again, they don’t resolve – but it’s not the binoculars fault. Galaxies? Yes. M81 and M82 were fine. M51 was faded, but there… and M65 and M66 took some aversion but could be seen. Double stars? Mizar and Alcor…. mmmm… ok. Cor Caroli? Again, just ok. All in all? The Meade 8X42 Travel Binoculars perform well in all applications.

All applications, but one…

Traveling With the Meade 8X42 Travel Binoculars

One of the reasons I enjoy binoculars so much is that I do travel. Something that’s only about the size of a good book is easy to tuck in between your clothes in your suitcase and send up the luggage ramp into the airplane. And this is just what I did with the Meade 8X42 Travel Binoculars. After all, my laptop has been halfway around the world and back in just this same manner.

Ummm… Apparently Meade just needs to take the word “Travel” out of their description.

The laptop in its suitcase arrived fine – but the binoculars in the other didn’t. Absolutely nothing fragile inside the same suitcase was damaged in any way, but the moment I tried to use the Meade 8X42 Travel Binoculars after traveling I got double images. Folks, when you see two perfectly focused images while looking through a pair of binoculars? Something has definitely gone afoul inside the tomato. I readjusted the interpupillary distance. I readjusted the right eye diopter. I readjusted the focus. I tried covering one lens – and then the other. The result? Either optical tube showed a crisp, clean image… But not together. Test number two – give them to someone else to look through. Guess what? Yeah. They saw the same thing. Two images. Just a little bit of active use and this pair of binoculars lost their collimation.

In the long run, maybe you won’t experience the same thing I did with the Meade 8X42 Travel Binoculars. Maybe I just got that one in every hundred pair that had a screw loose. Maybe the suitcase they were in got handled a lot rougher than what it looked like. Maybe both of sets of eyes went bad in a short period of time. Maybe it won’t happen to you… But maybe… Maybe it will.

Sorry, Ma. I really tried.