
[/caption]
If you have seen the International Space Station (ISS) pass over a few times with your own eyes, (here’s our guide on seeing it) you may want to have a go at photographing it.
Photographing the ISS is very worthwhile and gratifying. There are two basic methods; one being easy and the other being a little more difficult. Both methods are incredibly rewarding and good results can be obtained fairly quickly, once you have mastered the basics.
Method 1:

You will need a DSLR camera or another type of camera which is capable taking long exposures. Incredibly important is having a tripod or somewhere you can place your camera without it getting vibrations or movement.
Find out when and where the ISS will be passing over your location and choose a part of the sky the ISS is passing through at which you can point your camera.
Experiment with your camera settings, to get colours and exposures correct beforehand and do a couple of long exposure test shots of anything from 15 to 60 seconds. You can do shorter or longer exposures but this is up to you, depending your equipment and how artistic you want to be.
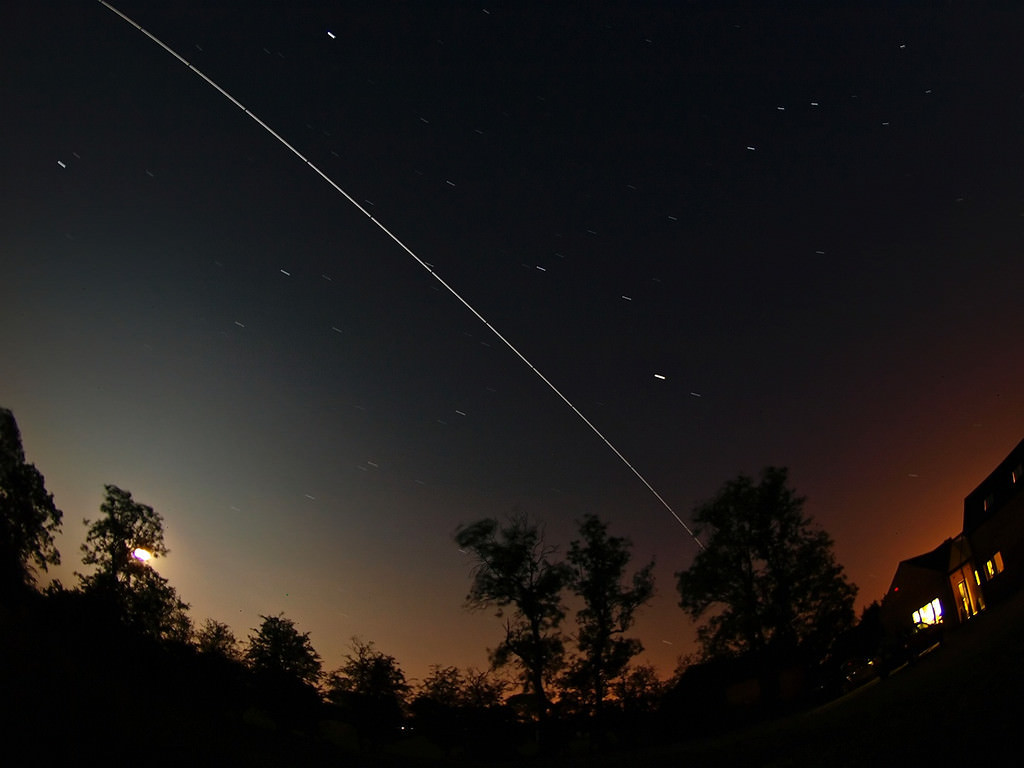
This method will produce a long white streak or line, which will show the path taken of the International Space Station as it passes over. This is the most common method for amateurs.
Method 2:

You will need a telescope, a webcam, and a strong mount or tripod. Set up your telescope and mount, along with webcam with a laptop and make sure of the time and where the ISS will be passing over your location.
In this method we will use the telescope to magnify and see the ISS up close while recording a movie (AVI). We will then stack the frames of the recorded movie in a specialist image enhancing program such as Registax.
Insert your WebCam into the telescope focusing tube using an adapter (available from astronomy stores) and connect the cables to your laptop. When the ISS is due, start recording and track the space station using a finder scope or computerized mount.
The difficult part of this method is tracking the ISS and keeping it in the field of view of the telescope while recording the video file. It is recommended that you set your mount in “Alt/ Az” mode or use a Dobsonian telescope so that you have free movement of telescopes optical tube assembly. You will basically be using the telescope as a giant video camera and you need to keep the ISS in shot for as long as possible.
This method is very difficult as the ISS has been magnified highly while moving very quickly and can be easily lost out of the field of view, or there can be too much movement (shaking) in the video. This method requires much practice.
Once you have been able to get a video of the ISS passing over, you can feed your video file into software such as RegiStax and the program will sort each individual frame, removing bad frames and stacking good frames to create a very clear image.
This method is fantastic for creating close up images with detail on the International Space Station; you can also see docked spacecraft. You can also use this method for trying to image other Earth-orbiting satellites, too.

It would be great to see your ISS photographs, so please send them into us via our Flickr site. Good luck!
Thierry Legault is an amazing photographer.
Another option for method 1) is to use the timelapse function of your camera to make a series of shorter exposure photos and stack them afterwards to create one image. This is ideal if you’re in a light polluted area and you want to keep the sky as dark as possible.
I’ve discovered that the secret to the ISS filming is two-fold: 1) shoot video, and 2) don’t just pan in on the Station. Frame with good background planets & stars and beaches & trees to get a sense of speed and scale.