
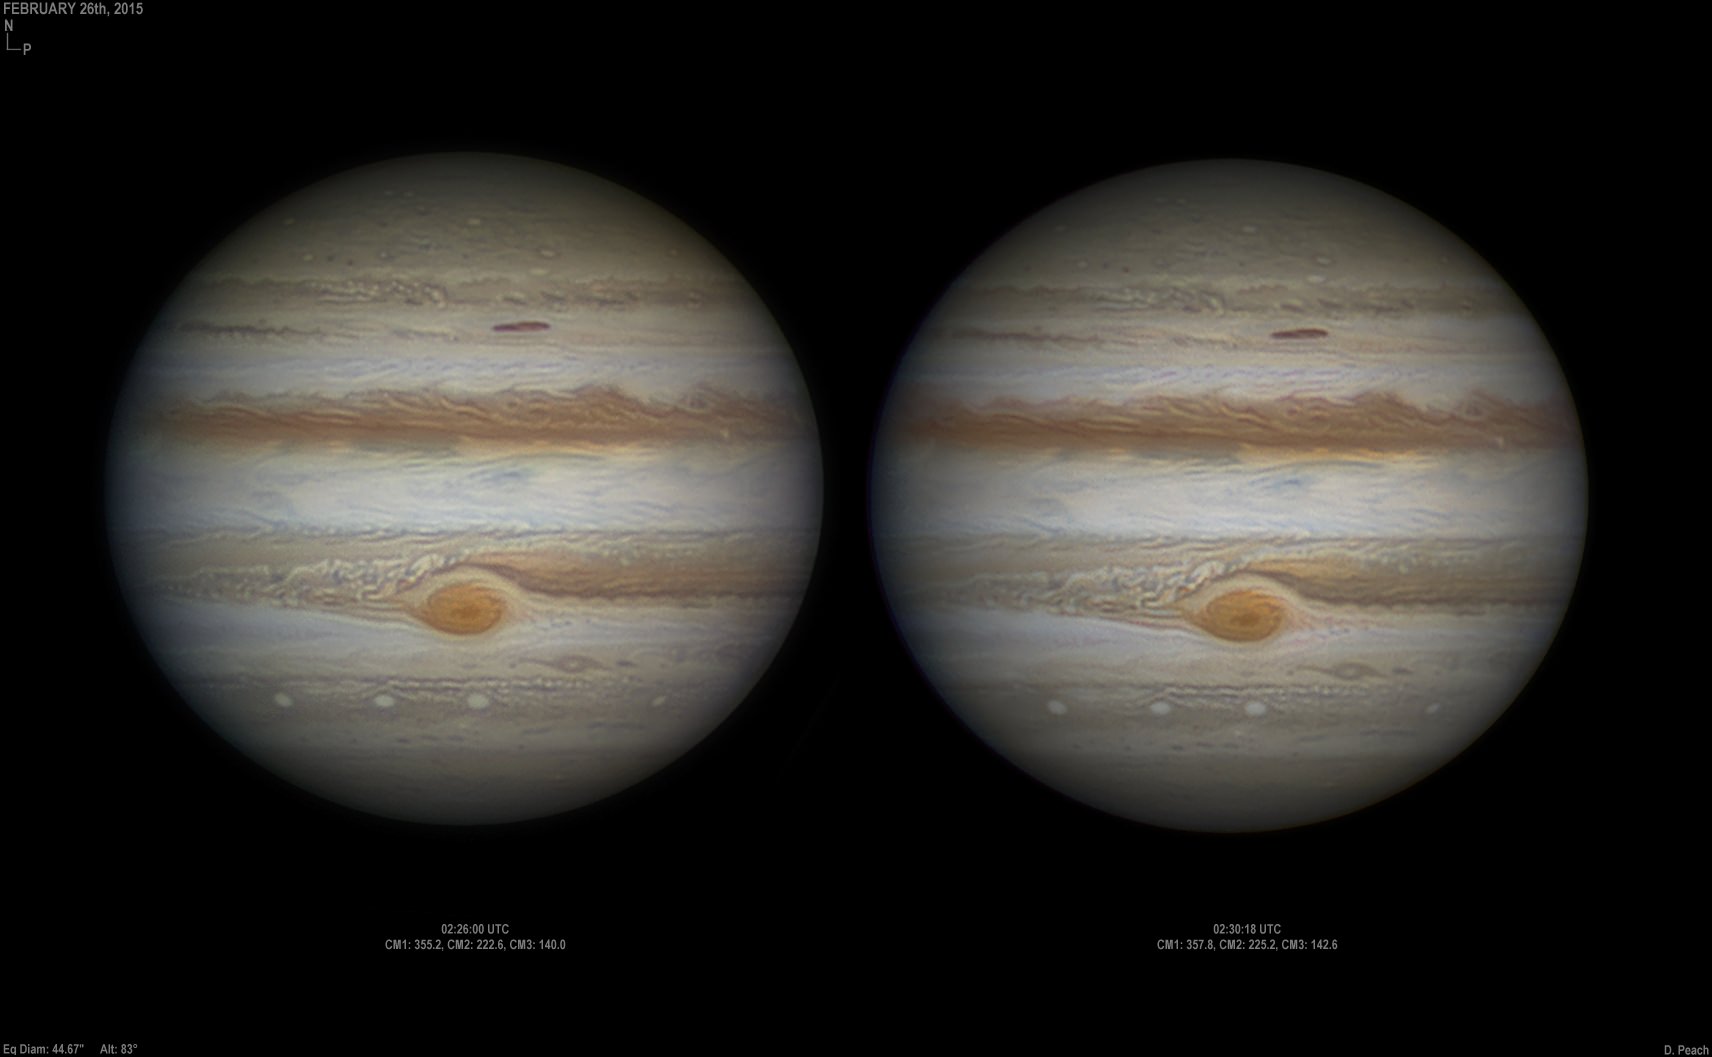
Cross your eyes and take a look at this image. If you’re lucky, you will be treated to a wonderfully clear 3-D view of Jupiter and its Great Red Spot, without the aid of a stereoscope. Or — if you haven’t quite mastered the art of viewing stereo pairs — you might end up with eyestrain.
Prolific astrophotographer Damian Peach took these two shots roughly five minutes apart — which makes them a great candidate for creating a stereo pair.
“Inspired by a suggestion from Dr. Brian May,” Peach told Universe Today via email, “this is the first time I’ve had two excellent quality sets of data so close in time with the GRS right in the centre to attempt this. I completely reprocessed the data for both images to keep a soft natural appearance and to closely match the colour between them as possible.”
Peach also said he measured the size of the GRS at 15,500km in width.
Still trying to view this as a 3-D image? Try this suggestion from Oxford University:
Hold a finger a short distance in front of your eyes and stare at it. In the background you should see two copies of the stereo pair, giving four views altogether. Move your finger away from you until you see the middle two of the four images come together. You should now see just three images in the background. Try to direct your attention slowly toward the middle image without moving your eyes, and it should gradually come into focus.
See more of Peach’s great astrophotography at his website.
Wow! looks Great in 3D I just crossed my eyes (but you must keep them level to line them up straight) it really works well 🙂
Stare cross eyed long enough at the image and the clouds will start to move! Or so it seemed to me for a secant there.
Two modest comments that are not meant to detract from the fascinating picture!
1) On “stereoscopic”: I have always preferred the original not-crossed-eyed version of stereo where the left eye looks at the left picture.
As the eyes must then look straight ahead they tend to focus automatically on “infinity” which is not what the eyes want when the picture is held at close distance. By putting on reading glasses and then “staring” relaxedly as if the picture were far away at the horizon, both eyes suddenly can see their proper pictures sharp in focus without having to strain as in the crossed-eyed way. Cross-eyed looking tends to linger on afterwards and leaves an unpleasantly strained feeling. That is why the original stereoscope (and the later View Master) with lenses were developed.
And therefore I took two partial screen shots of the left- and righthand side of the stereo picture and switched them around in two preview half-screens, put my reading glasses on and studied the Great Red Spot in my preferred (not crossed-eyed) stereo mode!
2) As any stereo effect is obtained by the grace of parallax, I tried to find how the location of the red spot, relative to the background, differed in the left hand picture from the right hand one and found it actually very hard to see any shift… My suggestion would therefore be to, next time, increase the time interval between the two from five to ten or more minutes.
(Pictures taken that from the starry sky in suitable time interval show up the planets spectacularly when looked at in stereo!)
If anyone has problems viewing this (and other similar images), I’ve found that the following procedure makes it very easy for me:
1) Maximise the image on screen, or display it with a black background.
2) Make the room as dark as possible, or bring your device to a dark room. You want to only see the images themselves, not external perspective cues that makes your brain and eyes want to refocus to the proper distance.
3) Now place your fingertip exactly between the two images.
4) Focus on the screen while moving your finger straight towards the bridge of your nose. You will see two ghost images of your fingertip, find the distance where they are in the exact middle of each Jupiter. Make sure that your head is level relative to the screen.
5) Shift your focus to your fingertip. You will see three Jupiters, the middle one is your stereo image.
6) Finally, shift your focus to the middle Jupiter while lowering your fingertip. Make sure that it is perfectly aligned, and suddenly the 3D effect will jump out at you if you’re lucky.
It requires a bit of fiddling at first, but when you get used to tricking your brain in this way it gets easier. I don’t _have_ to use the fingertip trick anymore, but it still makes it easier for me when I haven’t viewed such images for a while.
Optional: if you get this to work, have fun finding similar stereoscopic images online 🙂