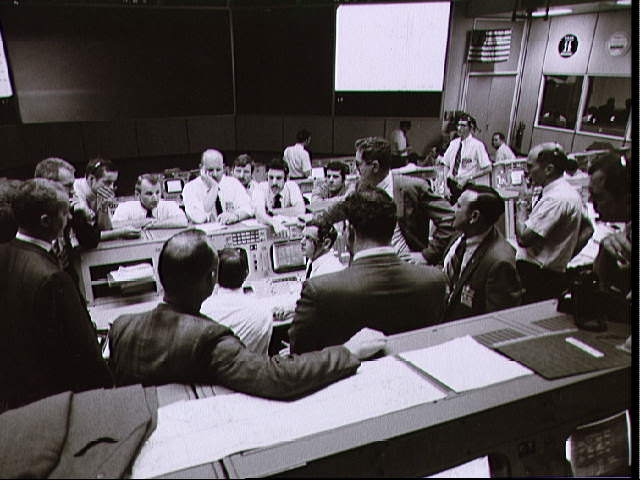
Overall view showing some of the activity in the Mission Operations Control Room during the final 24 hours of the Apollo 13 mission. From left to right are Shift 4 Flight Director Glynn Lunney, Shift 2 Flight Director Gerald Griffin, Astronaut and Apollo Spacecraft Program Manager James McDivitt, Director of Flight Crew Operations Deke Slayton and Shift 1 Flight Surgeon Dr. Willard Hawkins. Credit: NASA.
Following the explosion of an oxygen tank in Apollo 13’s
Service Module on April 13, 1970, approximately 56 hours into the mission, the
situation was bleak. With the Command Module (CM) without any power, the Lunar
Module (LM) was activated as a life boat to sustain the crew. The task ahead –
to save the spacecraft and the crew, and get them home again — would require an
incredible amount of innovation by both the Apollo 13 astronauts and the
engineers back on Earth.
The explosion caused the loss of the main source for oxygen,
water, and most importantly, electrical power for the CM. With only 15 minutes
of power left in the CM, astronaut Jack Swigert powered down the CM while Jim
Lovell and Fred Haise got the LM up and running.
For engineers on the ground, one of the biggest concerns was
maintaining enough electrical power in the LM and then creating enough power in
the CM to power it back up again for reentry to Earth.
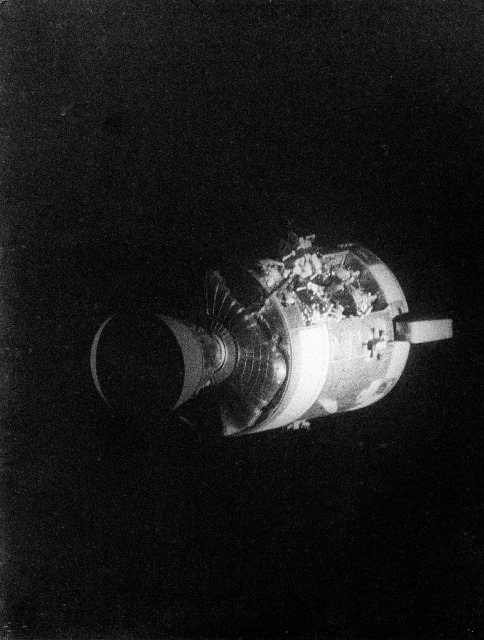
This view of the severely damaged Apollo 13 Service Module (SM) was photographed from the Lunar Module/Command Module (LM/CM) following SM jettisoning. As seen here, an entire panel on the SM was blown away by the apparent explosion of oxygen tank number two located in Sector 4 of the SM. Credit: NASA.
The explosion of a liquid oxygen tank in Apollo 13’s Service Module violently propelled debris and a 13-foot (4 meter) outer panel of the SM out into space.
Later, the crew saw the damage when they jettisoned the SM prior to reentering Earth’s atmosphere. Commander Jim Lovell described the scene:
“There’s one whole side of the spacecraft missing!” Lovell radioed to Mission Control. “Right by the high-gain antenna, the whole panel is blown out, almost from the base to the engine.”
The panel was likely blasted outward and rearward, toward the deep space S-Band radio antenna. The antenna was attached to the outer edge of the module’s rear base via a meter-long strut, and was used for both telemetry and voice communications.
NASA engineer Jerry Woodfill feels this hi-gain antenna was surely struck by the panel and/or schrapnel ejected by the oxygen tank explosion.
“That deep space radio communication was maintained during and after the explosion was almost miraculous,” Woodfill said. “Such a blow should have destroyed that hi-gain antenna. Those of us who watched the telemetry display monitors saw only a momentary flickering of the telemetry, but after a few flickers we continued to receive data.”
Woodfill said it was as though a boxer had taken a devastating punch and continued to stand unfazed.
This video of the severely damaged Apollo 13 service module was taken by the crew after it was jettisoned.
If instead, the antenna had been destroyed, the loss of data would have resulted in an impaired ability to analyze the situation and communicate with the crew.
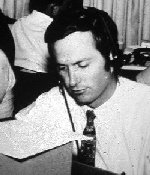
The moments following the explosion are seared into Woodfill’s memory. On the night of April 13, 1970, 27-year-old Woodfill sat at his console in the Mission Evaluation Room (MER) in Building 45 at Johnson Space Center — next door to Mission Control in Building 30 — monitoring the caution and warning system.
Jerry Woodfill working in the Apollo Mission Evaluation Room. Credit: Jerry Woodfill.“Because I was watching the command ship’s telemetry on a monitor at the moment of the explosion, both the words heard in my headset, “Houston, we’ve had a problem” and the scene I saw of the video monitor have not been forgotten” Woodfill said. “Seconds before I heard the audio of Jack Swigert’s call, I watched the video screen flicker several times.
To this day, Woodfill said he cannot understand how it continued to function following the explosion.
“As an engineer, I have studied the basics of simple machines,” he said. “The concept of the lever arm dictates that when an explosive blow strikes a structure atop an arm, the arm must bend back about its attachment to the supporting structure. In this case, that structure was the command ship’s supply module, the Service Module. Later photos by the crew (below) showed the antenna intact and the conical reflector dishes present with their center probes intact. In my mind, the entire assembly simply should have been severed altogether.”
An Apollo high gain antenna, on display at the Stafford Air & Space Center, Weatherford, Oklahoma.
The Unified S-band (USB) system was a tracking and communication system that combined television, telemetry, command, tracking and ranging into a single system. The high-gain antenna consisted of an 11-inch-diagonal wide-beam horn flanked by an array of four 31-inch-diameter parabolic reflectors. Its multifunctional system simplified operations, and its construction saved on weight.
And obviously, it was very durable.
Woodfill reiterated how important it was that the antenna survived the explosion.
“Later on it wasn’t needed, as the crew used the Lunar Module communication system,” said Woodfill, “but having that initial continuous communication was one of the things that was very important.”
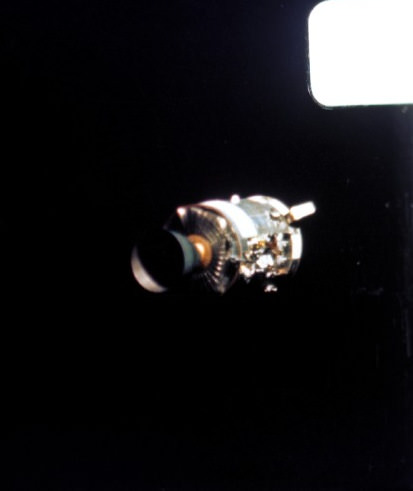
This color view of the severely damaged Apollo 13 Service Module (SM) was photographed with a motion-picture camera from the Lunar Module/Command Module following SM jettison. Credit: NASA.
And later those in Mission Control and the MER were be able to go back and look at the data that had been transmitted to Earth during that very crucial period of the mission, to help understand what had actually occurred.
“It was critical to have that data in those first moments of the explosion to analyze what had happened,” Woodfill said. “Uninterrupted communication was essential to investigating the status of the vehicle. While it may be true that the backup omni-antenna might have provided temporary communication, based on my analysis, the omni-antenna would not have served as ably during the time of greatest initial peril. In fact, to configure its use with the NASA world-wide tracking network would have caused an unfortunate delay.”
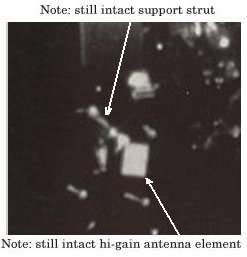
Here are some zoomed-in photos taken by the crew of Apollo 13 after the explosion of the S-Band/hi-gain antenna, and Woodfill has noted the parts of the antenna. They show the explosion failed to sever the hi-gain antenna mast and the conical dish receivers as well as the rectangular antenna, and the center probes of the conical dishes appear intact. Considering the force of the explosion, this is remarkable.
At left, a view of the Service Module and the S-Band antenna during a previous Apollo mission. At right is a zoomed in look at the damaged SM and the unfazed S-Band antenna on Apollo 13, taken during SM jettison. Credit: NASA/Jerry Woodfill.
An annotated closeup of the S-Band/Hi Gain antenna on Apollo 13 after the explosion. Credit: NASA/Jerry Woodfill.
Apollo 13 images via NASA. Montage by Judy Schmidt.
Apollo 13 images via NASA. Montage by Judy Schmidt.
“Things had gone real well up to at that point of 55 hours, 54 minutes and 53 seconds (mission elapsed time),” said Apollo 13 astronaut Fred Haise as he recounted the evening of April 13, 1970, the night the Apollo 13’s command module’s oxygen tank exploded, crippling the spacecraft and endangering the three astronauts on board.
“Mission Control had asked for a cryo-stir in the oxygen tank …and Jack threw the switches,” Haise continued. “There was a very loud bang that echoed through the metal hull, and I could hear and see metal popping in the tunnel [between the command module and the lunar lander]… There was a lot of confusion initially because the array of warning lights that were on didn’t resemble anything we have ever thought would represent a credible failure. It wasn’t like anything we were exposed to in the simulations.”
What followed was a four-day ordeal as Haise, Jim Lovell and Jack Swigert struggled to get back to Earth, as thousands of people back on Earth worked around the clock to ensure the astronauts’ safe return.
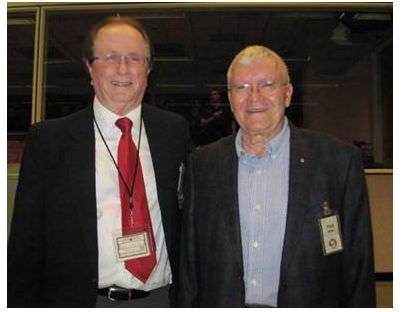
Jerry Woodfill and Fred Haise at the 40th anniversary celebration of Apollo 13 at JSC. Image courtesy Jerry Woodfill.
In 2010, Universe Today also commemorated the Apollo 13 anniversary with a series of articles titled “13 Things That Saved Apollo 13.” We looked at 13 different items and events that helped turn the failure into success, overcoming the odds to get the crew back home. We interviewed NASA engineer Jerry Woodfill, who helped design the alarm and warning light system for the Apollo program, which Haise described above.
Now, five years later on the 45th anniversary of Apollo 13, Woodfill returns with “13 MORE Things That Saved Apollo 13.” Over the next few weeks, we’ll look at 13 additional things that helped bring the crew home safely.
Jerry Woodfill working in the Apollo Mission Evaluation Room. Credit: Jerry Woodfill.
Woodfill has worked for NASA for almost 50 years as an engineer, and is one of 27 people still remaining at Johnson Space Center who were also there for the Apollo program. In the early days of Apollo, Woodfill was the project engineer for the spacecraft switches, gauges, and display and control panels, including the command ship’s warning system.
On that night in April 1970 when the oxygen tank in Apollo 13’s command module exploded, 27-year-old Woodfill sat at his console in the Mission Evaluation Room (MER) at Johnson Space Center, monitoring the caution and warning system.
“It was 9:08 pm, and I looked at the console because it flickered a few times and then I saw a master alarm come on,” Woodfill said. “Initially I thought something was wrong with the alarm system or the instrumentation, but then I heard Jack Swigert in my headset: “Houston, we’ve had a problem,” and then a few moments later, Jim Lovell said the same thing.”
Listen to the audio of communications between the crew and Mission Control at the time of the explosion:
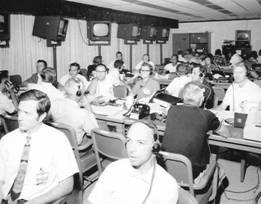
Located in an auxiliary building, the MER housed the engineers who were experts in the spacecrafts’ systems. Should an inexplicable glitch occur, the MER team could be consulted. And when alarms starting ringing, the MER team WAS consulted.
The Mission Evaluation Room. Credit: Jerry Woodfill.
The ebullient and endearing Woodfill brings a wealth of knowledge — as well as his love for public outreach for NASA — to everything he does. But also, for the past 45 years he has studied the Apollo 13 mission in intricate detail, examining all the various facets of the rescue by going through flight transcripts, debriefs, and other documents, plus he’s talked to many other people who worked during the mission. Fascinated by the turn of events and individuals involved who turned failure into success, Woodfill has come up with 13 MORE things that saved Apollo 13, in addition to the original 13 he shared with us in 2010.
Woodfill tends to downplay both his role in Apollo 13 and the significance of the MER.
“In the MER, I was never involved or central to the main events which rescued Apollo 13,” Woodfill told Universe Today. “Our group was available for mission support. We weren’t flight controllers, but we were experts. For other missions that were routine we didn’t play that big of a role, but for the Apollo 13 mission, we did play a role.”
But Apollo Flight Director Gene Kranz, also speaking at the 2010 event at the Smithsonian Air and Space Museum, has never forgotten the important role the MER team played.
“The thing that was almost miraculous here [for the rescue], was I think to a great extent, the young controllers, particularly the systems guys who basically invented the discipline of what we now call systems engineering,” Kranz said. “The way these guys all learned their business, … got to know the designs, the people and the spacecraft … and they had to translate all that into useful materials that they could use on console in real time.”
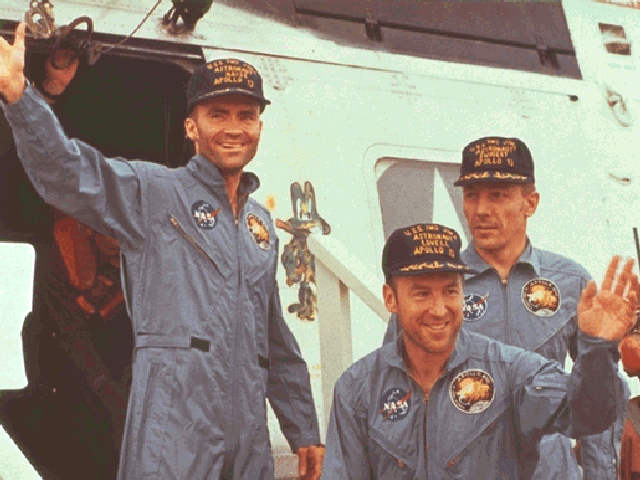
Apollo 13 astronauts Fred Haise, Jim Lovell and Jack Swigert after they splashed down safely. Credit: NASA.
Join Universe Today in celebrating the 45th anniversary of Apollo 13 with Woodfill’s insights as we discuss each of the 13 additional turning points in the mission. And here’s a look back at the original “13 Things That Saved Apollo 13: