Vixen R130Sf Newtonian Reflector Telescope and PortaMount II – Right In The Comfort Zone…

So what’s the latest telescope I’ve been testing? This time it’s a Vixen R130Sf Newtonian Reflector Telescope and PortaMount II. I can tell you right now that I’ve never laid my hands on a telescope that I was more comfortable with out of the box than this one… But, I guess I really need to start the story from the beginning, don’t I? Then follow me over to the Observatory and I’ll tell you how this charming Vixen stole my heart away.

Quite frankly, folks, as the head of a non-profit organization it’s my job to beg. Sure, I’d love to be sitting in an air conditioned office in a swivel chair telling my secretary to send out a purchase order for equipment – but that ain’t happening. At WRO, we don’t charge anything for our public programs, educational outreach, planetarium programs, or even visiting schools, libraries, or doing guest speaker shots. That’s just the way it is. Astronomy education should be free and we’re gonna’ keep it that way. So, when the time comes each year for us to give our Hidden Hollow Star Party, somebody has to approach a whole lot of astronomy equipment manufacturers and humble themselves to try to get door prizes. Those door prizes then go into a raffle where you buy tickets and that’s how we make our operating money.

You know, the good stuff like electricity, toilet paper, trash bags and coffee…

In these economic times, it’s not easy for any company to donate anything – much less something valuable. That’s why we were completely stunned when Janet D. of Vixen Optics told us they would donate a Vixen R130Sf Newtonian Reflector Telescope and PortaMount II. We would have been thrilled with a plossl eyepiece. Can you imagine how I felt when I got that news? My starz… We might even sell enough raffle tickets on that one to be able to afford to have new Styrofoam cups this year! Needless to say, we were incredibly honored and we knew that we’d have to take it out of the box to display it.

Can we have first light?

EOS_1567Needless to say, the guys were on it the moment the boxes made it to the concrete pad. Tape was cut, packing materials carefully removed and restored, optics gently lifted and ready for assembly. You know what? The Vixen PortaMount II is the easiest mount I’ve ever put together. Not one thing on it fought me. The HAL 130 tripod slicked right into place at the perfect height and I was totally delighted to see captive screws on both the mount and accessory tray that meant nothing was going to get lost in the dark. The tripod itself is very light aluminum, weighing in at right around 12 pounds . But, it’s by no means “cheap”. The legs are high grade material and extend from just about 32″ to just a little over 50″. The tube rings for the scope weren’t cheaply made either. The hinges didn’t “flap” when they were open. The just connected perfectly to the famous Vixen dovetail, the dovetail slid into place and the two knobs that hold it were very easy on arthritic hands.

R130Sf_and_portamount-LNow for the optical tube. Again, the scope rings didn’t flap around like broken bird wings when you opened them and they fit comfortably around the OTA. You didn’t feel like you had to torque it down to make it hold the tube and the felt lining made it just right so it was easy to rotate the tube and not even disturb the mount’s position. The scope body is well crafted. It’s lightweight at less than 20 pounds – but it has a very solid feel to it. Trim rings and mirror cells are finished well… not just covered like an afterthought. The four-vane spider is rock solid, but I’ll warn you in advance the primary mirror isn’t center marked. In this case, it’s a small scope. It really doesn’t need to be. The 2″ rack and pinion style focuser is nice and solid and doesn’t slop around. It has good tension and appears to be very well machined for lasting quality.

Now for the finderscope. Ah, yes… Vixen did this one right, too. No hookey jookie red dots or telrads here. Just a very generous 6×30 optical finderscope on a sturdy little bracket with spring tensioners to fine tune it. What’s that you say? Uh, huh. Well, let’s see you use your red dot finder when the batteries run out and you’ve got 75 kids waiting to see something and the nearest department store is 15 miles away. And ya’ wanna’ know what else? The daggone thing was less than a degree off center right out of the box! I had a hard time believing it until I saw it with my own eyes.

Oh, I’m getting more comfortable by the minute here.

EOS_1579Next? Balance. Geez, Louise… I want to meet the guys that designed these things, because I didn’t have to move the optical tube more than an inch from where I first laid it in the rings to hit balance. The Vixen PortaMount II is an absolute engineering work of art. There’s a little cubby built in with tools should you need to adjust the tension for the alt-az, but it just didn’t need it. Just the slightest amount of friction tension was all it took and no matter what position you put the scope in, it just stayed there. Quite frankly, after having used a whole lot of clunky German equatorial mounts over the years, I was amazed. I’ve used alt-az, too… But nothing of this caliber. It’s like an incredibly well balanced dob… with legs! I’ve attached the slow motion controls, which can be put on either side of the axis, but unless you were using ridiculously high magnification, just a slight touch of the hand keeps this scope where you want it to be. Thanks to the high quality of the PortaMount II, it is just that comfortably balanced.

So, now we’re off to the optics test. Well, finally. A little flaw at last or one of you out there is going to accuse me of gushing Vixen because they donated a scope. If you’ve been paying attention, then you know the key word here is Vixen R130Sf Newtonian Reflector Telescope. And what will happen to any reflector telescope that’s made a 3,000 mile trip via UPS? Yeah. It needed collimated. Painful process involving lasers, artificial stars and much pulling of hair and gnashing of teeth? No. Just a tweak with a screwdriver. Just like the finderscope, it only needed the most minor of adjustments to be put right back where it belonged.

In the comfort zone…

EOS_1570But! Back to the optics. The Vixen R130Sf Newtonian Reflector Telescope came with two eyepieces – a 20mm and 6.3mm – and this weird looking extension I wasn’t familiar with. Perhaps the 1.25″ adapter? Well, as soon as I put in an eyepiece to do anything more serious than align the finder, I figured it out. The extension/adapter needs to be screwed over the focuser drawtube to bring the eyepiece out to the proper focal length for perfect focus for these eyepieces. It’s a little unusual, but I didn’t walk out of the cornfield yesterday, you know. The Vixen R130Sf is a 650mm focal length f/5 and I’d rather have an eyepiece extender incorporated into the design than have an added lens down inside to rob more light and collect dust. Once in place? Blam! Razor sharp focus and all we need is dark…

And I’m feeling really comfortable.

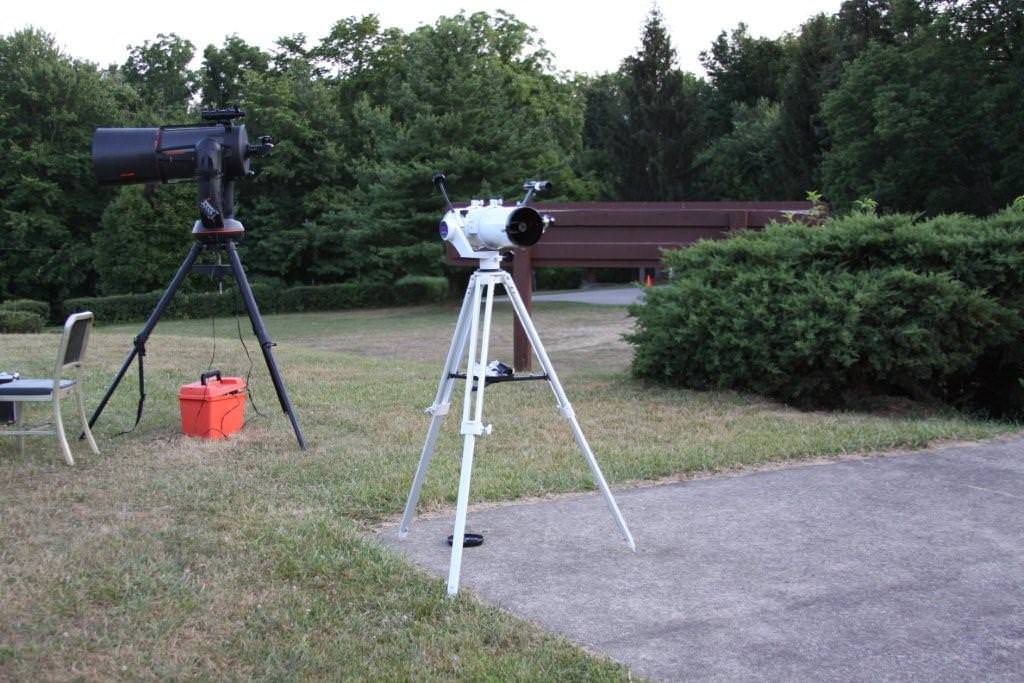
The Milky Way came out to sing and dance that night and the R130Sf Newtonian Reflector Telescope on a PortaMount II did Vixen proud. Without being tied to the restrictions of the EQ, I was all over the sky. It was simply nothing to find 10 Messier objects within minutes – and even share the view. I always have great fun when I’m observing with a bunch of guys with GoTo scopes and we race to see who gets there first, eh? By the time they get done aligning everything and punching buttons, I’m already two past you. But then, give me a faint, vague fuzzy and it make take an hour and six star charts. The real kicker for me is just that it is a pure scope. It doesn’t require batteries, electric cords or power packs. Just a little sky knowledge and patience are all it takes.

So how was the view? We’re talking about a telescope with an aperture of slightly over 5″ and the ability to reach at least 12th magnitude. Low power delivered great rich field, but did have just a tiny little band of coma around the outside edge. Perhaps this is something that would bother someone like say, oh, an astrophotographer, but at first I was too busy being delighted on its nebula performance to even notice. Those little touches like being able to see the Trifid nebula mean alot to me, you know. Higher magnification delivered smack you in the eye resolution on objects like globular clusters and planetary nebula… And I just didn’t have the heart to try other eyepieces in it to see if it cleared up the slight coma issue. Why?

Because I was so darned comfortable.

vixen_R130Sf_portamount-LI walked all over the night sky with that Vixen telescope, and it’s gonna’ break my heart to see it go. I’ve handled a lot of expensive, exquisite optics over the years – just like I’ve handled a lot of gotta’ be careful with ’em because they’re cheap scopes… But I’ve never ran across one that felt like I’d been using it for years the moment I laid hands on it. The Vixen R130Sf is absolutely the perfect size for someone who needs enough aperture to light up popular deep sky objects, but doesn’t need to lug around a 12″ telescope where ever they go. This one is a true workhorse – capable of showing a huge amount of the NGC catalog and delivering lunar and planetary views without requiring dewshields, battery packs, bells, strings or whistles. It’s just a great scope that’s built to last and one meant for someone who plans on using it for years. If you think there’s a coma issue? Then don’t look at the very edge… look at those perfect sharp pinpoints in the middle. The PortaMount II is quality through and through, it’s not going to just fall apart on you and it would be oh-so-easy to adapt any number of other telescopes right to it just as easily as the R130Sf went into place with that blessed universal dovetail. Go on, accuse me of saying things I don’t mean because this is a donation… I dare you. Because I’m telling you right now that there’s a couple of my scopes that I’ve lent to friends that I’m going to offer to them for cheap. Why?

Because I’ll want that Vixen comfort back.

Check out Amazon.com for cool deals on Vixen R130Sf Newtonian Reflector Telescope.

My most heartfelt thanks to the good folks at Vixen Optics for their generous donation. Please know that your support will benefit thousands of children who come to us each year for astronomy outreach! For those of you interested in the Vixen R130Sf Newtonian Reflector Telescope and PortaMount II, please support Vixen by purchasing from any of their premier dealers, such as OPT, Woodland Hills, Smart Astronomy, Telescopes.com and Scope City. Many thanks to Mike Romine for remembering to bring a camera, and to Mark Vanderarr for being far more photogenic than myself, and to Steve Carter and Bob Kocar for helping me “test” it.

I Could’a Been A Contender… NGC 2903 by Warren Keller

This beautiful Leo spiral galaxy – NGC 2903 – is only some 20 million light-years away and is one of the brightest galaxies visible from the northern hemisphere. Despite easily being seen in larger binoculars and small telescopes, for some reason it was never included in Charles Messier’s famous catalog of celestial grandeur. “You don’t understand! I could’a had class. I could’a been a contender. I could’a been somebody instead of a bum, which is what I am.” This incredible color image taken with an amateur ground-based telescope shows off the galaxy’s exquisite spiral arms – including intriguing details of NGC 2903’s core region, a stunning amalgamation of old and young star clusters with immense dust and gas clouds. But there’s a whole lot more there to be seen…

Just a little smaller than our own Milky Way, NGC 2903 is about 80,000 light-years across and displays an exceptional rate of star formation activity near its core in visible light – but it also screams bright in radio, infrared, ultraviolet, and x-ray bands. While in every respect, this galaxy is much like our own home neighborhood, just like “On The Waterfront”, there’s some mysterious goings-on along that central bar – very young, hot globular clusters. Apparently, star formation is absolutely running rampant in a 2000 light-year wide circumnuclear ring surrounding NGC 2903’s center. “This isolated system strikingly reveals a soft extended X-ray feature reaching in north-west direction up to a projected distance of 5.2 kpc from the center into the halo. The residual X-ray emission in the disk reveals the same extension as the Ha disk. Since galactic superwinds, giant kpc-scale galactic outflows, seem to be a common phenomenon observed in a number of edge-on galaxies, especially in the X-ray regime, and are produced by excess star-formation activity, the existence of hot halo gas as found in NGC 2903 can be attributed to events such as central starbursts.” says D. Tschoke (et al), “That such a starburst has taken place in NGC 2903 must be proven. The detection of hot gas above galaxy disks also with intermediate inclination, however, encounters the difficulty of discriminating between that contribution from disk and active nuclear region.”

So what causes extremely starburst activity? As we’ve learned from our astrophoto lessons – galaxy interaction is a prime suspect. “NGC 2903 is found to have an H I envelope that is larger than previously known, extending to at least three times the optical diameter of the galaxy. Our search for companions yields one new discovery. The companion is 64 kpc from NGC 2903 in projection, is likely associated with a small optical galaxy of similar total stellar mass, and is dark matter dominated. In the region surveyed, there are now two known companions: our new discovery and a previously known system that is likely a dwarf spheroidal, lacking H I content.” says Judith A. Irwin (et al), “If H I constitutes 1% of the total mass in all possible companions, then we should have detected 230 companions, according to cold dark matter (CDM) predictions. Consequently, if this number of dark-matter clumps are indeed present, then they contain less than 1% H I content, possibly existing as very faint dwarf spheroidals or as starless, gasless dark-matter clumps.”

So how do we study what we cannot see? Only through photography and understanding how each phase of cosmic construction affects photographic results. “These results, and other considerations, have led to the hypothesis that the dark matter surrounding spiral galaxies consists of cold gas, mainly in the form of molecular hydrogen. The spatial distribution of this cold gas should be similar to that of the observed neutral hydrogen.” says H. Hoekstra of the Kapteyn Astronomical Institut, “There is a potentially powerful selection effect that may cause a relationship between the surface densities of HI and dark matter for the galaxies in our sample. This is because the HI surface density distributions of the galaxies in our sample have the common characteristic that the highest values in the inner regions, as well as the lowest values in the outer regions are similar from galaxy to galaxy.”

Now that we understand how astrophotos are used to determine galactic properties, open the image and take a closer look at all the galaxies hidden nearby NGC 2903 – and the details inside. When Warren Keller and David Plesko at Cherry Mountain Observatory collaborated on this photo, you can bet the first results from the raw data didn’t look like this finished work of art. For those of you who already understand the ins and outs of what makes deep space imaging what it is – perhaps I’ll totally explain this wrong, because it’s a new concept to me… But that’s why the world has Warren Keller.

When processing a raw image, there’s a lot more to it that just whacking it into photoshop and tweaking this or adjusting that. There’s things hiding inside and just like a great symphony, it takes a composer and a virtuoso to end up with music to make you cry. Because I don’t fully understand the process, I asked Warren to help me along, so I might also understand how these tiny details are drawn from thin air… or the blankness of space. “One of my big things is color balance- being true to the data, coupled with an understanding of how the object should look. What I see though is what I call assumptive processing- ‘It’s a galaxy and its arms must be really blue!’ In reality, each is very different and that’s why I love ’em so much. That sets a precedent, but I say be faithful to the data (once gradients are eliminated).”

And taking that data and teaching others how to process it is what Warren is all about. “All that being said, I’m aware of Atmospheric Extinction, CCD’s relative insensitvity to Blue, especially front lit and ABGs and the cancellation of Blue by the yellowing lens of middle-aged folks.” But is there a way that even us yellowing old dogs can be taught new tricks? Yeah. Warren not only knows how to sing the song, but he’s a music teacher. He’s created a teaching program called Image Processing for Astrophotography – or IP4AP. Say’s Warren: “IP4AP “Image Processing For Astrophotography” was created for Astrophotographers of all skill levels. There are many resources for learning Image Processing, but we believe these techniques are best taught – Visually!”

So, I was curious… And here’s a introductory look at Warren’s teaching style:

Before you take a cut out of me for being “commercial”, please remember that my job as a astronomical reporter is to also find products and methods which I find exciting and our readers might want to be made aware of. And, quite frankly, after having looking at many of Warren’s images and how his lesson plans work, I thought there just might be more than one budding (or seasoned) astrophotographer out there that might find what IP4AP has to offer of great value. As a matter of fact, even premier astro imagers like Dietmar Hager have used it. “Having had a couple of sessions with Warren covering essential facts about sophisticated usage of AstroArt and Photoshop was like leading me out of the dark basement of astrophotography into the highlighted groundfloor and further up. Guys, and I can tell you this is a high rise building and Warren is the perfect guide. Thanks for enriching my knowledge about digital processing!”

Go on, open it… Count all the details you can see in this image of NGC 2903 and its companions… and when you’re ready to become a contender, you can find IP4AP at many great retailers like OPT, Adirondak Astronomy and High Point Scientific. You’ve made a large investment in equipment – Now make a small one and learn the secrets of producing stunning astrophotographs!

A High Definition Telescope? Yeah… The Celestron EdgeHD!


In this new generation of everything high def – from computer screen to televisions – is it possible to create a high definition telescope? The answer is yes… And the designer is Celestron. As always, I keep my eyes and ears open when it comes to the latest in astronomy equipment. While I’ve seen a lot of things come and go over the years (including other Ritchey-Chretien and astrograph knock-offs), the Celestron EdgeHD is a design that I think really deserves a closer look…

schmidt-cassegrain_telescopeFirst let’s start the story off where it deserves to be started… the basic Schmidt Cassegrain design. Some four decades ago, the SCT was cutting edge technology. Its predecessor the Cassegrain, used a primary concave mirror and a secondary hyperbolic convex mirror to focus the light back through the hole in the primary to the eyepiece or camera. The Schmidt design allowed for a corrector plate to be added to the optical path to help eliminate spherical aberrations – the increased refraction or reflection of the light rays when they strike near the mirror’s edge. This produced great flat-field images and long focal lengths in an extremely compact design – but it also introduced a very expensive telescope. One the average consumer couldn’t afford.

Enter Celestron…

In 1970 Celestron telescope designers and engineers announced a revolutionary method of producing Schmidt-Cassegrain telescopes at a reasonable cost and in volume. This optical breakthrough was incorporated in the first Celestron C8. The popularity of the C8 Celestron telescope in the consumer marketplace led to the C5 Celestron telescope and then to larger versions, including an 11″ and 14″ telescope. The “orange tube” telescopes became an instant classic and many of them are still in use today… But the design could be a little bit better, couldn’t it? Yeah. It could be aplanatic.

Aplanatic telescopes can be designed with two aspheric mirrors, configured to correct spherical and coma aberrations – a design which minimizes astigmatism and can be optimized to have no vignetting across the field. What’s more, the aplantic design also allows for a significant reduction in scale sizes when it comes to astrophotography, making them extremely compatible with finely-pixilated modern imaging equipment, like CCD cameras. But that would also make it very expensive wouldn’t it? Yeah… It would. But still, that design could get a little bit better couldn’t it? Sure. It could be an astrograph!

In this case, the astrograph is a telescope designed for the sole purpose of astrophotography. Not so great if you want to use it visually… But just dandy if you’re interested in wide field surveys of the night sky. It’s a pure research grade telescope – designed to work in conjunction with a specific shaped photographic plate or CCD detector. With an astrograph you could work on things like astrometry, stellar classifications and, with time, even proper motion of nearby stars. An astrograph means the possibility of finding things like asteroids, meteors, comets, variable stars, nova, and even unknown planets. But an astrograph means you’re talking about a mighty expensive telescope, right? Right.

Enter Celestron…

optical-design

Just like 40 years ago when Celestron revolutionized the affordability factor of the Schmidt-Cassegrain design (once also the domain of researchers only), they are about to revolutionize amateur astronomy once again by giving the world its very first high definition telescope – the Celestron EdgeHD.

Is Celestron making promises it can’t keep? Let’s take a look at the track record of some major telescope manufacturers.

It hasn’t been that long since Meade also introduced a similar design telescope known as the ACF, or Advanced Coma Free. It was a knock-off of the Ritchey-Chretien design, and supposedly free of third-order coma and spherical aberration, and heavily advertised as being as the same design as the Hubble Space Telescope. Well, we all know what happened right off the bat with the Hubble, don’t we? Darn right. One little wrong tweak in the optical design led to a major Hubble error and one wrong move in poorly executed RCT design will lead to fifth-order coma, severe large-angle astigmatism, and comparatively severe field curvature.

When companies compete with comparative design models for the consumer, they’re putting out a lot of advertising hype your way. But let’s cut to the chase. Two companies… Both produced a sky navigation product – one failed and one endured. Which one? Yeah. The Celestron SkyScout. You’re getting the picture. Let’s take our own IYA Live Telescope as another example. The Meade ETX lasted through 28 observations and I have a Celestron 114 that’s 22 years old and I can’t even begin to fathom how many times it’s been used. Try calling or writing the companies for customer service or questions… See which one answers you and which one doesn’t.

20090429_osct11_coma_half-2

Will the Celestron EdgeHD telescope be all that? The image you see here was taken by Andre Paquette using Celestron EdgeHD Optics. I’ve examined it upside down, backwards, forwards and from edge to edge… and what I see are perfect stellar images. (Open the full-sized image and check it out yourself. You’ll be impressed!)

edgehdsellsheet_Page_2_Image_0005Celestron promises the light becomes more concentrated when focused precisely. This maximizes image brightness, improves resolution and limiting magnitude when compared to telescopes of equal aperture. I know for a fact that you can’t beat Celestron’s Starbright XLT coatings, because I’ve never had to recoat a Celestron mirror yet. I look at the modern ergonomic design and I don’t see “cool” the same way as others… I see a self contained unit that isn’t going to be dragging or snagging on things – one with cooling vents located on the rear cell allow hot air to be released from behind the primary mirror. I see a telescope that’s going to perform incredibly in both visual and photographic capabilities…

11093_cge_pro_1100HDSo where’s the bottom line? The cost. Don’t start selling your gold dental fillings or thinking about taking out a second mortgage on your home, because Celestron has done it again. Just like so many years ago when they made the SCT affordable to backyard astronomers, they are now putting cutting edge, research grade design telescopes into the realm of possible. The average price is only about 1/3 more for the optical tube assembly than a standard SCT and it gets even lower as the aperture goes up. If you need the complete telescope package with a mount and tripod? Sure. It’s expensive – but the high quality of the mount is what you’re paying for and it’s worth it. (Remember two little telescopes – one that lasted through 28 observations and one that’s still going strong after 22 years.) What kind of faith do I have in Celestron? The same faith I’ve always had. Every Celestron product I’ve purchased over the years is still functioning… and the same cannot be said of other “M”anufacturers.

Go on… Take a look at the Celestron EdgeHD for yourself! You’ll find much more information and illustrations at the Celestron EdgeHD Tour pages, and you can take a look at pricing, specifications, and other information through Celestron’s premier dealers such as OPT, telescopes.com, Scope City, High Point, Hands On Optics, Astronomics and Adorama.

What will they think of next??

Summer Fun – The Celestron Optics Kit

For anyone who does astronomy outreach work, is interested in practicing binocular astronomy or is just looking for a great teaching tool, I’ve got something you really need to take another look at – the Celestron 10X50 UpClose Binoculars and Green Laser Pointer Optics Kit; great for binocular astronomy. Almost a year ago I did a review on this product, and I’m back to tell you how it’s held up against another year of service.

When I first researched the Celestron Optics Kit I was looking for inexpensive binoculars that anyone could handle for our guests at the Observatory. During a public night or an outreach program, we may have a hundred or more guests and, let’s face it, providing several pairs of binoculars can be expensive for a non-profit organization. When doing something of this nature, you face two dilemmas. One… When you can afford them, they are invariably low quality and you’ve just disappointed the person you were trying to teach binocular astronomy… and… Two… When you get a good pair of binoculars they cost so much that you’re afraid to let smaller children handle them. (Which is equally wrong, because kids are people, too!)

Of course, since the green laser pointer came along a few years ago, all of us have learned a lot of aiming tricks. They can be aimed (carefully) through an optical finderscope to project a beam in the sky, they can be rigidly mounted on a telescope or binocular body as a finder, they can be used to point things out, or… in my case… I quickly learned that even a novice (right down to my five and six year old grandchildren) can follow the visible beam to where you target it, to its end with binoculars. Then the beam is switched off and the object is in the binoculars! With a mind for safety, it’s a simple and fun way to teach anyone to use binoculars for deep sky observing.

But the green laser wasn’t what I was after… It was the binoculars, wasn’t it?

Another aspect of the binocular astronomy classes we give is providing a monthly star chart to our guests that highlights a few objects for them to locate on their own. It’s just a simple handout – one I print out at home before any program and we stand around in the dark and share a red flashlight as I teach them how to read it and point out the marker stars with the green laser. Yep. We share the red flashlight… A simple tool that should be in the hands of every single person that even remotely takes an interest in reading an astronomy chart outside at night… And one that I just don’t happen to have ten extra to pass around.

But the red flashlights wasn’t what I was after… It was the binoculars, wasn’t it?

So, back to basics. I needed multiple pairs of binoculars that could withstand hard use (like accidentally being dropped on concrete, run over by a Jeep or left out overnight) and perform well. After many years, and many pairs of personal binoculars, I’d love to put Nikon, Oberwerk or Fujinons in every one’s hands, but the reality check is not every one’s hands are ready for these types of binoculars. What I needed was something I knew from experience that could withstand being dropped, was water-proofed and provided an excellent view. In that case, experience tells me Celestron and a great all-purpose astronomy binocular size is 10X50.

So, here I am… Staring at the Celestron 10X50 UpClose Binoculars and Green Laser Pointer Optics Kit for $59 and then the reality check really comes home. For this price I can order five… And get five pairs of binoculars, five green laser pointers and five red flashlights… All for about what five pairs of binoculars would cost! Click. Ordered. Now I find out they’ve gone down to $29.95 and guess who’s ordering more?

Yep. We are. And here’s the reason why…

handnavigationEvery year we see thousands of visitors each summer and teach the night sky. Lessons begin as simply as learning navigation directions – like degrees – with hand spans and finger widths. When it comes down to nuts and bolts, the more experienced people you have with you armed with green lasers, the more effective any program can be, because a lot of seeing the laser beam has to do with the angle you are looking at it. (And unless you’re using one that will bore through concrete, no typical green laser pointer is going to cut through moonlight, ok?) In this case, we can easily do a presentation where we can point out constellations with the green lasers and responsible adults can also assist in the program by pointing out particular stars or objects for us to name. By having several flashlights available, small groups of kids can work together with charts and adults at the same time to learn constellations on their own. When it’s time to practice astronomy, we use the same “follow the beam” trick, they learn and have a great time!

outreachSo how do the binoculars hold up to exuberance, youth and use? Like the fabled Timex watch… If you think a 5 year old would be hard on equipment, try handing it to a group of teenagers. (Word of warning? Never trust them with your laser.) While most of them are respectful, the fact remains that these original 5 pairs of Celestron UpClose 5X10 binoculars have had the right eye diopter twisted like Chubby Checker, the interpupillary distance adjusted in and out more times than my waist size and the focuser spun around more times than the big wheel on the Price Is Right. They’ve had mascara cleaned off the lenses with a t-shirt, knocked off the observing table and left outside. In general… They’ve been used. But you know what? They still perform. All five pair have kept their collimation. Not one pair shows any signs of getting moisture inside and every last one of them still operates just the way they did when they came out of the box.

Are the laser pointers and flashlights still using the original batteries? Oddly enough, two of the flashlights and one of the laser pointers still is. None of the flashlights malfunctioned with time, but we did have two laser pointers that have to be “warmed up” to use. (Don’t ask me why, but they work brighter after they’ve been on for a few minutes.) Also, when the weather dipped down below the freezing point, the lasers also needed to be kept warm (like in an internal coat pocket) to function quick and easy. Sure, these low power green lasers aren’t going to stun the crowds with their light sabre-like qualities and shoot down passing aircraft, but they are highly efficient at being a simple beam pointer and work just fine. Just try to find one for what this whole kit costs!

Am I disappointed in the Celestron 10X50 UpClose Binoculars and Green Laser Pointer Optics Kits? Not hardly – and you won’t be either. Combined with a simple star chart and a starry night, you’ll be in for a whole lot of summer fun for about what a large pizza would cost. It is an exceptional bargain at $29.95 and one I highly recommend. As a matter of a fact, I recommend it so much that OPT is even going to give three of these kits away to Universe Today readers to keep so you can test it out yourself! From now until June 25 at 12:00 pm PDT you can send an email with the title of this review in the subject line and your name in the body of the email and Universe Today will randomly choose a winner to get your own Celestron Green Laser Pointer Optics Kit for free! All you have to do is pay for shipping, ok?

Put ’em to the test and see if you don’t agree. The Celestron 10X50 UpClose Binoculars and Green Laser Pointer Optics Kit is an exceptionally rugged and good performing astronomy binocular and having a red flashlight and green laser is a huge bonus.

The Celestron 10X50 UpClose Binoculars and Green Laser Pointer Optics Kit were purchased for this review from Oceanside Photo and Telescope and three free kits will be provided to randomly chosen winners by Fraser Cain of UniverseToday.

The Celestron “FirstScope” Telescope: Official Product of International Year of Astronomy

Celestron FirstScope Telescope

[/caption]

One of the most important goals of the International Year of Astronomy is to “promote widespread access to the universal knowledge of fundamental science through the excitement of astronomy and sky-observing experiences.” What’s the objective? “Enable as many laypeople as possible, especially children, to look at the sky through a telescope and gain a basic understanding of the Universe.” And how is this going to be facilitated? By the “number of laypeople, especially young people and children, viewing the Universe through a telescope at street astronomy events, star parties, professional observatory webcasts etc.” and the “number of ‘cheap’ new telescope kits produced, assembled and distributed.” Well, the Celestron FirstScope Telescope hits the mark perfectly as aimed at anyone, able to view the Universe and inexpensive, but it’s anything but cheap…

In 1609, world-renowned Italian scientist, Galileo Galilei, introduced an elementary telescope to the growing astronomy community which sparked interest into the mysterious night sky for centuries to come. Four centuries later, in celebration of the International Year of Astronomy 2009, Celestron offers the portable FirstScope Telescope. The FirstScope pays tribute to Galileo Galilei and many of history’s most notable astronomers and scientists by displaying their names around the optical tube. We honor the contributions of these men and women, who brought us one step closer to understanding the universe around us.

When I first read the introduction and saw the first images of the Celestron Firstscope Telescope, I knew that I’d have to get my hands on one. They are a unique little altazimuth reflector – a tabletop model that bears a strong resemblance to the dobsonian design. Of course, I read the specifications, and I knew that a 76 mm (2.99 in) aperture reflector optical tube with a 300 mm (11.81 in) focal length wasn’t going to be a whole lot large than a tennis ball can, but I’ve learned that small telescopes are quite capable of performing some amazing feats when put into the right hands. According to what I’ve read the Celestron First Scope is a nice, fast focal ratio of f/3.95… and from what I know of Celestron telescopes, it should behave quite nicely. But there’s only one problem.

They aren’t available on the market yet.

So who would be the kind of person to wander around NEAF confronted with telescopes worth tens of thousands of dollars, but would be the one to take off to neverland with a kid’s telescope that cost less than $50? Yeah. You’re right. Me.

celestron-firstscope-1From the moment I laid eyes on the little black sonotube covered with the most famous names in astronomy, I was charmed. The mount is absolutely made out of enamel covered pressboard and its bearing is basically a big locking nut… But, hey. So am I. I took the whole thing apart and put it back together again (sans removing primary mirror cell, secondary and focuser – because I didn’t want to have to go “borrow” a laser collimator) in a matter of minutes and I found it surprisingly well constructed. Both the base and the bearing are going to hold up to use… And I don’t mean just casual use… I mean good, hard, honest-to-goodness kid use. Unlike a dobsonian, the side bearing needs to be loosened to move the telescope in its “up and down” path and re-tightened to hold position, but the user is faced with two options. The bearing is machined well enough that it can be placed to the “just snug” point where friction holds it in place and allows for minor movements (such as slight tracking adjustments) and it is quite strong enough to allow for thousands of tightening (and overtighenings) as the years go past. If something should strip out? These are common parts. It can be replaced with trip to the hardware store.

Now for the optical tube…

firstcopeGood old sturdy sonotube. I used to be afraid of “cardboard” many years ago, but I’ve learned with time. Despite what you might think, it holds up to dew, cools down to ambient temperature like a dream, and really has its advantages – like not dinging easily. The 1.25″ rack and pinion focuser on the Celestron FirstScope Telescope is very standard and a tiny bit stiff, but we’re not talking cotton candy here. The focuser is surprisingly quality, well-machined, and is going to withstand use and abuse. It has excellent clearance from the secondary and more than sufficient enough backfocus to allow for a wide variety of eyepieces. What’s that you say about eyepieces? Oh, yeah. Again, Celestron has outdone themselves by providing two 1.25″ eyepieces – a 20mm and a 4mm. Did I hear you groan? Yeah. Me, too. A 4mm is simply too much magnification for a scope that size, but when testing it on a larger, more stationary target (like the Moon) I found it wasn’t too bad. Again, surprising quality because the eyepieces and focuser alone were worth what the telescope cost!

How did it perform? If you aimed the Celestron FirstScope at something large, you’d be doing fine if you were a beginner, but like most small optical tube assemblies – it isn’t offered with a finderscope. While reflex sighting along the tube isn’t too hard to do, I can also see where that could be extremely frustrating for someone a bit more new to the game. So… I asked for a solution. Guess what? Celestron telescope had one that fit the criterion – inexpensive, but not cheap.

first_scope_accessoriesEnter the Celestron FirstScope Telescope Accessory Kit. People? For under $20 I just got handed a 1.25″ Celestron 12.5 mm eyepiece, 6mm eyepiece, moon filter, nifty little carry bag for the whole outfit, and get this… a 5X24 finderscope and bracket. No kidding! A real, honest-to-goodness optical finderscope… Not one of those “red dot” marvels that accidentally get left on and whose batteries run down and end up being totally useless next time you go out unless you have spares. Folks? You can’t even buy a moon filter for under $20, let alone a finderscope, eyepieces and… and… what’s this? Why, there’s even a CD ROM in here called “Sky X” that teaches you, prints maps, runs a planetarium program and more.

Am I impressed? Yes. I will give you fair warning that the Celestron FirstScope telescope is not the Hubble. I will stress to you repeatedly that you are not going to see majestic sweeping spiral arms on tiny galaxies – nor are you going to resolve globular clusters or reveal intricate planetary details. But, what you can expect from this telescope is far, far more than Galileo saw 400 years ago. When put on a steady surface, the Moon will display its tortured surface and Jupiter its moons. Bright, open star clusters will become things to marvel over and the Andromeda Galaxy will look like it truly is next door. Just as the rings of Saturn “disappeared” on Galileo so long ago, you will only see a fine line now to mark their place until the tilt changes again… But who cares when the summer skies are filled with bright nebula to explore, fuzzy globular clusters to capture and the Milky Way curls across the sky like a swarm of fireflies? Do it for your kids… Do it for your grandkids. Do it for yourself as a momento of IYA 2009. You won’t be disappointed.

It’s small wonder the Celestron FirstScope telescope named was Official Product of International Year of Astronomy 2009, for the FirstScope truly pays tribute to the men and women who brought us one step closer to understanding the Universe around us by putting an affordable “real telescope” into the hands of anyone who wants one. It won’t be long until they’re available at Celestron dealers everywhere, and you’ll find them for under $50 (and the accessory kit for under $20) at premier Celestron dealers like Oceanside Photo and Telescope, Scope City, High Point Scientific, Adorama and Astronomics.

Reminder to Universe Today Readers… Don’t forget! While all premier Celestron dealers will offer the FirstScope at the same price, you’ll get a discount for being a Universe Today reader if you enter our name in the Club Affliliation section if you chose to order a Celestron FirstScope from OPT.

The Telescope Tackle Box – Celestron 94303 Accessory Kit


It’s been a few months since I’d reviewed a product, not because there isn’t anything new out there – but because I like things I can get excited about. Sure, I love fine, expensive optics, exotic telescopes and tech toys, but isn’t the whole point of asking for a product to use and abuse to give you an idea of what’s worth your hard-earned money and what isn’t? Yeah, I thought so, too. That’s why when I began researching Celestron products for “Guide To Space”, I knew I had to get my hands on one these to check out…

While the little kid in me still loves to get packages in the mail, the astronomer in me loves to open them up and see a brushed aluminum case inside the cardboard box even more. For those of us into the telescope game, we treasure cases of any kind and I have a wide collection of them – from discarded make-up kits to plastic power tool castoffs. I’ve found the object is to protect my equipment. While it doesn’t matter if one of my old sets of tripod legs fit great in an old tent pole bag, I’ve noticed it sure makes my heart beat a lot quicker if the case is shiny and has the manufacturer logo emblazoned on the front!

caseI wasn’t disappointed when I opened it either. The aluminum accessory case is well constructed with reinforced edges and corners, the hinges operate smoothly, the handle isn’t going to just come off and the latches are secure. Inside is lined with dense foam with circular cut outs for the included eyepieces with room for more and a rectangular cut out for the filters in their cases. First test? Ooops. I just dropped it from a height of about a meter and a half onto a hard surface and it didn’t pop open. Second test? I could set it on a hard surface and open it up and it didn’t flop over. Third test? Yeah. Everything inside was still where it was supposed to be! So far… So good.

There’s a very good reason why I’ve referred to the Celestron 94303 Eyepiece and Filter Accessory Kit as a “telescope tackle box”. Like the many compartmentalized fishing buddy, this kit contains a wide variety of celestial “lures” that serve an even wider variety of purposes. Let’s take a look at each one and what I encountered over several days and times of viewing different objects:

celestron_32mmThe least magnification factor of all the 1.25″ barrel eyepieces supplied here is the Celestron 32mm plossl. It’s an absolutely classic 4-element design and has a 44 degree apparent field of view, so how does it perform? With my 900mm focal length reflector is providing around 28X magnifying power. This gives outstanding view of wide field subjects such as the Orion nebula complex, the Plieades and combinations of objects such as M81 and M82… including great full disk lunar. The coatings perform very well and so do the optics. I don’t pick up any severe flaws at the edge of the field, the color correction is bright and clean (Orion nebula is grey/green as it should be, and the Plieades are blue) and the Moon doesn’t display reflections. In a 660mm focal length refractor, we’re only getting about 20X magnifying power and the 1525mm focal length reflector gives me about 48X. At all ranges, the Celestron 32mm plossl performs just fine and the eye relief is excellent.

celestron_15mmThe next up is the Celestron 15mm plossl and a jump to about a 52 degree apparent field of view. First choice is the 900mm focal length reflector and a magnifcation factor of 60X. This is a little bit stronger than what I would have preferred for a mid-range magnification factor. For the 660mm focal length refractor, it provides 44X which is much better. This still keeps the Moon at a full disc and larger objects within range. However, in the 1525mm focal length reflector, it provides just over 100X – but at a great eye relief with bright, non-vignetted edges. This makes the 15mm plossl an exceptional large galaxy study eyepiece and makes small nebula nice and bright. Again, the color correction is outstanding and there are no spurious (optically caused) reflections around bright stars like Sirius.

celestron_9mmNow for the 9mm Celestron plossl. Into the 900mm focal length reflector it goes. Eye relief is marginal, but it does still carry the nice 52 degree apparent field of view at 100X. It’s showing me the same performance properties of the 17mm in a longer focal length telescope – but with less eye relief. In the 660mm reflector it provides 73X, which means you’re sacrificing some eye relief to get the magnification, but the images are still surprisingly bright and no coma at the edges. In the shorter focal length telescopes, this is a good galaxy study eyepiece and does surprisingly well a small bright nebulae, too. In the 1525 focal length reflector it gives around 170X which makes it just dandy for smacking resolution out of globular clusters and studying galaxy details while still keeping the object bright. This is also a great range for the longer focal length to use for lunar and planetary studies because you’re not hammering the magnification so much that the least atmospheric disturbance is so noticeable.

celestron_6mmReady for more? Then let’s go for the Celestron 6mm plossl in the 900mm focal length reflector. This gives 150X magnification factor and no where near the scope’s practical limits. Even though the apparent field of view is still good, the eye relief is beginning to really suffer. However, I am quite surprised to see the image remains fairly bright on galactic studies. In the 660mm focal length refractor I’m getting 110X, and while this scope isn’t a “light bucket” this magnification range make the scope rather exceptional on pretty double stars, lunar and planetary details. For example, Iota Orionis was easily split and very beautiful, it was possible to see glimpses of the Cassini division in Saturn’s rings and Comet Lulin filled the field! As far as performance is concerned, put the 6mm plossl in the 1525mm focal length reflector and you get 254X. Go on… Take a look at the Trapezium. You’ll see red and blue stars!

celestron_4mmLast, but not least is the Celestron 4mm plossl. In the 900mm focal length reflector you get 225X. This is hammer time for lunar and planetary details – as well as double stars. The eye relief isn’t any worse than the 6mm, but you’re pushing the magnification to the point where the least atmospheric disturbance really begins to show. In the 1525mm reflector, this means 381X and just around half of what its practical magnification limits are. At this point, you are also dimming the image as well. In the 660mm focal length refractor it’s producing 165X and pushing it to its limits. While I’m getting nice airy disc, it just seems very “on the edge”.

When it comes to the eyepieces included in the Celestron 94303 Eyepiece and Filter Accessory Kit, I found all of them to perform very well in every telescope I chose. You must remember the magnification factor of any eyepiece is the focal length of the telescope divided by the focal length of the eyepiece – and that every telescope has a practical magnification limit. You must also consider that while the same eyepiece performing at 100X in one telescope, will not perform like a similar 100X power in another telescope because each telescope is capable of different resolution factors and light gathering ability. With this in mind, know that each one of these eyepieces normally retail for around $45 a piece, are threaded for filters, have protective caps, produce a nice, flat field with no screaming vignetting, good color correction, excellent contrast and decent eye relief. In my book, that makes them a valuable asset to any eyepiece collection.

celestron_2xHow about the barlow lens? Yes! There’s a 2X Celestron Barlow Lens here, too! For those of you who have never used a barlow, it’s a down and dirty, quick and convenient way of doubling the magnification power of any eyepiece – and preserving the eye relief. For example, and without being redundant, you can take any of the eyepieces reviewed above and simply double the magnification power when you place the barlow lens in the focuser before the eyepiece. In certain circumstances, this doesn’t seem to make a whole lot of sense to me because the wide variety of eyepieces included drop almost accordingly, but there is a marginal difference. Considering the barlow is an exceptionally useful tool to have in any astronomy kit and the fact that you might prefer the magnification factor and eye relief of say… the 15mm coupled with the barlow over the 8mm… it’s great that it’s in there! At around $40, the fully multicoated lenses certainly won’t cause any image degradation and the barlow just might be your cup of tea!

filter_setNow for the filters… 1.25″ glass telescope filters included with the Celestron Eyepiece and Filter Kit include Kodak Wratten #12, #21, #25, #56, #58A, and #80A. That’s awesome… But what do they do? First, let’s start with how they work. On the open end of the eyepiece barrel you’re going to find threads and these filters simply screw into these threads. What’s more, you’ll find the filter cells are also threaded to be connected to each other, so it is possible to “stack” filters. Using color filter with a telescope takes experimentation, and while you can recommend what each one is used for – only you can ultimately decide what works best for you! Each individual filter comes packaged in its own plastic padded case and they retail for around $15 a piece.

When it comes to #12 Yellow, you’ll find it reduces light transmission to 74%, thus helping to reduce glare around bright subjects such as the planets and Moon. It is known for enhancing orange and yellow features, and contrasting blue and green – such as those on Jupiter and Saturn – as well as giving nice contrast on lunar subjects. #21 Orange drops light transmission to 46% and blocks transmission of blue-green wavelengths. This means you’re going to enjoy this particular filter for seeing edge of maria detail on Mars (when Mars is close enough and big enough to enjoy) and it will improve some details in the equatorial belts on Jupiter and definitely make Saturn’s planet on the rings and rings on the planet shadow more defined. #25 Red only allows 14% of the light to come through, and this dandy little filter works well with large aperture scopes for seeing Mars polar caps and really rocks for digging unusual details off the lunar surface and helping to pick out Venus phases. #56 Light Green is a great all-purpose filter, allowing 53% transmission and works very well with Mars polar caps, Jupiter details and fine lunar details. It’s also a great “stacker” to enhance other filters, too. #58A Green gives 24% light transmission and it’s the world’s best set of telescope “sunglasses”. While it will help pick out odd ball features on Saturn, what you’ll find you use it for most is turning down the photons when observing the Moon and Venus! It also works very well in conjunction with a white light solar filter to help relieve eye strain while sketching. #80A Medium Blue is also another “classic” color filter. It provides 32% light transmission and although it will dim out other details, you’ll find it really helps when it comes to spotting the Red Spot and shadow transit events on Jupiter… and can even help distinguish differentiations in Saturn’s cloud patterns. This particular filter makes long-term lunar studies very eye friendly!

moonLast, but not least? The neutral density filter. Like its predecessors, it retails for around $15, is threaded on both sides, made from high quality optical glass, fully coated and has about a 13% transmission factor. What makes it different is 0.9 density, which means it’s reducing glare while transmitting light in a uniform manner across the entire spectrum. While it appears to have a gray color – its color isn’t affecting the wavelengths of light. That makes the neutral density filter an exceptional tool to have in your kit, because it can be used to help “tone down” disparate double stars, take the edge off the Moon when watching an occultation, shave some of the light off Venus, enhance bright stars, and become a lunar, solar and planetary observer’s best friend. While it is often simply just called a “Moon Filter”, you’ll find that you’ll use this particular little disc more than any other over the years. So often, in fact, that you may often wonder why that galaxy looks so dim only to discover you’ve forgotten to take it out of your favorite eyepiece!

stamp-of-approvalAll in all, if you were to purchase each piece of the Celestron 94303 separately, you’d have about $365 in all of these cosmic lures. So, what does the Celestron Eyepiece and Filter Accessory Kit retail for? Try $139 plus shipping. Sure, you could go fishing for the stars with just the eyepieces included with your telescope and you’ll catch them… But sooner or later, you’re going to want to start adding other things to your telescope tackle box – and lasting value and practicality are going to be a point to consider. While these aren’t “prestige” products, they are well constructed, optically well above satisfactory for the price and one of the best daggone values I’ve seen in a long, long time…

Way to go, Celestron…

My many thanks to Oceanside Photo and Telescope for once again providing us with a review product. It is very appreciated. I encourage all readers if you chose to purchase this kit from OPT, to be sure to place “Universe Today” in the club affiliation section when ordering to receive a discount on your final bill.

Midnight At The OPT Corral: Shootout Between The Celestron SkyScout and Meade MySKY

It’s midnight on the plains of Ohio. A lone tumbleweed rolls across the backyard – or maybe it’s just a black german shepherd skulking about in the starlight. A mysterious figure dressed in black steps off the deck planks and out into the open. She’s come fully armed and ready to duel it out. But this time it isn’t the classic battle between the McClaurys and Clantons versus the Earps and Doc Holliday… It’s a shootout between a Celestron SkyScout and a Meade mySKY.

There isn’t any spurs to chink on my tennis shoes as I make my way out across the open back field. However, I am just strange enough to be dressed in a black leather duster and a borrowed black leather fedora and I’m doing my best cowboy swagger as I mosey my way towards the fence row where I’d earlier hung a cardboard sign that proclaimed it to be the “OPT Corral”. I’m in the wide, wide open now… Armed with fresh batteries and the latest technology. I want my questions answered and I want to give those answers to you.

Ready… Set… Aim… Shoot!

Hands down, the Meade mySKY is the single coolest astronomy gadget I’ve ever used. The second it turned on I was hopelessly, helplessly in love with the graphics, music and program. Five minutes later I had a short in the audio cable and when I tried to turn it off the button stuck and even at the risk of getting dew and grass on my good leather coat I had to sit down and take the batteries out to fix it. Once done, everything reset, and we were good to go again, but the nagging problem with a slight short in the audio cord persisted. Still… It’s terminally cool. Every time I would aim it at something I would have this vision of Carl Sagan out there with me, wandering through the weeds, puffing away and aiming a ray gun at the night sky. Hollywood all the way, baby… The multi-media presentations are simply stunning (and after awhile, annoying) and I can say without a doubt that for anyone who even remotely has an interest in astronomy that you’d love it, too.

Ready… Set… Aim… Shoot!

The Celestron SkyScout has about all the visual appeal of a chubby chick at a dance – but take it from a chubby chick at a dance – we’re the type you want to meet. Yep, we aren’t glamorous – but we don’t short out and we’re still on the same batteries you put in us over a year ago. We’re not “wowing” you with fifteen minute video on everything you wanted to know about the Moon but were afraid to ask, but guess what? We’re not blinding you either. We’re just a nice sturdy little box with a pleasant voice that explains an object when wanted and needed, and gives a red scrolling readout when wanted and needed. Same goes with the other… But not all the time, you see. No matter how many times you turn it off and on, or have to take the batteries out to turn it off and on, you have to go through the initial video presentation. But I digress…

Ready… Set… Aim… Shoot!

Once you’ve learned to use the Meade mySKY functions, you can dim the screen and change it over to night vision mode. However, I will warn you that even very dim and red, it is still like pointing your cell phone screen at the sky. Personally, I found it blinding and had to cover it with my hand to aim. The aiming mechanism itself is also a little difficult. It is three illuminated red marks, like a reflex sight, which can either be static or blinking. The problem is, when you go for a tight star field? The sights cover the stars and you can’t see where you’re aimed! To be fair, the Celestron SkyScout has somewhat solved that problem. By looking through the SkyScout (similar to a camcorder) you are seeing an unmagnified view of the night sky and you have an illuminated (brightness adjustable) red exterior circle. Again, this is considerably better, but not perfect. The screen does dim the stellar factor, so there’s no absolute solution besides preference.

Ready… Set… Aim… Shoot!

Score in the favor of the Meade mySKY. In this case I feel that its internal GPS system picked up on my location faster than the Celestron SkyScout and didn’t seem to notice when I walked it closer to metal. Odd, but true. In both cases, some operations are absolutely identical, because both pieces of equipment are capable of driving each companies respective telescopes. However, out here in the back fields, drivin’ the scopes ain’t what I’m after… It’s drivin’ the stars.

Ready… Set… Aim… Shoot!

Now we’re down to that good old classic saying – “the brass tacks”. In other words, what’s my opinion and why. Well, I ain’t afraid of no buzzards, so I’m going to give it to you.

If you want totally cool, get the Meade mySKY. It goes through all the same motions as the other, plus it has all the multi-media programming that any techno-geek could ever want. As a word of caution, I would also assess it as not very durable and somewhat annoying in the long run. It’s damn fancy, Frank… Kinda’ like a silver Colt revolver with trimmins’….

If you want long-term service, get the Celestron SkyScout. It lacks the bells and whistles, but also lacks the techno-problems that goes with them. It has proven itself to be highly durable and practical, perhaps a bit boring, but a useful astronomy tool. It’s a Glock, George… Plain and simple.

Shoot ’em both and decide.

Addendum: OPT has announced that due to the popular nature of this article, they have reduced the price of the Celestron SkyScout to $199 and a Meade mySKY will now be offered at $149 with free shipping.

Many thanks to Oceanside Photo and Telescope for providing the Meade mySKY and allowing me to use OPT as part of the ‘shoot out’ idea.

The Vixen ED100SF Refractor – Superb Optical Quality

So here we go. There’s a knock on the door and a big box arrives. It’s either a coffin for a short, skinny person or I’ve got another telescope on my hands. I wrestled it up on my dining room table, carefully cut the packing tape and revealed the shiny aluminum case that lay beneath the brown cardboard layer with the word Vixen stamped on the outside. Vixen? Haven’t we met somewhere before in another life?

For those of you who know me, you know I’m not much of a refractor person, although I own several. The reason isn’t because I don’t like refractors, it’s because I’m primarily a faint galaxy and comet hunter and to get the aperture I need I simply can’t afford a refractor that size. However, I am also not adverse to being a sometimes “optical connoisseur” and there have been times in my life that I’ve been talked into doing things that I probably had no business doing…. and that’s how I first got introduced to Vixen refractors. To make a long story short, a friend of mine in California coerced me into purchasing an old 4″ Vixen refractor for him from a total (spooky) stranger just because he happened to live in Ohio and I’m the one that ended up footing the bill, packing this anitque across country in a self-made case fashioned from PVC pipe and loving it to death.

And now there’s another one here.

Of course, my first experience with a circa 1980 Vixen refractor certainly didn’t prepare me for today’s modern optics. When I unlatched the clean, neat aluminum case that comes standard with the Vixen – ED100SF I was blown away with the fit and finish of the product itself. Who doesn’t love a brand new telescope with a perfect white finish and all the trimmings packed neatly inside custom foam? Everything looks good, right down to the scope rings and Crayford focuser – but the bottom line isn’t looks – it’s performance. In the long run, I had some serious issues with yesteryear’s Vixen refractor and what I want to know is how today’s Vixen performs.

One of the first things you need to realize is the Vixen ED100SF isn’t a complete telescope. While most of you probably are aware of what an optical tube assembly is, I want to be fair and point out to others that it is only the telescope body with the focuser and mounting rings. In order to keep costs down, optical tube assemblies are offered to those who already have several mounts, tripods and finderscopes – along with a wide variety of eyepieces. This allows folks like me (and many of you) to afford telescopes like the Vixen refractor by making use of things we already have. In this case, the Vixen ED100SF needs to be mounted on something capable of supporting at least 14 pounds, and I happen to have several equatorial mounts capable of filling the bill – along with many different styles of finderscopes and eyepieces to use.

Now that we’re set up, are we ready to check out those optics?

As I said, once upon a time I had issues with Vixen optics – very specifically with chromatic aberration. This is also a reason why I am a reflector person. I do not like color fringing. You give me purple and I’ll tell you you’re giving me poo. Sure. Once upon a time, they tried to correct chromatic aberration by increasing the focal length. This made for great magnification powers and also made for terribly long telescopes. But, purple images or not, I loved that old Vixen… Would the new one behave the same?

The answer is no. Thanks to today’s extra low dispersion glass with its little element of flourite, there simply isn’t any unwanted color in the image. Now when I look at something, the only purple haze I get is if I’m listening to Jimi Hendrix on the ipod. All of those red, green, and blue wavelengths are coming right together in perfect, crisp focus and the image is absolutely razor sharp. Where once I might have called something a little bit “muzzy”, there is only perfection. And it isn’t even a stellar image!

The real test of the Vixen ED100SF comes with a perfect airy disk around Vega. Go ahead, do Epsilon! It’s perfect and clean. Go ahead and do a more difficult one, like Gamma Andromeda – because you’ll see there’s three stars there instead of just two. Put your backside down on my observing chair here and watch Jupiter for awhile. Again, even though I am not much of a refractor person or a planetary observer – I could really get to liking views like this! When a galiean moon comes out of eclipse and you can pick out what looks to be a hair-fine line of black between Jupiter’s limb and the satellite’s limb? What can you say besides “Wow!” The Crayford focuser is as smooth as glass and the optical quality of the telescope remains through every eyepiece I put in it. Wait a week and watch the Moon. No false colors there. Just deep dark craters and perfect definition.

On deep sky performance, I can only be honest. Here, the Vixen ED100SF only performs like a 4″ telescope. It doesn’t resolve globular clusters or galaxies any better than a similar sized reflector telescope. However, I must be fair and say that I am not an astrophotographer. I can only imagine that the high quality images that I was getting in planetary and double star performance would carry through equally should you wish to image deep sky with this baby. Since the color correction is absolutely outstanding, I can only imagine what would happen if it were combined with the correct filters and timed exposures to pick out HII regions in those distant galaxies I so admire. On open clusters, the Vixen ED100SF also gave precision performance. Objects like NGC 7790 were virtual pinpoints and that’s a nice thing to see in any telescope. In side by side comparisons with a Genesis refractor and a Takahashi, I could see no difference in optical performance visually.

At one time the Vixen ED100SF cost in excess of $1200, making it not the type of telescope for everyone. But now, prices have come to $799. Still, not the type of telescope for everyone, but definitely within the range of those interested in superb optical quality. Vixen has definitely come a long way over the years and like that Vixen telescope I delivered to a man in California so long ago…

I don’t want to give it back.

The Vixen ED100SF Refractor was kindly provided for this review by Oceanside Photo and Telescope. Our many thanks for the use of this very fine telescope!

Celestron Optics Kit – One Heck Of A Teaching Tool!

Are you ready for one very sweet and complete optics package? For anyone who does astronomy outreach work, is interested in practicing binocular astronomy or is just looking for a great teaching tool, I’ve got something you really need to take a look at… the Celestron 10X50 UpClose Binoculars and Green Laser Pointer Optics Kit.

When I first spied the Celestron 10X50 UpClose Binoculars and Green Laser Pointer Optics Kit I was researching for inexpensive binoculars to supply to our guests at the Observatory. It is not uncommon during a public night or an outreach program to have a hundred or more guests and one or two pairs of binoculars doesn’t go very far. My goal was to find something a non-profit organization could afford, priced so that we could get several pairs, and geared towards performance so our guests weren’t disappointed with the view and our binocular astronomy program. Since the introduction of the green laser pointer a few years ago, I quickly learned that even a novice (right down to my four and five year old grandchildren) can follow the visible beam to where you target it, to its end with binoculars. Then the beam is switched off and the object is in the binoculars! With a mind for safety, it’s a simple and fun way to teach anyone to use binoculars for deep sky observing.

But the green laser wasn’t what I was after… It was the binoculars, wasn’t it?

Another aspect of the binocular astronomy classes we give is providing a monthly star chart to our guests that highlights a few objects for them to locate on their own. It’s just a simple handout – one I print out at home before any program and we stand around in the dark and share a red flashlight as I teach them how to read it and point out the marker stars with the green laser. Yep. We share the red flashlight… A simple tool that should be in the hands of every single person that even remotely takes an interest in reading an astronomy chart outside at night… And one that I just don’t happen to have ten extra to pass around.

But the red flashlights wasn’t what I was after… It was the binoculars, wasn’t it?

So, back to basics. I needed multiple pairs of binoculars that could withstand hard use and perform well. After many years, and many pairs of personal binoculars, I’d love to put Nikon, Oberwerk or Fujinons in every one’s hands, but the reality check is not every one’s hands are ready for these types of binoculars. What I needed was something I knew from experience that could withstand being dropped, was water-proofed and provided an excellent view. In that case, experience tells me Celestron and are great all-purpose astronomy binoculars 10×50.

So, here I am… Staring at the Celestron 10X50 UpClose Binoculars and Green Laser Pointer Optics Kit for $59 and then the reality check really comes home. For this price I can order five… And get five pairs of binoculars, five green laser pointers and five red flashlights… All for about what five pairs of binoculars would cost! Click. Ordered.

After they arrived, it was time to put them to the test, eh? And now we’re not just talking the “Tammy Test” we’re talking about the multi-person, multi-use, how long will these kits hold up type of test. Here’s my first group – the Ohio Military Police. There wasn’t just three of them either – there were over three hundred. Needless to say, not one of them had a problem using the binoculars or with focusing them. Out of all of them that I interviewed, no one had issues with astigmatism on any of the binoculars and the lasers pointers and flashlights all performed equally well. These tests were carried out over two days and those binoculars were used hard, folks… No wimpy care, here.

On we go, eh? How about your average scout troop? Now we’re talking young hands… Hands that can’t be trusted on their own with the green lasers, but the leaders can. In this case, we can easily do a presentation where we can point out constellations with the green lasers and responsible adults can also assist in the program by pointing out particular stars or objects for us to name. By having several flashlights available, small groups of kids can work together with charts and adults at the same time to learn constellations on their own. When it’s time to practice astronomy, we use the same “follow the beam” trick, they learn and have a great time!

Still more? Then try thirty plus groups a year that look like this. Wild teens and sometimes sedate adults who come here to learn about astronomy. Telescopes are great and we share those, too. But nothing takes the cake like having your own pair of binoculars in hand – or having a green laser to point at something when you have a question. So, how did the Celestron 10X50 UpClose Binoculars and Green Laser Pointer Optics Kit perform in all of these situations? The binoculars are still going strong, folks. After all that use, not one single pair of them has shown any signs of a problem. The red flashlights are all still working on the original batteries and so are the green lasers. However, the green lasers are not extremely powerful and not very bright during situations like dusk or full Moon. At the same time, compared to other lasers in my possession, they do a fine job and should not be discounted. After all, the laser and flashlight are almost like getting them for free when you buy the binoculars!

In the long run the Celestron 10X50 UpClose Binoculars and Green Laser Pointer Optics Kit is an exceptional bargain at $59 and one I highly recommend. As a matter of a fact, I recommend it so much that OPT is even going to give one to a lucky Universe Today reader to keep so you can test it out yourself! From now until October 7, 2008 at 12:00 pm PDT you can send an email with the title of this review in the subject line and your name in the body of the email and Universe Today will randomly choose a winner to get your own Celestron Green Laser Pointer Optics Kit for free! No matter where you live…

Put ’em to the test and see if you don’t agree. The Celestron 10X50 UpClose Binoculars and Green Laser Pointer Optics Kit is an exceptionally rugged and good performing astronomy binocular and having a red flashlight and green laser is a huge bonus.

The Celestron 10X50 UpClose Binoculars and Green Laser Pointer Optics Kit were purchased for this review from OPT and a free kit will be provided to a randomly chosen winner by Oceanside Photo and Telescope.