For many of us, the northern nights are getting longer and our minds and hands need something to keep them occupied. Star parties and public education nights are becoming fewer, but school is back in session and so is the opportunity to teach. In the south, warmer nights are coming up and so is the chance to share your knowledge of the skies and astronomy equipment with friends and family. It’s just the right time of year to take a close look at a telescope that really serves a purpose – the Galileoscope.
My first experience with the Galileoscope was during the 2009 “Year Of Astronomy”. I purchased one to be used in conjunction with outreach programs that dealt with history. Nothing more. Nothing less. In other words, I struggled to put the thing together, used it once or twice, and pretty much put it back in the box and put it away. I was too “busy” to really pay too much attention to it.
And that was a real shame on my part.
A couple of months ago it came to my attention that the Galileoscope was now readily available. When it first came out, it was a long waiting list – but not anymore. Now these basic replica telescope kits can be purchased by the case and be in your hands within weeks. Just seeing this advertisement was enough to motivate me to go on a search mission in my astronomy “stuff” and re-locate my own. A few boxes here, a couple of shuffles there and next thing you know, there it is. Still assembled and still in perfect condition. Now I didn’t need to be afraid of it. If something happened? Hey! It could be replaced.
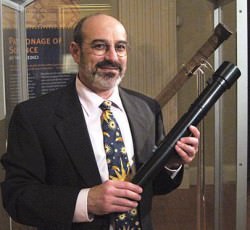
With the instructions missing from the box, the next step was to find out some very pertinent information – and personal thoughts – that I couldn’t find on-line. Time to contact one of the Galilescope’s designers, Rick Fienberg. As former Editor in Chief of Sky & Telescope magazine, he’s an expert on astronomy education and popularization and is intimately familiar with the amateur-astronomy community, a critical component in the success of the Galileoscope… and a really nice guy, besides. What I needed to know was if it could be repeatedly assembled and disassembled without ruining it. After all, just one blown O-ring brought down a shuttle…
 “The Galileoscope is designed to be disassembled and reassembled repeatedly. This feature is essential for a product intended (at least in part) for classroom use — schools with limited funds are able to buy only a small supply of Galileoscopes and have to use them over and over again rather than let students take them home to keep.” said Dr. Fienberg. “We always hoped that the Galileoscope wouldn’t end up as a one-shot, short-term product that would die at the end of IYA2009. We created something that simply didn’t exist before and for which there is a huge education-and-outreach need. The need remains, and the Galileoscope continues to fulfill it.”
Feeling the outreach fire beginning to burn again, I carefully laid the scope out on the table and began the process of reverse engineering. Once apart, I walked away for awhile and came back nervous. However, I didn’t need to be. All I needed to do was go over the Galileoscope Assembly Instructions and watch the Galileoscope Assembly Video. What I found this time wasn’t what I was expecting. My first experience with the scope was hurry up, get it done, get it to a program… and not really use it. This time was different. This time I was really looking at the optics, understanding how to explain how they worked and impressed with the simplicity and quality of the kit as a whole. It made me think… Just as it made the people who designed it think.
“Advice on the design of the telescope came from a variety of people not connected with the project. Optical designers, amateur and professional astronomers, and educational developers all provided input on what makes an effective, yet inexpensive telescope kit. It was critical that the telescope kit be educationally useful as well as astronomically useful. Thus great consideration was given as to how the educational uses of the telescope could be maximized. However, before we embarked on a new telescope design we needed to understand the limitations of previous inexpensive telescopes.” explains Fienberg. “The key optical requirements of the Galileoscope centered on usability and image quality. Since price was clearly going to be an issue, we needed a trim, justifiable set of requirements. The key imaging requirement was to be able to to create a “Wow” experience for kids, from nearly any location in the world.”
 While the Galileoscope team’s original “Wow” intentions were meant to be visual – and meant for a younger audience – the real “Wow” happened for me when I realized exactly what I was doing as I put it together. It’s more than just assembling a working model. It is a valuable lesson in optics. Of course, many of you are politely yawning behind your hand at this point, knowing this was also one of the original intentions behind the Galileoscope, but ask yourself this… Just how many of you have honestly put together a working eyepiece or examined how crown and flint works? Looking at a diagram of how an eyepiece design functions, or what makes a refractor telescope… well… refract is one thing. Holding a quality lens in your hands is another. It awakens a natural curiosity inside you and sparks a sense of wonder.
“Designs were made using both glass and plastic achromatic objectives. Although each would have worked well, we felt that the conservative manufacturing approach would be to use glass, even though it was considerably more expensive. We felt that we might jeopardize the overall system quality using plastic.” says the Galileoscope team. “Because of the low price we were trying to achieve, we often relied on manufacturing practices and standards rather than manufacturing to tolerances. In this case we felt that the very mature refracting telescope industry could be counted on to manufacture a high-quality objective. Our testing of department store telescopes convinced us of this.”

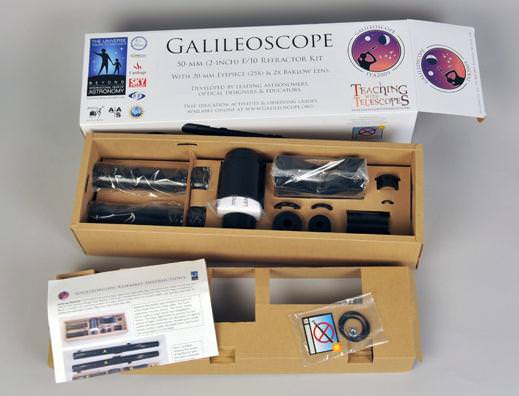
As I finished construction again, a lot of points were driven home to me that I had simply missed on the first go round. Thought and care had been given to internal baffling so the scope could be used near a bright light source, such as found in urban settings. Snap-type assembly features were not used so that they would not break after repeated assembly. The focal ratio, eyepiece design and even the inclusion of a barlow were carefully considered. The team even realized the display stand could be doubled as an optical bench where the tube is assembled in two halves, rather than in a nested design. In other words, the Galileoscope might be inexpensive, but it’s certainly not cheap.
So how does it perform?
Well, at my age I have enough problem steadying a pair of 10X50 binoculars without assistance, so only the most brief of glimpses can had through using it in “hand-held” mode. Of course, the team had also taken this into account and the assembly comes with a quarter twenty fixture that allows it to be easily connected to any photo/video tripod. However, if you don’t have – or can’t afford – a tripod, it’s an easy problem to solve. Somewhere at some point in time I had run across a clever idea where a person had used a sturdy Galileoscope Cardboard Box Mount as a simple alt-az configuration. Just weigh down the bottom of the box and pass the quarter twenty bolt through the side near the top. Sandwich the bolt on either side with a washer, and place a nut on the inside to hold it. By loosening and tightening the nut, you can control the up and down motion, and just turn the box for side to side. Aiming is acquired through a reflex “notch”, much like a gun sight.

Once steadied, the view surpasses that of a “toy” telescope. While the Galileoscope isn’t going to perform like a Takahashi refractor, it gives very suitable views of the Moon, does indeed reveal the rings of Saturn and brings the four primary satellites of Jupiter out to play. I found it gave very acceptable images of bright, easy to aim at objects like M8, M44, M6, M7 and – later in the year – the Andromeda Galaxy, the Double Cluster, M42 and M44. With some coaxing and patience, other deep space objects can be found, but aren’t particularly impressive at this aperture. Here it’s not the quality that’s at fault, but image size and limited resolution. Mechanically, the Galileoscope is well crafted for a kit scope. While focusing is a “push – pull” arrangement, I found it easy to find good focus by twisting it slightly similar to using a helical focuser, while moving it in and out. The supplied 20mm eyepiece is also quite sufficient, with enough eye relief at 16mm to be comfortable and the included barlow lens is a lesson in itself!
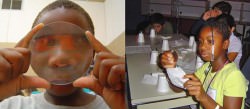
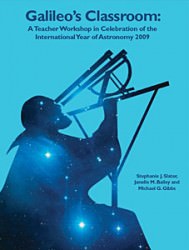
 All in all, the Galileoscope is a great experience. Through partnership programs like Galileo’s Classroom and Teaching With Telescopes, the educator can find a wealth of resources just waiting to be used. There’s even a Galileoscope Observing Guide! So where do you get the kits for your personal exploration or for your organization? At this point in time, the Galileoscope can be ordered through the Galileoscope Organization or through OPT as the Galileoscope Telescope Kit.
As for me, I can see future programs at the Observatory. On one side of the coin, I envision sharing how a telescope is made and what makes it work with children… On the other side I see an intimate group of adults, each working with their own Galileoscope and learning the principles behind the equipment they use in their hobby. After all, we weren’t born with this knowledge spurting out of our ears.
We gotta’ learn it some where.
My many thanks to Rick Fienberg of Galileoscope.org for patiently answering my questions and providing images and additional information for this article. When the original IYA project was in full swing, many Galileoscopes were donated to various classrooms around the world and it has been my pleasure to speak with some of those recipients over the months, ship them additional educational materials and watch their interest grow. When you have a moment, please check out Kodali AnilKumar:India: Astronomy Observation, where both students and teachers made great use of the Galileoscope!


I loved these little telescopes. Here at UF the astronomy department is really good about public outreach, and bought a boatload of galileoscopes. We all became pretty familiar in assembling and disassembling them, and brought them out everywhere, be it at the university, at the science museum, or out in local schools. The kids always seem to love it and helping them assemble it is a great experience.
We have one and they are very hard to focus. Cheap and hardy though.
I picked one up back in 2009, and have used it a number of times. My son (5yo) loves it and is constantly bugging me to let him use the telescope.
Focus -is- a bit difficult, but (as mentioned in the article) twisting the view piece around makes it much easier to make fine adjustments. It isn’t perfect, but definitely workable if you use a little patience. 😉
Overall, I think it is more than worth the price, even after adding in the cost of a four foot tall, 15$ tripod (what I’m using).
I can’t thank you enough for writing this article Tammy! The bottom line is that this little scope is a great way to begin at the beginning! All too often I have heard about ‘adults’ purchasing sophisticated and expensive optics which are used a few times then ‘stashed away’ into a closet to gather dust… mostly because they haven’t spent the time to understand the basics or learn the night sky one step at a time! And/or have unreasonable expectations as to what they might see?
With the spread and use of today’s computerized ‘go to’ telescopes, beginners don’t always feel ‘connected’ to their scopes. The ‘hands on’ assembly approach puts that usage into perspective. This scope may be simple, but is actually far better than what Galileo had… and look what HE started!
The ‘upshot’ is, that as soon as I can.. I will purchase a dozen or two of these scopes and donate them to my wife’s elementary school!
It is not really a “Galileoscope”, as it is cheating using a achromatic objective and positive eyepiece rather than that of Galileo’s simple lens design. It is really a modern achromatic refractor telescope in kit form.
The original telescope of Galileo would a have a simple objective lens and a simple negative lens eyepiece, and yes these simple optics were plagued with chromatic aberration as mentioned. But this is what Galileo (and others) tolerated and still made fundamental discoveries.
I made a simple lens telescope with spare lenses and cardboard tubes in the spirit of the early telescopes. It has a simple 30mm planoconvex objective lens and short focus positive eyepiece lens assembled in “Kepler configuration”. Cost? Almost nothing! And through the veil of varying degrees of chromatic aberration controlled by different size aperture stops placed over the objective I could pick out craters on the moon to almost theoretical resolution, I could split the double stars gamma Arietis and Alpha Centauri see all four Galilean satellites of Jupiter and resolve several star clusters and nebulae.
These days we are spoiled by the luxury of achromatic optics and by this token the misnamed “Galileoscope” cushions users from the actual experience of what Galileo and early observers actually saw in their scopes. So, I’m rather enjoying my simple costless telescope that actually shows me “quite a bit”, and can’t wait to try it out on Saturn.
And because I made it myself I have no jitters when reverse engineering it 😉
Perigee007
Guess what I still have my first home made scope – I used it to follow the 1957 solar eclipse! It has an uncemented achromatic objective which I use to demonstrate colour fringing etc.
Roseland
Very useful kit for children, beginners and those new to astronomy.
They can learn the basics of telescope which will help them built more sophisticated telescopes later on as their interests grows.
Thanks for this report.
A. S. Bhasker Raj
Amateur Astronomer
India
I was given a Galileoscope in 2009 by the director of the planetarium at the university where we both work. I used it once at a small star watch (following an astronomy club picnic) at which a dozen or more nonmembers attended. The two objects viewed that night were the Moon and Jupiter. I was amazed at the sharpness and clarity of the images. The two equatorial belts on Jupiter were clearly visible. The Moon look super with little chromatic aberration. The public did not know they were looking through a very low-cost scope.
Here is my assessment of the assembly and operation of the Galileoscope. The directions that came with the scope (I had one of the original 2009 version) were poor. A downloadable PDF from the Galileoscope website solved that issue with a more complete set of directions. The cemented 50-mm doublet, though not coated, is very nicely made. It was a good decision to go with a glass achromat rather than a plastic one. I strongly recommend that vinyl or latex gloves be worn during assembly, or your oily fingerprints will get on the glass surfaces–particularly the very small eyepice lenses. I seriously doubt that children younger than 14 or 15 have the manual dexterity to assemble this scope. The eyepieces are particularly challenging because of the small lens elements.
The slide style focuser is a bit tight but as stated in the article twisting as one slides makes the focuser work adequately. The use of a metal nut (rather than plastic) that can attach to a 1/4-20 post on a standard photo tripod was another good decision. The gunsight “finder” works pretty well but will make finding dimmer DSOs somewhat more difficult as the scope has a somewhat narrow field of view. The one mistake in designing this scope was to eliminate a diagonal. I know, Galileo didn’t have one and a diagonal compromises using the scope as a “spyglass.” On the other hand, most people will mount it on a photo tripod (even Galileo mounted his scopes) to get the best results. Unfortunately, the lack of a 90-deg diagonal makes for awkward viewing of parts of the sky. A simple plastic diagonal would not have cost that much to produce and would have made for a more useful instrument. (My first telescope in 1957 was a 50-mm long tube refractor, and it had a diagonal.)
Initially, the Galileoscope sold for $15 in bulk. List price for a single unit was $35. Now, a single unit price varies from $50 (Galileoscope website) to $60 (Edmund Scientifics). A bulk purchase of 6 scopes reduces the unit cost to $25. When it was priced at $35, the Galileoscope had no competitors. However, at $50 (suggested list price), the Celestron Firstscope (a 76-mm table-top dobsonian mounted reflector) will outperform it. I have seen the Firstscope offered at $39.95 at B&H Photo, including an accessory kit that provides a carrying bag, two eyepieces, and a 5×24 finderscope. The Firstscope has a real focuser and accepts standard 1.25″ eyepieces. At $50, the Galileoscope is overpriced. It is a shame that the price point of $35 could not be maintained. As a tool for educators (and at a $25/unit bulk price), the Galileoscope fulfills its designers’ original goals. As a commercial product at $50/unit it is overpriced for the features it provides.
Nice article. I will try the box type tripod arrangement for my Galileoscope.